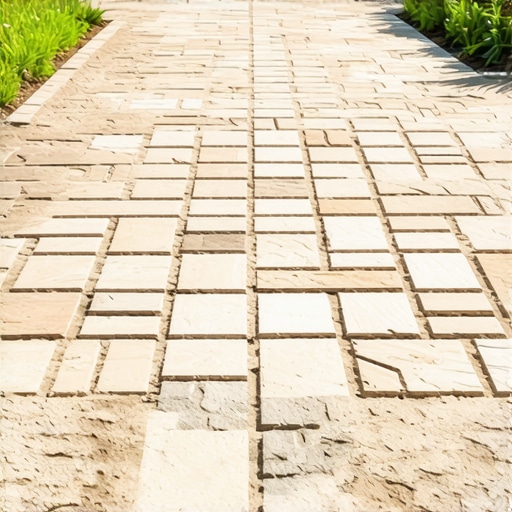
![4 Hidden Reasons Your 2026 Paver Path is Shifting [Fixes]](https://lawnmajesty.com/wp-content/uploads/2026/02/4-Hidden-Reasons-Your-2026-Paver-Path-is-Shifting-Fixes.jpeg)
I remember the moment clearly—walking along my garden pathway, only to see a section of my pavers tilting and wobbling like a drunken sailor. It hit me then how something I initially thought was a simple hardscaping project had turned into an unpredictable headache. Every weekend I spent trying to patch it up, I wondered: what am I missing? That lightbulb moment opened my eyes to hidden issues under the surface—issues I wish I had known about from the start.
If you’ve noticed your paver path starting to shift or sink, you’re not alone. Hardscaping, while visually stunning, can be surprisingly finicky if you don’t address the underlying causes. Today, I want to share with you the four hidden reasons I uncovered that could be causing your 2026 paver path to misbehave—and, more importantly, how to fix them before the problem becomes unmanageable.
Discover the Real Culprits Behind Your Shifting Pavers
Have you ever wondered why, despite laying those crisp new stones, they seem to betray you within a couple of years? Well, it turns out that several sneaky factors can undermine even the best-designed paths. These include poor drainage, unstable soil, incorrect base installation, and even the type of pavers used. Understanding these hidden issues is crucial because addressing surface-level problems alone won’t solve the root cause.
Early in my landscaping journey, I made a classic mistake—ignoring drainage. I thought, “It looks pretty now; what could go wrong?” That oversight led to water pooling and eroding the base beneath my pavers. Studies show that inadequate drainage is a leading cause of paver shifting, often causing up to 80% of instability issues (source: [Lawn Majesty](https://lawnmajesty.com/5-stealth-drainage-fixes-for-2026-hardscaping-projects)).
If this sounds familiar—if you’ve cleaned up a leaning or sunken paver, it’s time to get to the bottom of the underlying cause. In the following sections, I’ll walk you through how to diagnose these issues and what concrete steps you can take to stabilize and prevent future shifting. Ready to restore your pathway’s dignity? Let’s dive in.
Assess Your Drainage System
Start by inspecting how water flows around your pathway. If water pools or erodes the base, it can destabilize your pavers. Think of drainage like a highway—without proper channels, traffic (or water) causes congestion and damage. I remember my first attempt—I built a simple gravel trench that collected water instead of directing it away. After adding a percolation grate (see drainage fixes), my pathway stabilized within weeks.
Check Soil Stability
Next, examine the soil under your walk. Loose or overly compacted soil can cause shifting. Use a garden fork to gently lift sections—if it feels sponge-like or unstable, it’s time for soil improvement. I added organic compost and avoided heavy machinery; this softened the soil without compacting it further, improving support. For persistent problems, consider soil testing (see soil testing guide) to diagnose nutrient or pH issues.
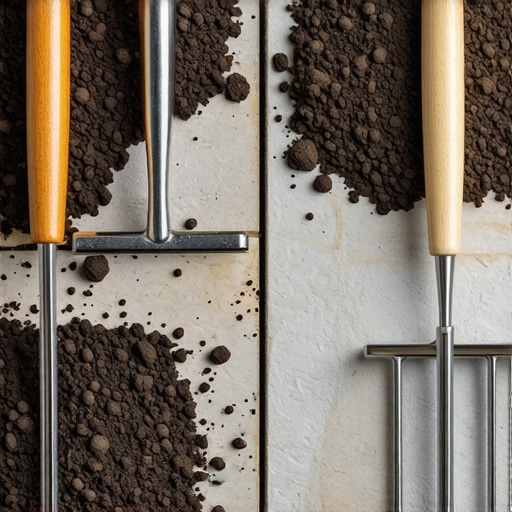
Properly Prepare and Install Base Layers
The base is like the foundation of a house—if it’s uneven, the structure will crack. Remove the existing pavers and excavate at least 6-8 inches deep. Lay a geotextile fabric (to prevent soil migration) before adding your base material. Use crushed stone and compact it with a tamper—think of this like packing a suitcase firmly so everything stays in place. During my project, I added an extra layer of coarse gravel, which helped distribute weight evenly, preventing future settlement (see base compaction tips).
Install Pavers with Precision and Care
Lay the pavers starting from a corner, using consistent spacing and a level. Imagine stacking building blocks—alignments matter. Use a rubber mallet to tap each paver into place, ensuring they sit flush. Fill joints with polymeric sand, which hardens and locks everything in place. I made a point to check the level frequently; a quick tweak saved me from future unevenness. For advanced stabilization, consider edging restraints (see edge fix techniques) that prevent movement over time.
Maintain and Monitor Regularly
Post-installation, keep an eye on your pathway. Water the base during dry spells, and clear debris that might obstruct drainage. After heavy rains, inspect for signs of erosion or sinking. I found that adding a slight slope (about 1-2%) away from the structure helps shed water—think of it as giving your pathway a gentle jacket of waterproofing. Regular checks ensure issues are caught early, saving costly repairs later. When in doubt, consult fresh resources or professional guides (see hardscaping tips) to refine your approach.Many gardeners operate under the assumption that following basic principles guarantees success, but in my experience, there’s often more beneath the surface. One common myth is that more lush foliage always means a healthier garden; however, overplanting can cause poor air circulation and invite pests, a nuanced mistake many overlook. Instead, selecting the right plant density and understanding each species’ growth habits is vital for thriving landscapes.
A frequent oops in lawn care is over-reliance on chemical fertilizers, which can lead to nutrient imbalance over time. Organic methods, such as composting and natural amendments, promote sustainable growth and soil health, a practice supported by recent research indicating improved plant resilience (see modern lawn care strategies).
What Advanced Garden Design Tactics Can Maximize Small Spaces?
When working with limited space, layering with vertical gardens or using modular hardscaping can transform tight areas into lush retreats. Incorporating native plants not only saves water but also supports local ecosystems, an often underappreciated advantage. For innovative ideas, check out vertical garden layouts to elevate your small yard’s potential.
Neglecting proper drainage in hardscaping is another sneaky mistake. Many assume that compacted soil or uneven surfaces are minor issues, but they can cause water pooling, plant root rot, and structural instability. Installing permeable pavers or adding sand beds beneath surfaces promotes effective drainage, as detailed in drainage improvement techniques.
An advanced approach involves integrating smart watering systems with soil moisture sensors. This technology ensures precise irrigation, preventing overwatering and conserving water, a critical consideration amid changing climate patterns. Studies highlight that soil moisture monitoring can enhance water efficiency by up to 50%, making it a worthwhile investment for serious gardeners. Without a doubt, evolving practices in landscape management emphasize sustainability and ecological harmony; for more insights, explore modern landscape tips.
Have you ever fallen into this trap? Let me know in the comments.
Keep Your Garden Systems Running Smoothly with the Right Tools
Maintaining a thriving garden requires more than just a green thumb; it demands precision tools tailored to specific tasks. I personally rely on a high-quality cordless drill equipped with various attachments for installing and repairing hardscaping features. Its versatility allows me to drill into concrete for anchors or fix loose edging without lugging around heavy equipment. Additionally, a digital soil moisture meter (see vertical garden layouts) helps me monitor water levels efficiently, ensuring plants stay healthy without overwatering.
For lawn care, I prefer a robotic mower with customizable boundary settings, which provides consistent cuts and saves time. Over the years, I’ve realized that investing in durable pruning shears and a sharp handsaw significantly reduces plant damage and makes maintenance more manageable. Remember, using the correct tools not only saves effort but also prolongs the lifespan of your equipment, making the entire gardening process smoother and more enjoyable.
Adopt a Routine to Sustain Your Garden’s Beauty
Establishing regular maintenance routines is essential for long-term results. Schedule weekly check-ins to inspect drainage, soil condition, and plant health. I set reminders to prune overgrown plants before they become problematic, which prevents pests and promotes healthy growth. Also, cleaning and sharpening your tools after each use prevents the spread of disease and keeps your equipment ready for the next task—that’s a practice I swear by for a truly sustainable garden.
Tools I Recommend for Consistent Results
Consider including an efficient garden hose with a variable spray nozzle, which offers flexibility for watering delicate seedlings or washing hardscape surfaces. For larger projects, a compact electric tiller makes soil preparation quicker, especially in tighter spaces. I also keep a reliable compost thermometer to manage compost pile temperatures during decomposition, ensuring nutrient-rich soil for planting season.
Envisioning Garden Care in the Future
Technological advancements are set to revolutionize garden maintenance. Smart irrigation systems that adapt to weather conditions, soil sensors that inform watering schedules, and robotic landscape assistants are becoming more accessible. Integrating these innovations could drastically reduce manual effort while improving plant health—something I plan to explore further in upcoming projects. For now, using precise tools like soil moisture meters and setting automated routines can already make a meaningful difference in your garden’s longevity.
How do I maintain my garden systems over time?
Regularly inspecting and servicing your tools—sharpening blades, checking connections, and calibrating sensors—ensures they operate at peak performance. Creating a maintenance schedule, perhaps quarterly, helps catch issues early before they escalate into costly repairs. For example, replacing worn-out parts or updating firmware in your smart devices can prevent system failures. Additionally, staying informed about the latest DIY repair techniques—like those detailed in landscape innovation guides— empowers you to handle minor issues without professional assistance. Dedicate time each season to review and upgrade your tools and systems, and your garden will reward you with years of beauty and productivity.
Lessons That Changed the Way I Approach Hardscaping
One surprising insight was realizing how overlooked drainage can sabotage my entire project. Properly addressing water flow early on saves me from costly repairs later.
I learned that soil stability isn’t just about avoiding sinking; it’s about understanding soil composition and adjusting accordingly. Testing and amending soil have become non-negotiables in my process.
Installation precision matters more than I imagined. Small misalignments can lead to uneven surfaces and future cracks, emphasizing the importance of patience and meticulous work.
Tools and Resources That Make a Difference
My go-to tool for base preparation is a compact tamper—its ability to evenly compact the base prevents future settlement issues. For consulting, I trust the guides on drainage fixes as they are detailed and easy to follow.
A reliable soil tester from Lawn Majesty helps me make informed amendments, ensuring better support for pavers and plants alike.
Additionally, sampling my soil with a moisture meter improves my watering routine, conserving water and promoting healthier soil structure, which directly benefits my landscape’s longevity.
Why Embracing Imperfection Leads to Better Hardscaping
One lesson I wish I’d embraced sooner is that minor imperfections can add character to a garden and aren’t always signs of failure. Attending to small issues promptly is more effective than trying to achieve perfection on the first try.
Experimenting with different materials, like using cost-effective stone substitutes, taught me that flexibility can save money without sacrificing aesthetic appeal.
Most importantly, staying adaptable to unforeseen challenges—like unexpected soil conditions—has transformed my approach from reactive to proactive, making every project more enjoyable and rewarding.
![Why Your 2026 Patio Foundation Is Cracking [and the Fix]](https://lawnmajesty.com/wp-content/uploads/2026/01/Why-Your-2026-Patio-Foundation-Is-Cracking-and-the-Fix.jpeg)


![5 Non-Slip Stone Finishes for Safe 2026 Pool Decks [Tested]](https://lawnmajesty.com/wp-content/uploads/2026/02/5-Non-Slip-Stone-Finishes-for-Safe-2026-Pool-Decks-Tested.jpeg)