5 2026 Small-Space Patios Using $2 Concrete Pavers
Engineering High-Performance Small-Space Patios with $2 Concrete Pavers
Building a professional-grade patio on a budget is not about the price of the stone but the integrity of the engineering beneath it. I recently got called out to tear up a $30,000 patio that was sinking because the previous contractor failed to address the hydrostatic pressure and sub-base compaction. The pavers were premium Italian porcelain, but they looked like a topographical map of the Himalayas within six months. This proves a vital point: a $2 concrete paver laid on a perfect base will outlast a $40 stone laid on dirt every single time. My crew and I have spent decades fixing the mistakes of ‘mow-and-blow’ hackers who think a patio is just a puzzle you lay on the ground. It is a civil engineering project. We are managing weight distribution, water runoff, and soil expansion. If you ignore the 2A modified stone or the proctor density of your soil, your patio is just expensive rubble waiting to happen.
Engineering Small-Space Patios with Economy Materials
Building a small-space patio using $2 concrete pavers requires a focus on sub-grade preparation and drainage management. By utilizing a 6-inch compacted stone base and high-quality polymeric sand, budget-friendly materials can achieve the structural longevity of expensive natural stone while maintaining high load-bearing capacity. This approach ensures the finished surface remains level despite local freeze-thaw cycles.
“Standard concrete pavers must meet ASTM C936 specifications for absorption and compressive strength to ensure freeze-thaw durability.” – ICPI Technical Manual
When you are working with economy units, usually the standard 12×12 or 16×16 concrete patio blocks found at supply yards, the margin for error in your base decreases. These units are thinner than premium pavers, making them more susceptible to cracking if the sub-base settles unevenly. You must excavate deep enough to reach stable sub-soil, removing all organic material and roots. Any wood left under that stone will rot. When it rots, the ground shifts. When the ground shifts, your $2 paver snaps.
Design 1: The Offset Monolith (Running Bond)
The Offset Monolith design utilizes a traditional running bond pattern to maximize interlocking strength and minimize long, continuous joint lines. This layout is ideal for small-scale hardscaping because it visually elongates the space while providing superior resistance to lateral shifting under foot traffic. It is the most stable configuration for thin concrete units.
For this design, you set your first row and then offset the second row by exactly half the width of the paver. This staggers the joints. In engineering terms, this distributes the load across multiple units rather than a single point. It is basic physics. If you use a standard 12×12 block, your lines should be laser-straight. Use a string line. Do not trust your eyes. Your eyes will lie to you; the string line will not.
Design 2: The Grid with Permeable Voids
A Grid with Permeable Voids incorporates uniform spacing between $2 pavers, filled with 3/8-inch clean crushed stone to facilitate stormwater infiltration. This design reduces hydrostatic pressure beneath the hardscape and prevents surface pooling in small-space garden designs. It is an effective solution for areas with heavy clay soil.
This is where we move away from the solid slab feel and toward a more modern, breathable system. By leaving a 2-inch gap between pavers and filling it with angular stone, you create a mini-French drain across the entire patio surface. This is critical in urban environments where drainage is limited. It stops the ‘puddling effect’ that leads to moss growth and concrete scaling.
How much modified gravel do I need for a patio base?
To calculate the required modified gravel, multiply the total square footage of the patio by the depth of the base (minimum 6 inches for pedestrian traffic) and divide by 324 to find the cubic yardage. Always add a 20% compaction factor to ensure you have enough material to reach the necessary 95% proctor density.
Design 3: The Traditional Basketweave
The Traditional Basketweave pattern uses pairs of $2 concrete pavers set at 90-degree angles to create a structural weave that resists rotational movement. This design is highly effective for square patios and provides a classic aesthetic without requiring complex masonry cuts. It is the most efficient use of material for DIY installs.
I like the basketweave for small spaces because it eliminates the need for a powered wet saw in most cases. You are working with the geometry of the block. However, you must be surgical with your screeding. Because the pavers change direction, any high spot in the bedding sand will cause the corners to ‘teeter-totter.’ The tamper should literally bounce off the compacted base before you even think about laying a stone.
Design 4: The Framed Inlay
A Framed Inlay utilizes a soldier course border around the perimeter of the patio to provide structural edging and visual definition. This technique prevents lateral migration of the interior pavers and creates a high-end finish using standard budget-friendly concrete units. It acts as a secondary restraint system.
You want to set your border pavers in a ‘wet’ bed or use a heavy-duty plastic edge restraint spiked every 8 inches. If the edges move, the middle follows. It is the ‘zipper effect.’ Once one joint opens up, water gets in, the sand washes out, and the whole system fails. Don’t skip the edge restraints. It is the most common failure point I see in amateur work.
Design 5: The Stepped Landing
The Stepped Landing design is used for sloped small spaces, incorporating timber or stone risers to create a series of level paver platforms. This approach manages grade changes and prevents soil erosion while maximizing the usable square footage of a small backyard. It requires precise transit leveling.
Grading is the soul of landscaping. You need a minimum 2% slope (1/4 inch per foot) away from any foundation. If you are building a landing, you have to manage where that water goes when it hits the riser. I always install a perforated pipe behind the transition to catch subsurface water. Water is the enemy of the hardscaper. It will find a way to ruin your work if you don’t give it a path to leave.
“A retaining wall doesn’t fail because of the stone; it fails because of the water trapped behind it.” – Hardscape Engineering Axiom
Below is a technical breakdown of how to choose your base depth based on the soil biology you are dealing with. If you have heavy clay, you cannot treat it like sandy loam.
| Soil Type | Excavation Depth | Gravel Base Depth | Compaction Passes |
|---|---|---|---|
| Heavy Clay | 10-12 Inches | 8 Inches | 6-8 Passes |
| Sandy Loam | 8 Inches | 4-6 Inches | 4 Passes |
| Compact Silt | 9 Inches | 6 Inches | 5 Passes |
To ensure your project doesn’t become a cautionary tale, follow this checklist during the build process. Every step is mandatory.
- Call 811: Always mark utility lines before the first shovel hit.
- Excavate Organic Matter: Remove all grass, roots, and topsoil until you hit sub-grade.
- Geotextile Fabric: Lay down a non-woven fabric to prevent soil from mixing with your clean gravel.
- Vibratory Compaction: Rent a plate compactor. A hand tamper is a toy.
- One-Inch Sand Bed: Use concrete sand, not play sand. Screed it perfectly level.
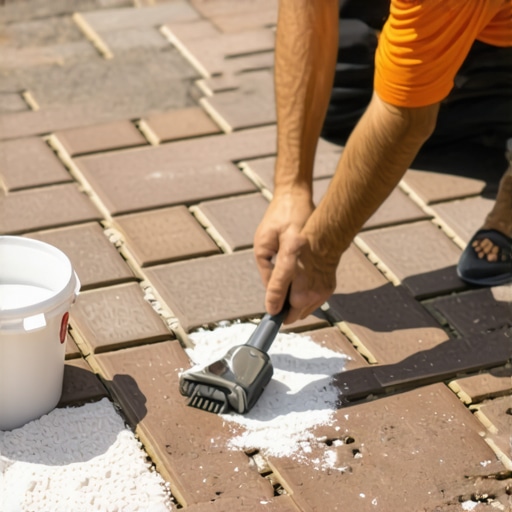
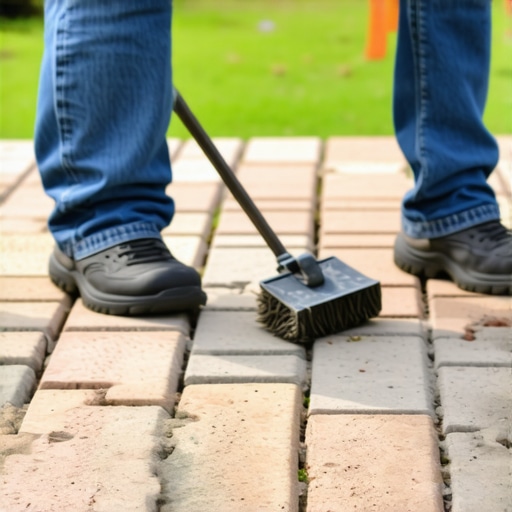
- Polymeric Sand Finish: Sweep it in, vibrate it down, and mist it. This locks the ‘puzzle’ together.
How do I stop cheap concrete pavers from cracking?
To prevent concrete paver cracking, ensure the sub-base is perfectly flat and compacted to a 95% proctor density. Cracking is rarely a material defect and usually the result of point-loading caused by voids in the bedding sand or an uneven stone base. Use a 1-inch uniform layer of coarse sand for the final bed.
The first year of your new patio is the ‘settling in’ period. You might see some white powder on the surface; that is efflorescence. It is a natural chemical reaction in concrete. Don’t panic. It will wash away. Watch your joints. If the polymeric sand settles, top it off immediately. Maintenance is the difference between a five-year patio and a fifty-year patio. Take care of the drainage, and the $2 pavers will take care of you. Don’t skip the details. It will rot if you leave the organic material. Do the work once, and do it right.
![Fixing 2026 Uneven Paver Walkways [Step-by-Step]](https://lawnmajesty.com/wp-content/uploads/2026/06/Fixing-2026-Uneven-Paver-Walkways-Step-by-Step.jpeg)
![Build a $1000 2026 Flagstone Patio [DIY Step-by-Step]](https://lawnmajesty.com/wp-content/uploads/2026/05/Build-a-1000-2026-Flagstone-Patio-DIY-Step-by-Step.jpeg)