Build a $300 2026 Stone Path with Sand Joint Edging DIY
Build a $300 2026 Stone Path with Sand Joint Edging DIY
I recently got called out to tear up a $30,000 patio that was sinking because the previous contractor decided that a two-inch layer of uncompacted dirt was a ‘sufficient base’ for heavy pavers. It was a disaster. The stones were heaving, the drainage was nonexistent, and the homeowner was essentially looking at a very expensive pile of rubble. I have spent 20 years in the dirt, and if there is one thing I have learned, it is that the longevity of your hardscape is determined entirely by what you cannot see. This guide isn’t about making things look pretty for a weekend; it is about engineering a path that will survive the freeze-thaw cycles of 2026 and beyond without costing you a fortune in remediation.
The $300 Stone Path Blueprint
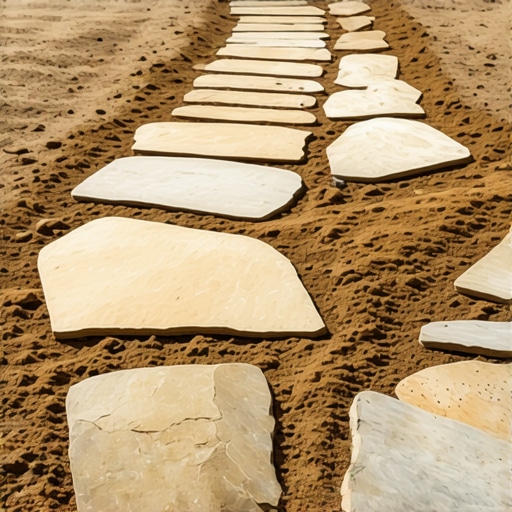
Building a $300 stone path requires prioritizing structural sub-grades and bulk material sourcing over expensive retail kits or decorative ‘big box’ pavers. By utilizing reclaimed flagstone or quarry seconds and a compacted modified gravel base, you can achieve professional-grade hardscaping durability on a strict budget.
“A retaining wall doesn’t fail because of the stone; it fails because of the water trapped behind it.” – Hardscape Engineering Axiom
How much modified gravel do I need for a stone path?
To calculate your gravel needs, multiply the length by the width by the depth (in feet) and divide by 27 to get cubic yards. For a standard 20-foot path that is 3 feet wide with a 4-inch base, you need approximately 0.75 cubic yards of 2A modified gravel. Always add 10% for compaction loss. Purchasing this in bulk from a quarry rather than in 50-pound bags will save you roughly 400% in material costs.
The Engineering of the Base Layer
The biggest mistake DIYers make is ‘skimming.’ They think they can just scrape off the grass and lay stone. If you do that, the first heavy rain will turn your path into a mud slide. You must excavate. We are looking for the subgrade. In most regions, you need to clear away at least 6 to 8 inches of organic material. Soil with high organic content holds water; water expands when it freezes; expansion destroys your path. You need to reach the mineral soil. Once there, you must use a plate compactor. A hand tamper is for small repairs; for a 20-foot path, rent a power compactor. You want to hit 95% Standard Proctor density. The ground should feel like concrete before the first stone touches it.
| Material | Quantity (for 60 sq ft) | Estimated Cost (Bulk) | Professional Requirement |
|---|---|---|---|
| 2A Modified Gravel | 1 Ton | $45 – $65 | Must contain ‘fines’ for interlocking. |
| Masonry Sand | 0.5 Ton | $30 – $45 | Angular grains, not rounded play sand. |
| Reclaimed Flagstone | 60 sq ft | $150 – $180 | Check local classifieds or stone yard ‘seconds’. |
| Industrial Geotextile | 1 Roll | $25 – $35 | Woven fabric to prevent soil migration. |
The Horticultural Impact of Stone Placement
Hardscaping is not just civil engineering; it is garden design that affects your biology. Most people don’t realize that limestone-based gravel or certain pavers can leach minerals into the soil, significantly raising the pH. If you are running this path near acid-loving plants like Azaleas or Blueberries, you are slowly poisoning them. I always recommend a heavy-duty geotextile fabric between the soil and your gravel base. This isn’t just for weed suppression—which is a myth anyway, as weeds grow in the sand joints—it is to keep your subgrade from migrating into your base and to provide a chemical buffer. Use a woven fabric with a high CBR (California Bearing Ratio) to ensure it doesn’t puncture under the weight of the stone.
How deep should a stone path base be?
A professional-grade path requires a minimum 4-inch compacted gravel base topped with a 1-inch sand setting bed. If your soil is heavy clay, increase the gravel base to 6 inches to allow for better hydrostatic pressure relief. Without this depth, the stones will shift during the first seasonal transition.
The Installation: Screeding and Setting
Once your gravel is compacted in 2-inch lifts (never try to compact 6 inches at once), you need your setting bed. This is where you use sand. But not just any sand. Avoid ‘play sand’ at all costs. The grains are rounded and will act like ball bearings under your feet. You want sharp sand or masonry sand. Use 1-inch PVC pipes as screed rails. Lay them on your compacted gravel, pour the sand, and drag a straight board across them. This gives you a perfectly flat surface. When you lay your stones, do not ‘drop’ them. Place them. Use a rubber mallet to set them into the sand. You should hear a ‘thud,’ not a ‘clack.’ The ‘thud’ means it is seated.
“Ensure the subgrade is sloped at a minimum of 1 percent away from building foundations to prevent water accumulation and structural damage.” – ICPI Technical Manual
Sand Joint Edging and Locking
The final step is the joints. For a $300 budget, you aren’t using expensive polymeric sand, which can be fickle anyway. Use the same masonry sand you used for the bed. Sweep it into the joints when the stones are dry. Use the plate compactor again (with a protective mat) over the stones to vibrate the sand down into the gaps. This creates interlock. Interlock is the magic of hardscaping. It turns individual rocks into a single, unified surface. If the sand disappears, add more. Repeat until the joints are full. This is how you prevent the stones from ‘walking’ over time.
- Call 811: Never dig without marking your utility lines. It is the law.
- Pitch the Path: Ensure the path has a 1-2% slope to shed water. A flat path is a puddle.
- Edge Restraints: Even on a budget, use a hidden plastic edge or a ‘soldier course’ of stones to keep the path from spreading.
- Deep Watering: After install, water the surrounding lawn care areas deeply to settle the disturbed soil.
- Root Flares: If the path goes near trees, do not cut large roots. Bridge over them with extra gravel.
It will rot if you use wood. It will sink if you skip the gravel. Don’t skip this. A stone path is a permanent addition to your property. Treat it with the respect that 2,000 pounds of mineral material deserves. If you follow these engineering steps, you won’t be calling me in three years to fix a sinking mess. You’ll have a path that looks like it has been there for a century and will stay there for another one.
![Why Your 2026 Patio is Pooling Water [Fix]](https://lawnmajesty.com/wp-content/uploads/2026/07/Why-Your-2026-Patio-is-Pooling-Water-Fix.jpeg)