3 Stone Seating Ideas for 2026 Outdoor Kitchens
3 Stone Seating Ideas for 2026 Outdoor Kitchens
Most outdoor kitchens built today will fail within seven years. I know because I spend half my season ripping them out. I recently got called out to tear up a $30,000 patio that was sinking because the previous contractor used ‘screenings’ as a base instead of a properly graded 21A modified stone. The seating wall was leaning at a 15-degree angle because they ignored hydrostatic pressure. In the world of high-end hardscaping, if you aren’t thinking about soil mechanics and moisture migration, you’re just stacking expensive rocks that the earth will eventually swallow. For 2026, the trend is moving away from flimsy furniture and toward permanent, engineered stone structures that function as both seating and site stabilization. We are talking about thermal mass, structural integrity, and the physics of comfort.
1. Monolithic Natural Stone Slabs and Thermal Mass Seating
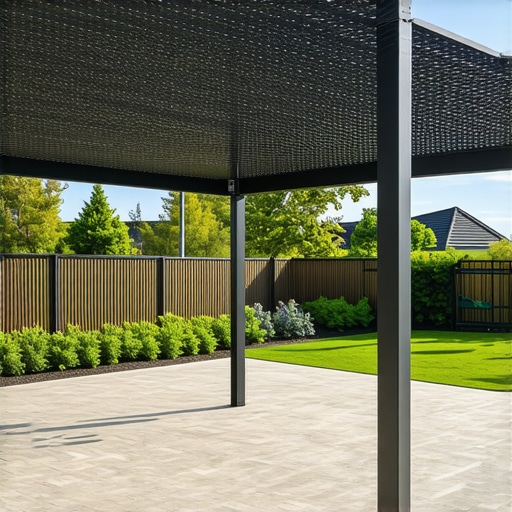
Monolithic natural stone slabs offer 2026 outdoor kitchens a permanent seating solution that leverages thermal mass to regulate micro-climates. These single-piece units, often carved from granite, basalt, or limestone, require a 6-inch reinforced crushed stone base to prevent frost heave and ensure the seat remains level under extreme weight loads.
When you install a 4,000-pound slab of Pennsylvania Bluestone or Canadian Granite, you aren’t just placing a bench; you are installing a heat sink. During the day, these stones absorb solar radiation. When the sun goes down in late autumn, the stone slowly releases that heat, extending the usability of your outdoor kitchen by weeks. However, you cannot just drop these on the grass. You need a structural excavation. I tell my crew that the hole is more important than the stone. We excavate to a depth of 12 inches, lay down a non-woven geotextile fabric to prevent soil migration, and then compact 3-inch lifts of modified gravel using a plate compactor with a centrifugal force of at least 4,000 lbf. If that base isn’t at 95 percent Standard Proctor density, the stone will shift. It is a mathematical certainty. Natural stone varies in porosity, so for 2026, we are seeing a shift toward high-density igneous rocks that resist the freeze-thaw cycles that shatter cheaper, sedimentary alternatives.
“A retaining wall doesn’t fail because of the stone; it fails because of the water trapped behind it.” – Hardscape Engineering Axiom
2. Tiered Retaining Walls with Integrated Ergonomic Seating
Tiered retaining walls with integrated seating utilize segmental retaining wall (SRW) units or natural dry-stack stone to manage slope transitions while providing social hubs. By incorporating cantilevered capstones at an 18-inch height, these structures solve drainage issues while eliminating the need for bulky, moveable patio furniture.
The engineering of a seating wall is frequently botched by ‘mow-and-blow’ outfits who think a little mortar solves everything. It doesn’t. A seat wall built into a slope must be treated as a dam. You need a 4-inch perforated SDR-35 pipe behind the first course of stone, encased in #57 clean angular stone, to move water away from the structure. Without this, the ‘hydrostatic pressure’ will push the wall over. For 2026, we are designing these with ‘ergonomic pitch.’ Most walls are built perfectly vertical, which is uncomfortable for the human back. We are now leaning the backrest portion of the stone wall at a 5-degree angle and using 14-inch deep capstones with a 2-inch overhang to provide ‘calf-relief’ space. This prevents your heels from hitting the wall while sitting. We also use high-performance polymeric sand in the joints of the hearth to prevent ant hills and weed growth from compromising the structural interlock of the units.
How much modified gravel do I need for a patio base?
To calculate the required modified gravel, multiply the square footage of your seating area by the desired base depth (usually 6 to 8 inches for seating walls) and divide by 324 to get cubic yards. Always add a 20 percent compaction factor to your final order to account for volume loss during tamping.
What is the ideal height for a stone kitchen seat?
The industry standard for outdoor stone seating is 18 inches from the finished grade to the top of the capstone. This height mimics standard indoor dining chairs, allowing for comfortable leg positioning and easy transition to a standing position for guests of all ages.
| Material Type | PSI Strength | Porosity % | Maintenance Level |
|---|---|---|---|
| Granite Slabs | 15,000+ | 0.1% | Very Low |
| Cast Concrete | 5,000-8,000 | 3.0% | Medium (Sealing Required) |
| Sandstone | 4,000-6,000 | 8.0% | High (Freeze/Thaw Risk) |
| Basalt | 20,000+ | 0.05% | Lowest |
3. Cantilevered Floating Stone Benches with Steel Reinforcement
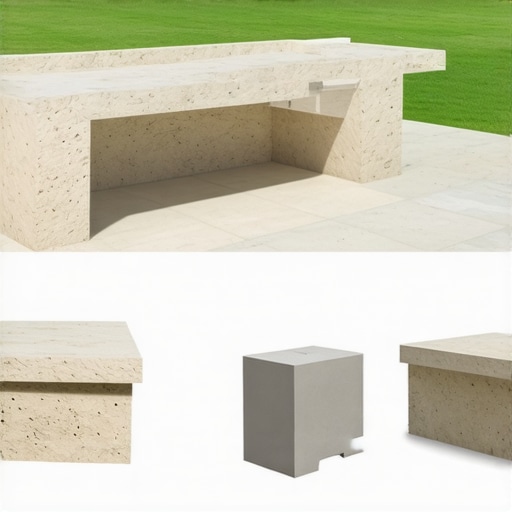
Cantilevered floating stone benches create a minimalist aesthetic in 2026 landscapes by using structural steel brackets anchored into masonry cores. This design allows for uninterrupted floor space and easier hardscape cleaning, provided the stone has sufficient flexural strength to support a 300-pound point load at the edge.
This is where civil engineering meets garden design. You cannot float a piece of stone without understanding tension and compression. We typically use 1/2-inch thick stainless steel plates bolted into a reinforced concrete masonry unit (CMU) wall that has been fully grouted. The stone itself—usually a high-density porcelain slab or a thick-cut granite—is then epoxy-bonded to the steel. The physics are unforgiving. If the anchor depth into the wall isn’t at least 2.5 times the length of the overhang, the leverage will crack the masonry. I always drill into my new crew members: if you don’t fix the soil grading first, every plant or stone you put in the ground is just expensive compost. For these floating benches, the grading must slope away from the wall at a minimum of 2 percent. This ensures that water doesn’t pool under the bench, which would lead to ‘efflorescence’—that ugly white salt staining—on your high-end stone. It is about precision, not just pretty pictures.
“Standardization of segmental concrete units ensures that structural integrity is maintained through ASTM C1782 compliance, focusing on freeze-thaw durability and load distribution.” – ICPI Technical Manual
- Step 1: Utility Marking. Call 811 before you dig a single inch.
- Step 2: Excavation. Remove all organic topsoil until you hit ‘subgrade’ (clay or hardpan).
- Step 3: Geotextile Layer. Use 4oz non-woven fabric to separate soil from your clean stone.
- Step 4: Compaction. 2-inch lifts of gravel. Don’t skip the vibratory plate compactor.
- Step 5: Leveling. Use a laser level. A 1/8-inch mistake at the base is a 1-inch mistake at the top.
- Step 6: Jointing. Use high-grade polymeric sand or epoxy resin for 2026 standards.
Landscape construction in 2026 is about durability. You aren’t building for the ‘lush’ photos on social media; you are building for the freeze-thaw cycle of 2035. If you use the right stone, respect the drainage requirements, and compact your base until the machine bounces off the ground, your outdoor kitchen seating will outlast the house itself. Don’t be the homeowner who calls me to fix a sinking wall. Build it right the first time.