Building a Smokeless Fire Pit from Scratch
The Invisible Engineering Behind a Smoke-Free Burn
Building a smokeless fire pit requires managing secondary combustion and ensuring a compacted aggregate base to prevent structural failure. By utilizing a double-walled design and specific airflow vents, you eliminate particulate matter before it exits the pit, creating a clean, high-heat burn. This isn’t just about stacking stones; it is about thermodynamics and civil engineering in your backyard.
I recently got called out to tear up a $30,000 patio that was sinking because the previous contractor thought 2 inches of pea gravel was a sufficient base. It wasn’t. The whole thing turned into a subterranean swamp within two seasons. When we pulled up the pavers, the soil was saturated and the fire pit in the center had literally cracked in half because of the freeze-thaw pressure. If you don’t understand hydrostatic pressure and soil compaction, you are just wasting money. You cannot build a high-heat structure on a low-quality foundation. I tell my crew every day: the work that matters is the work you eventually bury. For a fire pit, that means excavating deep enough to hit stable subgrade and replacing it with engineered fill. It is the difference between a legacy feature and a pile of broken concrete.
Phase 1: Soil Mechanics and Foundation Preparation
To prepare a fire pit foundation, you must excavate the site to a depth of at least 12 inches to accommodate 3/4-inch modified stone and a leveled bedding layer. Proper soil stabilization prevents the masonry from shifting during thermal expansion or heavy rain events. This is the most critical step for long-term hardscape durability.
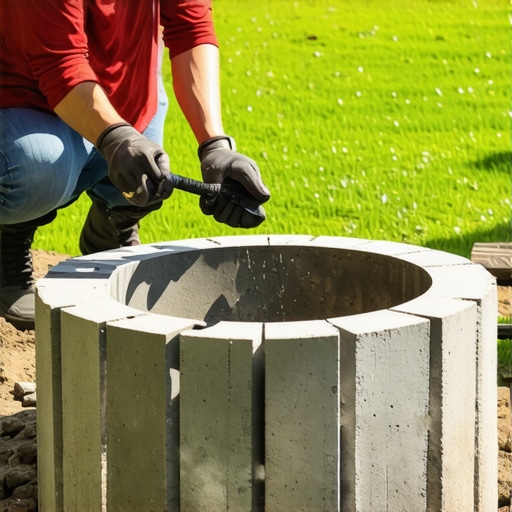
Most DIY guides tell you to dig a shallow hole. They are wrong. You need to account for the weight of the masonry and the intense heat that will dry out the surrounding soil, causing it to shrink. We start by stripping the organic material. Grass and topsoil are sponges. If you leave them under your pit, it will settle. Once you hit the sub-soil, you need a plate compactor. A hand tamper is a toy. You need 3,000 to 5,000 pounds of centrifugal force to lock those stones together.
“A retaining wall or fire pit doesn’t fail because of the stone; it fails because of the water trapped behind or beneath it.” – Hardscape Engineering Axiom
We use a non-woven geotextile fabric to separate the soil from our gravel. This prevents the ‘fines’ in the soil from migrating up into your clean stone, which preserves the drainage capacity of your base. If water can’t get out, the ice will push your pit out of the ground in January. Don’t skip the fabric. Don’t skip the compaction.
How much modified gravel do I need for a fire pit base?
For a standard 4-foot diameter pit area, you typically need approximately 0.5 to 0.75 cubic yards of CR6 or 21A modified stone to achieve a 6-inch compacted lift. Ensure you calculate the volume based on a 12-inch over-dig to provide a structural shoulder for the outer masonry walls.
Phase 2: The Science of Secondary Combustion
A smokeless fire pit functions through the Venturi effect, where cool air is drawn into the bottom of a double-walled insert, heated between the walls, and injected back into the flames at the top. This oxygen-rich environment allows for the combustion of smoke particles before they leave the chamber. This process is often called gasification.
| Material Component | Thermal Resistance | Best Use Case |
|---|---|---|
| Firebrick (Alumina) | High (2,000°F+) | Inner lining of the combustion chamber. |
| Cast Concrete Pavers | Moderate | Outer decorative shell only. |
| Stainless Steel Insert | High | Managing the smokeless airflow path. |
| Lava Rock | High | Drainage and heat dispersion at the base. |
To get a truly smokeless burn, you need two things: heat and oxygen. When wood burns, it releases gases. In a normal pit, these gases escape as smoke. In a smokeless design, we use an inner steel liner. The air enters the bottom vents, travels up through the 2-inch gap between the walls, and gets superheated. When it exits the top holes, it hits the smoke and causes a second flame. It looks like a blowtorch. It is efficient. It is clean. But if your vents are too small, the system chokes. If they are too big, the air doesn’t heat up enough. I aim for 1-inch diameter holes spaced 3 inches apart around the top rim. Precision matters here.
Phase 3: Masonry and Thermal Expansion
When selecting fire pit masonry, you must prioritize refractory materials like firebrick or heavy-gauge 304 stainless steel to withstand internal temperatures. Standard concrete pavers can calcify or explode if they are in direct contact with high heat due to moisture trapped in the concrete pores. Always leave a 1-inch thermal gap between your heat source and your decorative stone.
I see it every year: someone buys cheap pavers from a big-box store and builds a pit. Three months later, the stones are cracking. Why? Because concrete expands when it gets hot. If you don’t have a fire ring or firebricks, the heat transfers directly into the moisture trapped in the paver. That moisture turns to steam, the pressure builds, and the stone pops. It’s dangerous. We always line the interior with firebrick and refractory mortar.
“High-temperature environments require materials with a low coefficient of thermal expansion to prevent structural degradation.” – Masonry Engineering Standard
This keeps the heat where it belongs. Use a high-quality polymeric sand in the joints of the surrounding patio to ensure the whole system remains permeable but stable. It prevents weeds. It stays put. It works.
How do I prevent my fire pit from cracking?
To prevent fire pit cracking, you must install a steel fire ring or refractory brick liner to act as a thermal barrier. Additionally, ensure the outer masonry wall is not mortared to the inner heat-shield, allowing both structures to expand and contract independently during heat cycles.
Step-by-Step Installation Checklist
- Call 811: Never dig without marking utility lines. Even a 12-inch hole can hit a shallow gas line.
- Excavation: Dig 12 inches deep and 12 inches wider than your intended pit diameter.
- Base Layer: Add 6 inches of 3/4-inch crushed stone. Compact in 2-inch increments.
- Leveling: Use a 4-foot level. If the base isn’t level, the pit will look like the Leaning Tower of Pisa.
- The First Course: Set your first ring of stones. This is your anchor. Use masonry adhesive only on the outer rings.
- The Airflow Vents: Leave 2-inch gaps in the bottom course of the outer wall to allow intake air to reach the inner liner.
- Heat Shield: Drop in your smokeless stainless steel insert. Ensure it sits flush on the masonry.
- Capstones: Finish with a heavy natural stone cap to protect the joints from rain.
Maintenance and Longevity
A smokeless pit produces very little ash because the fire is so hot. But that ash is acidic. If you let it sit in the bottom and get wet, it will eat through your steel liner eventually. Clean it out after every three or four burns. Use a steel cover when the pit is not in use. Water is the enemy of any hardscape. If you keep the internal chamber dry, your stainless steel will last 20 years. If you leave it open to the elements, you’ll be replacing the liner in five. Don’t be lazy. Protect your investment. Proper garden design isn’t just about how it looks on day one; it’s about how it performs in year ten. The soil pH around the pit can also be affected by ash runoff, so keep the area clean to protect your nearby turf grass. Stick to the plan. Build it right. Burn it hot. It will last.


![Build a $250 2026 Brick Fire Pit [Weekend DIY]](https://lawnmajesty.com/wp-content/uploads/2026/07/Build-a-250-2026-Brick-Fire-Pit-Weekend-DIY.jpeg)
![Build a $300 Modern Pergola for 2026 Shade [DIY]](https://lawnmajesty.com/wp-content/uploads/2026/06/Build-a-300-Modern-Pergola-for-2026-Shade-DIY.jpeg)