5 Modern Pergola Designs for Compact Urban Backyards
The Hardscape Autopsy: Why Urban Pergolas Fail
Modern pergola designs for compact backyards prioritize vertical utility and structural integration, utilizing powder-coated steel or Western Red Cedar to maximize overhead coverage without consuming limited ground-level square footage. I recently got called out to tear up a $30,000 patio that was sinking because the previous contractor didn’t account for the 400-pound pergola footings. He sat the posts directly on top of 4 inches of modified gravel without digging below the frost line. Over three winters, the freeze-thaw cycle pushed the posts up, cracking the pavers and shearing the ledger bolts right off the house. It was a disaster. It will rot if you don’t fix it. Don’t skip the engineering phase. Most people look at a pergola and see a decorative sunshade; I see a massive sail that can generate thousands of pounds of uplift during a thunderstorm. If your footings aren’t deep enough, that beautiful structure is just a very expensive kite waiting for a gust of wind.
“A pergola is only as stable as its footings; wind shear is the silent killer of overhead structures.” – Structural Timber Association
The Physics of Urban Footings and Soil Density
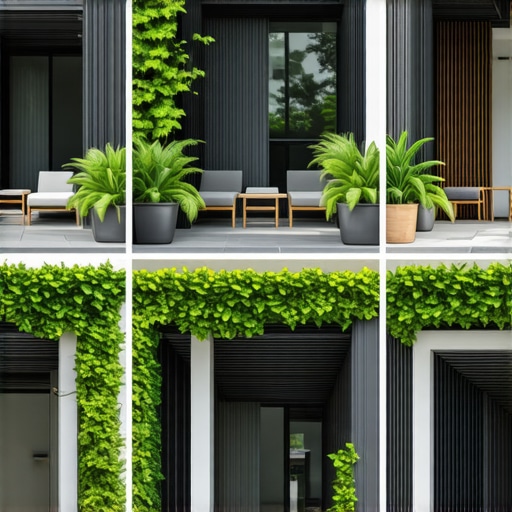
In compact urban yards, you are often dealing with disturbed soil—soil that has been moved, compacted, or filled during the original construction of the home. This soil often has a bearing capacity of less than 1,500 pounds per square foot (PSF), which is insufficient for heavy structures. You must excavate to the local frost line—usually 36 to 42 inches in northern zones—and use a 3,000 PSI concrete mix for the piers. Don’t just dump a bag of dry mix in a hole and hit it with a hose. That leads to weak, honeycombed concrete that will crumble within five years. Use a mixer. Get the slump right. We use 6×6 posts even on small pergolas because 4x4s are prone to warping and twisting as they dry out in the sun. A 6×6 post has more than twice the cross-sectional area and significantly better structural integrity. [image placeholder]
How much weight can a compact pergola handle?
A standard residential pergola should be engineered to handle a live load of at least 20 pounds per square foot for snow and a wind load of 90 to 115 MPH, depending on your local municipal building codes and the exposure category of your property.
1. The Cantilevered Steel Frame
Cantilevered steel pergolas are the gold standard for small spaces because they eliminate the need for front-facing posts. This design uses a heavy-duty steel beam anchored into a massive concrete counterweight buried underground. This opens up the floor plan for outdoor kitchens or seating. We use A36 structural steel, which is then sandblasted and powder-coated to prevent rust. The engineering here is all about leverage. The torque applied to the base is immense, so the bolts must be Grade 8 galvanized steel. Cheap zinc bolts from a big-box store will snap under the shear force. If you want a minimalist look, this is it. It looks like it is floating. It is not. It is held down by two tons of concrete.
2. The Adjustable Louvered Aluminum System
Aluminum pergolas with motorized louvers are perfect for the erratic weather found in urban micro-climates. These systems allow you to close the roof completely during a downpour, effectively acting as a solid roof. However, the drainage must be managed. High-end systems have integrated gutters in the beams that channel water down the inside of the posts. If you don’t clear the debris, the gutters overflow and the motor burns out. Don’t buy the cheap kits. The gears are plastic and will strip the first time a heavy snow hits them. We look for extruded aluminum with a wall thickness of at least 1/8 inch. Anything thinner will dent if a hailstone hits it. The motor should be a 24V DC system with a manual override.
3. The Wall-Mounted Minimalist with Tension Wires
For the ultra-compact patio, we often attach one side of the pergola directly to the house. This requires a ledger board. Most DIYers mess this up by not using proper flashing. If water gets behind that ledger, it will rot your house’s rim joist. We use Z-flashing and 1/2-inch lag bolts spaced every 16 inches on center. Instead of heavy wood rafters, we use stainless steel tension wires. These wires provide a framework for deciduous vines like Wisteria or Hops. This creates a seasonal canopy. In the summer, the leaves provide shade. In the winter, the leaves drop, allowing sunlight to heat the house. It’s biological engineering. It works. The tension on those wires can exceed 500 pounds, so the anchors must be through-bolted into the studs, not just the siding.
4. The Box-Frame Western Red Cedar
Cedar is the workhorse of the landscaping industry for a reason. It contains natural oils (thujaplicins) that resist rot and insect infestation. For a modern look, we use a box-frame design with no overhangs. The rafters are flush with the beams, creating a clean, geometric silhouette. We finish it with a high-solids oil-based stain. Avoid water-based stains; they peel. Oil-based stains penetrate the wood fibers and can be easily refreshed without sanding. When we build these, we use hidden fasteners from Simpson Strong-Tie. You don’t want to see a bunch of silver screws sticking out of your high-end cedar. It looks cheap. Use stainless steel. Always.
“Post-harvest wood treatment must reach the core to prevent internal rot in load-bearing garden structures.” – Forest Products Laboratory
5. The Corner-Pivot Shadow Box
This design uses vertical slats on two sides to create privacy in tight urban quarters where neighbors are only 10 feet away. The “shadow box” effect is created by staggering the slats on either side of the horizontal rails. This allows air to flow through—preventing the structure from becoming a wind sail—while completely blocking the line of sight. We use a 1:2 ratio for the slats to ensure maximum privacy without sacrificing the open-air feel. The pivot point is usually the corner post, which must be reinforced with a steel insert if the wind loads are high in your area. Steel doesn’t lie. It stays straight while wood tries to dance.
What is the best material for a low-maintenance pergola?
Powder-coated aluminum and structural steel are the best materials for low-maintenance pergolas, as they do not rot, warp, or require annual staining, unlike traditional pressure-treated lumber or Western Red Cedar.
Material Comparison for Urban Pergolas
| Material | Lifespan | Maintenance Level | Est. Cost (per sq ft) | Structural Strength |
|---|---|---|---|---|
| Pressure Treated Pine | 10-15 Years | High (Annual) | $25 – $40 | Moderate |
| Western Red Cedar | 20-25 Years | Medium (Bi-annual) | $50 – $80 | High |
| Powder-Coated Aluminum | 30+ Years | Low (Wash only) | $80 – $150 | High (Weight-to-Strength) |
| Structural Steel | 50+ Years | Low (Periodic Check) | $120 – $200 | Very High |
The Professional Installation Checklist
- Utility Markings: Call 811 before you dig. Striking a gas line in a compact backyard is a fast way to end your project and your neighborhood.
- Footing Depth: Ensure you are 6 inches below the local frost line to prevent heaving.
- Drainage: Use a 1-inch standoff base for wood posts. Never bury wood directly in concrete. It will rot at the soil line within 7 years.
- Fasteners: Use 304 or 316-grade stainless steel in coastal areas or ACQ-rated galvanized steel for pressure-treated wood.
- Permits: Most municipalities require a permit for any structure over 100 square feet or anything attached to the house.
The Settlement Period: Year One Expectations
During the first year, your pergola will settle. If it is wood, you will hear it crack and pop. This is called “checking.” It is normal. The wood is drying out and the fibers are splitting. It doesn’t mean the structure is failing. If it’s a louvered system, the seals might need a slight adjustment after the first winter. Check your bolts after six months. Vibration from wind can loosen nuts. Give them a quarter-turn if they feel soft. Maintaining a pergola in an urban environment means dealing with soot and pollution. Wash the beams once a year with a mild detergent to prevent the finish from oxidizing. Your yard is an ecosystem; treat the structures within it like the engineering marvels they are. Final specs matter. Precision matters. Don’t cut corners.

![Build a $80 Gravel Fire Pit Area [2026 Budget]](https://lawnmajesty.com/wp-content/uploads/2026/07/Build-a-80-Gravel-Fire-Pit-Area-2026-Budget.jpeg)