![Fix Sinking Pavers with This $40 Poly-Sand Trick [2026 DIY]](https://lawnmajesty.com/wp-content/uploads/2026/05/Fix-Sinking-Pavers-with-This-40-Poly-Sand-Trick-2026-DIY.jpeg)
Fix Sinking Pavers with This $40 Poly-Sand Trick [2026 DIY]
The Anatomy of a Failed Patio: Why Your Hardscape is Diving
I recently got called out to tear up a $30,000 patio that was sinking because the previous contractor used stone dust as a bedding layer instead of ASTM C33 washed concrete sand. Within two seasons, the pavers looked like a topographic map of the Himalayas. You walk out after a rainstorm and see that one low spot holding a puddle. That is not just a puddle; it is a symptom of a structural failure. When a patio sinks, it is rarely the fault of the stone itself. Instead, it is a failure of the sub-base or the loss of joint stabilization. Sinking pavers are typically caused by sub-base migration, poor compaction, or hydrostatic pressure that washes out the bedding layer. To fix this, you must restore the interlocking tension of the system using a high-quality polymeric sand and proper compaction techniques.
“A retaining wall doesn’t fail because of the stone; it fails because of the water trapped behind it.” – Hardscape Engineering Axiom
The Forensic Diagnosis of Paver Settlement
Before you spend a dime, you need to understand why the ground moved. If you have a low spot, the base material has likely migrated. This happens when the contractor skips the geotextile fabric between the native soil and the modified gravel base. Over time, the heavy clay or silty soil mixes with your clean gravel, ruining the load-bearing capacity. You end up with a ‘bowl effect’ where water collects, freezes, and pushes the pavers out of alignment. If your pavers are shifting laterally (sideways), your edge restraints have failed. If they are sinking vertically, your base is compromised. We are going to focus on the vertical fix using the $40 poly-sand reset trick. This process works if the base is still mostly intact but the joints have emptied out, allowing the pavers to wiggle and dive.
The $40 Poly-Sand Trick: Restoring Interlock
The secret to a stable patio isn’t more gravel; it’s the polymeric sand lock. Polymeric sand is a calibrated mix of graded sand and binders (polymers) that, when activated with water, creates a flexible but firm joint. This joint prevents water from infiltrating the base and keeps the sand from washing out. For roughly $40 a bag, you can stabilize about 50 to 75 square feet of pavers, provided you follow the physics of the application. Most DIYers fail because they treat it like regular dirt. It is not dirt. It is a chemical installation. You must ensure the joints are bone dry and the pavers are vibrating at a high frequency to settle the sand. Without vibration, the sand hangs up at the top of the joint, creating a bridge that will collapse the first time someone steps on it. You need a full-depth sand column to resist the lateral forces of foot traffic.
| Material Type | Drainage Rating | Stability Factor | Cost Per 50 sq ft |
|---|---|---|---|
| Play Sand | High | Low (Washes out) | $5 |
| Stone Dust | Very Poor | Medium (Heaves) | $8 |
| Standard Poly-Sand | Superior | High | $40 |
| G2 Intelligent Sand | Superior | Highest (No Haze) | $65 |
How much modified gravel do I need for a patio base?
To calculate your base material volume, multiply the square footage of your patio by the depth of the base (usually 4 to 6 inches for walkways, 8 to 12 inches for driveways) and divide by 27 to get cubic yards. For a standard 10×10 patio with a 6-inch base, you need roughly 2.5 tons of 2A modified gravel. Do not skip the compaction. You must run a vibratory plate compactor over the gravel in 2-inch lifts. If you throw 6 inches of gravel in a hole and hit the top with a hand tamper, you have a failed project. You are looking for 98% Standard Proctor Density. Anything less will settle under its own weight within twelve months. The $40 poly-sand fix only works if your base has reached this level of density.
Why do my pavers keep sinking even after I add sand?
If your pavers continue to sink after refilling joints, you likely have an underlying drainage issue or a ‘piping’ effect where water is moving under the pavers and carrying the bedding sand away. This often happens at the edge of the patio where the soil grade meets the stone. If the water has nowhere to go, it will carve a path under your hardscape. Check your downspouts. If a gutter is dumping water within five feet of your patio, no amount of sand will save it. You need to pipe that water away using a 4-inch PVC solid drain line. The sand is the lock, but the base is the foundation. You cannot lock a foundation that is sitting in a swamp. Keep the water moving away from the structure.
“Compaction of the sub-grade to 98% Standard Proctor Density is the single most critical factor in preventing pavement deformation.” – ICPI Tech Spec No. 2
The Step-by-Step Restoration Checklist
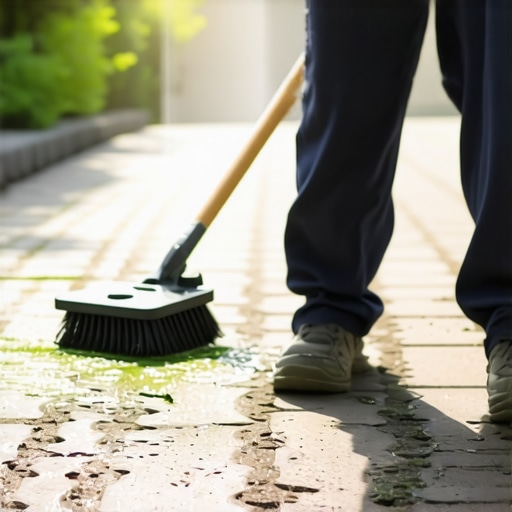
- Clean the Joints: Use a pressure washer to blast out at least 1.5 inches of old sand and organic debris. Do not skip this. New sand will not bond to old, mossy dirt.
- Dry the Surface: The pavers must be 100% dry. If there is moisture in the joints, the polymers in the sand will activate prematurely and stick to the top of the stone, creating a white haze.
- Apply the Sand: Pour the polymeric sand and sweep it into the joints using a stiff-bristle broom at a 45-degree angle to the joint lines.
- Vibrate the Pavers: Use a plate compactor with a protective mat or a rubber mallet to vibrate the stones. This settles the sand into the bottom of the joint.
- The Leaf Blower Trick: Before wetting, use a leaf blower on low power to blow every single grain of sand off the surface of the stones. If you leave it there, it will stain.
- Mist Activation: Set your hose to ‘mist.’ Do not soak it. You want to dampen the sand so the water penetrates the full depth without washing the polymers out of the sand.
The Scientific Reality of Joint Stabilization
Polymeric sand works through a process called cross-linking. When the water hits the polymer additives, they create a web-like structure that binds the sand grains together. This makes the joint semi-permeable. It allows a microscopic amount of water to pass through, but it prevents the bulk movement of the sand grains. This is critical for freeze-thaw cycles. In regions like Pennsylvania or Ohio, the ground moves. A rigid mortar joint would crack and shatter. Polymeric sand is ‘self-healing’ to a degree; it has enough flex to move with the earth and then settle back into place. But remember, this only works if the joint is clean. If you try to top-dress a dirty joint, the new sand will peel off like a scab. Do the prep work or don’t do the job at all. Your patio is an engineering project. Treat it like one.

![Fixing 2026 Uneven Paver Walkways [Step-by-Step]](https://lawnmajesty.com/wp-content/uploads/2026/06/Fixing-2026-Uneven-Paver-Walkways-Step-by-Step.jpeg)