
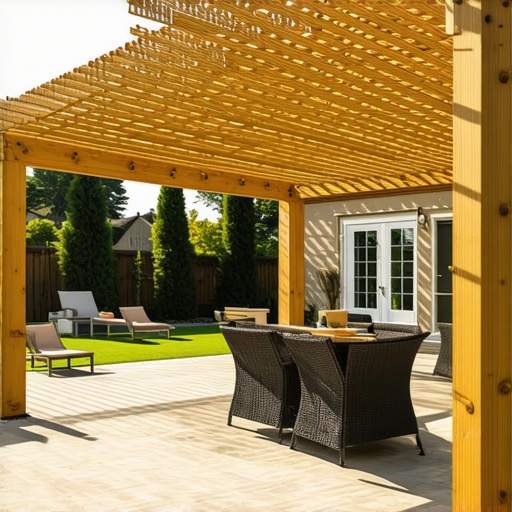
How to Build a Custom Pergola Over an Existing Patio
The Pre-Build Reality: Engineering Before Aesthetics
Building a custom pergola over an existing patio requires a rigorous assessment of structural load-bearing capacity and wind uplift resistance to ensure the safety and longevity of the hardscape. You cannot simply bolt a heavy timber structure to a four-inch concrete slab and expect it to survive a 70-mph wind gust or the freeze-thaw cycles of a northern winter.
I recently got called out to tear up a $30,000 patio that was sinking because the previous contractor tried to install a massive cedar pergola directly onto the pavers. They didn’t understand that a paver system is a flexible pavement, not a structural foundation. Within two seasons, the point loads from the 6×6 posts had punched through the bedding sand and crushed the modified gravel base. The entire southwest corner of the patio was underwater every time it rained because the pitch was ruined. It was a $15,000 mistake that could have been avoided with four concrete piers. I always drill into my crew: if you don’t fix the structural interface first, you’re just building a liability. We had to lift every stone, excavate the base, pour 42-inch deep footings, and then re-lay the field. It was a nightmare for the homeowner, but a necessary autopsy of a failed project.
“Paver systems are designed for distributed loads, not concentrated vertical point loads from overhead structures.” – Interlocking Concrete Pavement Institute (ICPI) Standards
Structural Assessment: Can Your Patio Support a Pergola?
Determining if an existing patio can support a custom pergola requires verifying the concrete thickness or paver base depth to prevent structural failure or substrate cracking. Most standard 4-inch slabs lack the point-load capacity for heavy timber posts without dedicated footings. You must know what lies beneath.
First, check the thickness of the slab. If it is a poured concrete patio, you need at least 4 inches of 3000 PSI concrete for a lightweight structure, but for heavy timber, this is insufficient. For paver patios, you are looking at a 1-inch bedding sand layer over 4 to 8 inches of compacted CR-6 or 21A modified gravel. Neither of these layers provides the lateral stability required for a tall structure. You must excavate and pour footings that extend below the local frost line. If you skip this, the pergola will heave. It will lean. Eventually, it will fail. Don’t guess. Use a core drill or a spade to verify the substrate before you buy a single stick of lumber.
How deep should pergola footings be?
In most jurisdictions, footings must reach 12 inches below the local frost line to prevent shifting. This typically means a depth of 36 to 48 inches in northern climates. The diameter should be at least 12 inches for a 6×6 post to allow for proper load distribution. Use 3000 PSI concrete and reinforced rebar cages if the soil is expansive clay. Clay is the enemy of stability. It expands when wet and shrinks when dry. This movement will snap a post base if the footing isn’t anchored deep in the stable subsoil.
Selecting the Right Materials for Longevity
Choosing the correct pergola materials involves balancing rot resistance, structural spanning capability, and thermal expansion properties to ensure the structure remains aesthetically pleasing and safe. High-quality materials like Western Red Cedar or Grade #1 Pressure Treated Pine are essential for outdoor durability. Avoid big-box store ‘whitewood’ at all costs.
| Material Type | Structural Span (12ft) | Rot Resistance | Maintenance Level | Average Lifespan |
|---|---|---|---|---|
| Western Red Cedar | Excellent | High (Natural Oils) | Moderate (Staining) | 20+ Years |
| PT Pine (Grade #1) | Good | Very High (Chemical) | Low (Once Cured) | 25+ Years |
| Extruded Aluminum | Superior | Immune | Zero | 40+ Years |
| Vinyl (Hollow) | Poor | Immune | Zero | 10-15 Years |
Cedar is the professional’s choice for a reason. It is dimensionally stable. It stays straight. It smells better than chemically treated wood. If you use pressure-treated lumber, ensure it is KDAT (Kiln Dried After Treatment). Standard PT lumber from the local yard is often saturated with water. As it dries in the sun, it will twist, warp, and check. Your 2×8 rafters will look like propellers within six months. This ruins the geometry of the pergola. It looks amateur. Spend the extra 30% on KDAT or Cedar. You won’t regret it.
The Installation Process: A Step-by-Step Breakdown
The pergola installation process involves precise layout geometry, post-to-footing anchoring, and structural beam-to-post connections using galvanized or stainless steel hardware to resist lateral forces. Every measurement must be checked with a transit level or a laser for accuracy. Plumb is not a suggestion; it is a requirement.
- Mark post locations using the 3-4-5 triangle method to ensure the footprint is perfectly square.
- Core-drill through the existing concrete or remove pavers at post locations.
- Excavate footings to the required depth and bell out the bottom for maximum uplift resistance.
- Pour concrete piers and set Simpson Strong-Tie ABW66 or similar adjustable post bases.
- Notch the 6×6 posts to create a ‘shelf’ for the beams to sit on, rather than relying solely on bolts.
- Install beams and level them across the entire span using a 4-foot level or laser.
- Space rafters at 12 or 16 inches on center, securing them with hurricane ties.
When you set your post bases, do not embed the wood directly in the concrete. This is a rookie move. The wood will wick moisture from the concrete. It will rot at the base. Always use a stand-off bracket that keeps the wood one inch above the concrete surface. This allows for airflow. It prevents the end-grain from soaking up water. This single detail can double the life of your posts. Also, use 1/2-inch galvanized carriage bolts for beam connections. Screws have high tensile strength but low shear strength. In a high-wind event, screws can snap. Bolts will hold.
“Wind uplift forces on open-roof structures often exceed the dead weight of the material itself.” – ASCE 7-16 Minimum Design Loads
How much modified gravel do I need for a patio base?
For a standard paver patio, you need enough modified gravel to create a 6-inch compacted base, which roughly equates to 1 ton of gravel per 50 square feet. This base must be compacted in lifts of 2 to 3 inches using a plate compactor to achieve 95% Proctor density. If the base isn’t solid, the patio will fail under the weight of the pergola footings if they aren’t properly isolated. I tell my guys: the tamper should literally bounce off the ground when it’s done. If it sinks, keep compacting.
Finishing and Maintenance for Years of Service
Applying a high-solids oil stain or UV-resistant sealant is the final step in protecting the lignin in the wood from degradation caused by ultraviolet radiation and moisture penetration. Maintenance should be performed every two to three years to preserve the wood’s structural integrity. Neglect leads to silvering and eventual fiber separation.
Wait at least 30 days before staining new cedar to allow the internal moisture to equalize. For pressure-treated wood, wait until the ‘green’ tint fades and a water drop test shows the wood is absorbing liquid. Use a penetrating oil-based stain rather than a film-forming sealer. Film-formers like polyurethane will peel. They are a nightmare to sand off. Penetrating oils soak into the fibers and can be easily refreshed with a light cleaning and a new coat. Check your hardware annually. Wood shrinks over time. Those carriage bolts you tightened today will be loose in twelve months. Give them a quarter-turn every spring. It keeps the structure rigid and prevents the ‘sway’ that eventually pulls footings loose.
![Build a $150 2026 Cedar Planter for Patios [Easy Project]](https://lawnmajesty.com/wp-content/uploads/2026/07/Build-a-150-2026-Cedar-Planter-for-Patios-Easy-Project.jpeg)