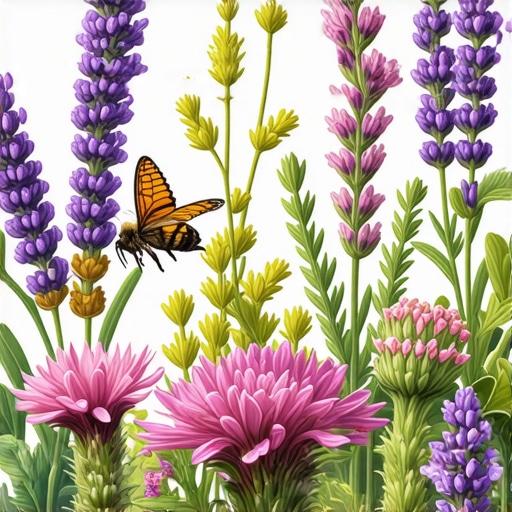
The Best Perennials for a Low-Water Pollinator Garden
The Fundamental Reality of Soil Grading: Why Drainage Dictates Survival
A successful low-water pollinator garden requires a precise 2 percent slope away from structural foundations and a soil composition that facilitates rapid drainage to prevent root rot. By prioritizing soil mechanics and grading over aesthetic plant selection, you ensure the long-term viability of native perennials and pollinator habitats.
I always drill into my new crew members: if you don’t fix the soil grading first, every plant you put in the ground is just expensive compost. I have seen guys spend five figures on specimen-grade Agastache and Echinacea, only to watch them melt into black slime because the yard had a three-inch depression that collected runoff. We are not just digging holes; we are managing hydrostatic pressure and moisture migration. If your soil is heavy clay, you cannot just drop a plant in. You are essentially building a ceramic pot in the ground that will drown the root system during the first spring rain. We use a transit level to verify the pitch before a single shovel hits the dirt. Precision matters. It is the difference between a garden that thrives for twenty years and one that fails in twenty days.
“Native plants have evolved to handle local climate extremes, but they cannot overcome poor site preparation or anaerobic soil conditions caused by improper grading.” – Texas A&M AgriLife Extension
How much mulch is too much for perennials?
For most pollinator-focused perennials, a layer of two to three inches of coarse-shredded hardwood mulch is the limit. Anything deeper creates a moisture-wicking barrier that prevents oxygen exchange at the root flare. We see “mulch volcanoes” everywhere in the industry, and it is a death sentence for the plant. The bark begins to rot, and the rot spreads to the vascular system of the perennial. Keep the mulch at least two inches away from the actual stems. Don’t skip this step. Airflow at the base is non-negotiable for Asclepias and Salvia species.
The Materials Breakdown: Selecting Nursery Stock Over Big-Box Alternatives
Professional-grade landscaping demands high-quality nursery stock with established root systems and verified genetics to ensure resilience against drought and pests. Choosing cultivars specifically bred for low-water consumption and pollen production provides a superior return on investment compared to mass-produced retail plants.
| Plant Species | Root Type | Bloom Period | Drought Tolerance |
|---|---|---|---|
| Asclepias tuberosa | Taproot | June to August | Extremely High |
| Echinacea purpurea | Fibrous | July to September | High |
| Agastache foeniculum | Fibrous | July to October | High |
| Perovskia atriplicifolia | Woody Base | July to September | Extremely High |
| Monarda fistulosa | Rhizomatous | June to August | Moderate to High |
We avoid the big-box stores for a reason. Their plants are often pushed with high-nitrogen fertilizers to look good on the shelf, which results in weak, leggy growth and a lack of root development. When you put those into a xeriscape environment, they go into shock immediately. We source from growers who harden their stock off. We look for root-bound indicators and reject anything with girdling roots. If a plant has been circling its pot for six months, it will never establish correctly in your yard. It will struggle, and eventually, it will die. We want plants that are hungry for the soil, not plants that have been pampered in a climate-controlled greenhouse.
What is the best soil for a pollinator garden?
The ideal substrate for a low-water garden is a sandy loam with a pH between 6.2 and 7.0. You need enough organic matter to support microbiology but enough grit to ensure water moves through the root zone at a rate of at least one inch per hour. We often incorporate expanded shale or coarse sand into heavy clay to break up the surface tension. If you don’t test your soil pH before planting, you are just guessing. A pH that is too high or too low will lock out essential micronutrients like iron and manganese, regardless of how much fertilizer you apply.
Installation Protocol: The Science of the Root Flare
Proper installation techniques, including the identification of the root flare and the use of site-specific soil amendments, are critical for the successful establishment of perennials in a landscaping project. Focus on compaction levels and initial hydration cycles to force deep root penetration into the subsoil layers.
“A retaining wall doesn’t fail because of the stone; it fails because of the water trapped behind it, and the same principle applies to garden beds: drainage is the primary engineer of plant health.” – Hardscape Engineering Axiom
- Call 811 to mark all underground utilities before excavation begins.
- Excavate the planting hole to twice the width of the root ball but no deeper than the root ball itself.
- Score the sides of the hole to prevent “glazing” in clay soils, which can trap roots like a cage.
- Ensure the root flare (where the stem meets the roots) is slightly above the finished grade.
- Backfill with native soil to ensure the plant adapts to the local mineral profile immediately.
- Hand-tamp the soil to remove large air pockets without over-compacting the rhizosphere.
The tamper should literally bounce off the compacted base if you are doing hardscaping, but for planting, we want a firm but breathable structure. If the soil is too loose, the plant will settle too deep and the crown will rot. If it is too tight, the roots cannot penetrate. We use a five-gallon bucket test: if the water doesn’t disappear in ten minutes, the compaction is too high. You must address the physical structure of the earth before you can expect biology to take over. This is engineering, not interior design. We are building a living system that must withstand heat, wind, and periods of zero precipitation.
The Establishment Phase: Year One Bio-Feedback
The first growing season is a critical period where irrigation must be managed to encourage deep root growth rather than surface-level moisture dependency. Monitor transpiration rates and foliar turgor to determine the precise water requirements of the new installation.
While the internet tells you to water every day, turf grass and perennials actually need deep, infrequent watering. We aim for exactly 1 inch per week in a single application. This forces the roots to chase the moisture down into the cooler, deeper soil layers. If you mist the surface every day, you are training the plants to keep their roots near the surface where they will bake in the July sun. It is a slow process. In year one, you are the life support system. By year three, the garden should be self-sustaining. We look for new terminal growth as a sign of success. If the plant is putting out new leaves, the roots have successfully bridged the gap from the nursery pot to the native soil. It is a game of patience and observation.
Don’t be fooled by a lack of flowers in the first month. We tell our clients: the first year they sleep, the second year they creep, and the third year they leap. We are building a foundation. If you push for blooms too early with high-phosphorus fertilizers, you are stealing energy from the root system. Let the plant focus on its underground infrastructure. That is what will keep it alive when the thermometer hits 100 degrees and the rain stops falling for three weeks. Your goal is a resilient system, not a temporary display. Real landscaping is about the long game.
{“@context”: “https://schema.org”, “@type”: “HowTo”, “name”: “How to Install a Low-Water Pollinator Garden”, “step”: [{“@type”: “HowToStep”, “text”: “Mark utilities by calling 811.”}, {“@type”: “HowToStep”, “text”: “Grade the site to a 2 percent slope for drainage.”}, {“@type”: “HowToStep”, “text”: “Amend soil with grit or organic matter based on pH testing.”}, {“@type”: “HowToStep”, “text”: “Install plants with root flares slightly above grade.”}, {“@type”: “HowToStep”, “text”: “Apply 2 inches of hardwood mulch, avoiding the stems.”}, {“@type”: “HowToStep”, “text”: “Water deeply once per week to establish roots.”}]}
![3 Reasons Your 2026 Hydrangeas Aren't Blooming [Fix]](https://lawnmajesty.com/wp-content/uploads/2026/05/3-Reasons-Your-2026-Hydrangeas-Arent-Blooming-Fix.jpeg)