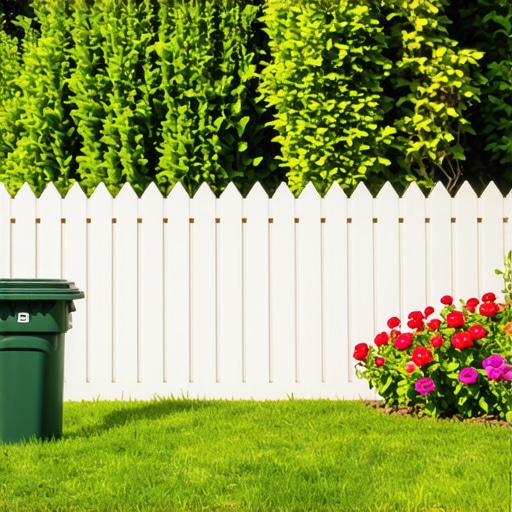
How to Install a Hidden Garbage Can Screen with Picket Fencing
The Engineering of Concealment: Why Most DIY Screens Fail
To install a hidden garbage can screen with picket fencing, you must excavate a level 4-inch compacted gravel base, set pressure-treated 4×4 posts below the frost line, and ensure proper drainage to prevent organic rot and soil shifting near your home’s foundation. It is not just about aesthetics. It is about site engineering. If you treat this like a craft project rather than a civil engineering task, the wind will topple it by year three. I have seen it a thousand times. The frost heaves the posts because the installer did not understand hydrostatic pressure or soil friction. You are building a structure that must withstand lateral wind loads while sitting in a biology-heavy environment. Respect the dirt.
The Narrative of the Foundation: A Lesson for My Crew
I always drill into my new crew members: if you don’t fix the soil grading first, every plant or post you put in the ground is just expensive compost. Last spring, I watched a junior foreman try to set a picket screen on a 5-degree slope without leveling the subgrade. He thought he could ‘eyeball’ the plumb line. Within two weeks, the spring rains turned that slope into a mudslide, and the entire $2,000 screen was leaning like it was drunk. We had to excavate the entire site, haul in 21A modified stone, and start from scratch. The lesson is simple: the soil decides how long your work lasts. You don’t tell the ground what to do; the ground tells you. If you don’t compact your base to 95% Proctor density, you are wasting my time and the client’s money. Soil is alive, and it is constantly trying to move your hardscaping.
Phase 1: Planning and Utility Clearances
Before you strike a shovel into the earth, you must call 811. You are likely installing this screen near the house or garage, which is exactly where gas, electric, and secondary water lines live. Digging blindly is for hacks. Once the lines are marked, calculate your footprint. A standard 96-gallon roll-out bin requires at least 32 inches of width and 36 inches of depth. For two bins, you need a minimum internal clearance of 68 inches to allow for ‘knuckle room’ when moving the cans. Use batter boards and string lines. Do not trust a tape measure pulled across loose dirt. String lines do not lie. You need a 90-degree corner. Use the 3-4-5 triangle method to ensure your screen is square. If the corner is off by even two degrees, your picket panels will bind and look like garbage.
How deep should fence posts be for a garbage screen?
For a standard 4-foot picket screen, your fence posts must be buried at least 24 to 30 inches deep, or 6 inches below your local frost line, to prevent heaving and ensure lateral stability against wind loads. In high-wind areas, the ‘one-third rule’ applies: one-third of the total post length should be underground. Don’t skip the gravel. A 6-inch layer of clean #57 stone at the bottom of the hole is mandatory for drainage. Without it, the bottom of your post is sitting in a teacup of water. It will rot. Even the ‘ground-contact’ rated lumber has limits.
“Post-to-ground contact is the primary failure point in residential fencing; moisture wicking through the end grain of the timber creates a localized micro-climate for fungal decay.” – Wood Preservation Manual
Phase 2: Material Selection and Soil Chemistry
Stop buying your lumber from big-box stores that store their wood in humid, unventilated warehouses. Go to a real lumber yard. You want Pressure Treated (PT) lumber rated for ‘Ground Contact’ (UC4A) for the posts. For the pickets, Western Red Cedar is the gold standard because of its natural thujaplicins, which are organic compounds that repel rot-causing fungi. If you use cheap pine, you will be replacing it in five years. Also, consider the hardware. ACQ-treated lumber will eat standard galvanized nails for breakfast through galvanic corrosion. You must use 304 or 316-grade stainless steel fasteners. Anything else is professional negligence. Use a markdown table to compare your options.
| Material Type | Expected Lifespan | Maintenance Level | Structural Integrity |
|---|---|---|---|
| Pressure Treated Pine | 10-15 Years | High (Stain/Seal) | Moderate (Prone to warping) |
| Western Red Cedar | 20+ Years | Low (Natural rot resistance) | High (Stable) |
| Cellular PVC / Vinyl | 25+ Years | Zero | Low (Requires internal reinforcement) |
Phase 3: The Installation Process
Excavate the entire footprint of the screen, not just the post holes. Remove the sod and 4 inches of topsoil. Topsoil is organic; it compresses and holds moisture. You want a mineral subgrade. Fill this area with 4 inches of crushed stone and compact it with a hand tamper until the tamper literally bounces off the surface. This is your ‘pad’ where the cans will sit. Setting cans on mud is how you get a mosquito breeding ground. Dig your post holes using a power auger or a manual post-hole digger. The hole should be 3 times the width of the post. For a 4×4 post, that is a 12-inch diameter hole. Add 6 inches of gravel to the bottom. Set the post. Level it. Brace it with 2x4s. Pour your concrete, but stop 2 inches below grade. Slope the top of the concrete away from the post to shed water. If you let water pool at the post base, you have failed.
Can I put a fence over a utility line?
You can install a picket screen near utility lines only if you have obtained 811 clearance and use hand-digging techniques within the 18-to-24-inch ‘tolerance zone’ to avoid catastrophic damage to gas or electric conduits. In many jurisdictions, building a permanent structure directly over a utility easement is prohibited. Check your local codes. I have seen homeowners fined thousands because they blocked an easement for a trash screen. Don’t be that guy.
The Assembly: Picket Spacing and Airflow
When attaching your pickets, use a spacer block. Consistency is what separates a professional from a DIY hack. Space pickets at least 1/2 inch apart. This allows for ‘air wash.’ Airflow dries out the wood after rain and prevents the buildup of mold and mildew on the garbage cans themselves. Garbage cans are bacteria factories; you need ventilation. Attach pickets with two screws per rail. One screw allows the wood to pivot and warp; two screws lock it into a structural diaphragm.
“A retaining wall or screen doesn’t fail because of the material; it fails because of the water and pressure trapped behind it.” – Hardscape Engineering Axiom
Checklist for a 20-Year Installation
- Call 811 and mark all private lines (irrigation, low-voltage lighting).
- Excavate 4 inches of organic material from the footprint.
- Install a geotextile fabric barrier to prevent weed growth under the gravel.
- Use UC4A Ground-Contact rated 4×4 posts.
- Sink posts below the local frost line (30 inches is a safe average for mid-latitudes).
- Use 316-grade stainless steel screws for all connections.
- Level the gravel pad to a 1% slope to ensure water runoff away from the house.
- Apply a copper-naphthenate solution to any cut ends of the pressure-treated posts.
![Stop Hillside Soil Washout for $200 [2026 DIY Fix]](https://lawnmajesty.com/wp-content/uploads/2026/05/Stop-Hillside-Soil-Washout-for-200-2026-DIY-Fix.jpeg)
![Build a $250 Stone Retaining Wall [DIY 2026]](https://lawnmajesty.com/wp-content/uploads/2026/06/Build-a-250-Stone-Retaining-Wall-DIY-2026.jpeg)