Fixing 2026 Wobbly Paver Steps with Stone Adhesive
The Forensic Autopsy of a Failing Hardscape
To fix wobbly paver steps, you must remove the detached units, mechanically strip old efflorescence or failed mortar, and apply a professional-grade polyurethane stone adhesive. This remediation ensures structural integrity by creating a flexible yet high-strength bond that withstands freeze-thaw cycles and heavy foot traffic dynamic loads.
I recently got called out to tear up a $30,000 patio that was sinking because the previous contractor thought he could skip the compaction phase and just ‘glue’ everything to a loose gravel bed. The client was hearing a hollow ‘thunk’ every time they stepped on the third riser. That sound is the death knell of a hardscape. It means the bond has failed, and air gaps are allowing moisture to sit between the paver and the base. When that water freezes, it expands with a force of 30,000 PSI, literally shearing the stone away from its foundation. I walked that site for five minutes and realized the whole stair tower was a liability. We didn’t just fix the ‘wobble’; we had to perform a total structural extraction. If you ignore a loose step, you aren’t just looking at a trip hazard; you are looking at the eventual collapse of the entire masonry assembly. It will fail. It is just a matter of which winter does the final blow.
“A retaining wall doesn’t fail because of the stone; it fails because of the water trapped behind it.” – Hardscape Engineering Axiom
The Engineering of the Bond: Why Stone Adhesive is Non-Negotiable
Most homeowners assume that mortar is the strongest way to hold steps together. They are wrong. Mortar is brittle. It has high compressive strength but almost zero tensile strength. In a modern 2026 hardscaping context, we use advanced polyurethane-based adhesives. These are engineered polymers that remain slightly flexible. This flexibility is critical because stone, concrete, and the earth beneath them are constantly in motion. The coefficient of thermal expansion for a concrete paver means it will grow and shrink every single day. A rigid mortar joint will crack under that stress, whereas a high-PSI stone adhesive will stretch and maintain the seal. We are looking for an adhesive that meets or exceeds ASTM D3498 standards for dry, wet, and frozen lumber, but adapted for masonry. You need a product that can handle at least 400 PSI of shear strength.
How much stone adhesive do I need for a stair project?
Calculating adhesive coverage requires measuring the square footage of the contact points between the riser and the cap stone, typically allowing for two 1/4 inch beads per linear foot. For a standard 4-foot wide step, you should expect to use approximately half a 10-ounce tube per tread-to-riser connection to ensure a gap-filling bond.
| Bonding Method | Adhesion Strength | Flexibility Index | Service Life (Years) |
|---|---|---|---|
| Type S Mortar | Moderate | Very Low | 5-10 |
| Polyurethane Adhesive | Extreme | High | 15-25 |
| Silicone Caulk | Low | Extreme | 1-2 |
| Standard Construction Glue | Medium | Low | 3-5 |
Why do my paver steps keep coming loose?
The primary reason for paver step failure is hydrostatic pressure and capillary suction which pulls moisture into the joint, weakening the chemical bond. If the base aggregate was not compacted to 95% Proctor density, the vertical settlement causes the adhesive to pull away from the stone surface, resulting in a ‘wobble’ that worsens over time.
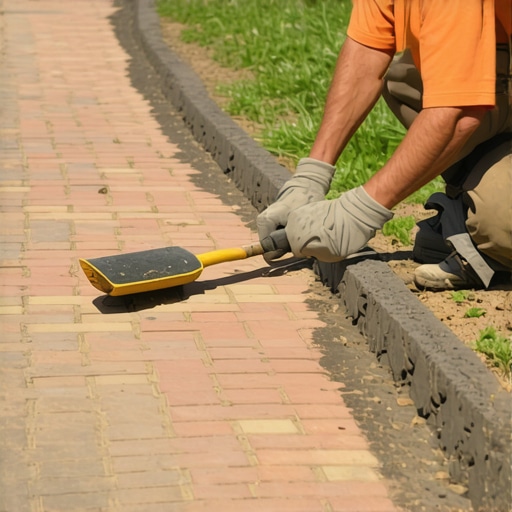
- Step 1: Removal and Cleaning. Use a flat pry bar to lift the loose stone. Do not force it; you don’t want to chip the edges. Use a wire brush or a grinder with a diamond cup wheel to remove every trace of old glue or dirt. The adhesive needs a clean, porous surface to bite into.
- Step 2: Moisture Check. If the stone is saturated, the adhesive won’t cure correctly. Use a leaf blower to dry the underside of the stone. A ‘damp’ surface is okay for some 2026-spec adhesives, but ‘soaking’ is a failure point.
- Step 3: The Bead Pattern. Apply a 1/4 inch thick bead in a ‘serpentine’ or ‘S’ pattern. Do not apply the adhesive in a closed circle. If you trap air or water inside a circle of glue, it has nowhere to go when you compress the stone, creating a ‘hydro-lock’ that prevents a flush fit.
- Step 4: Setting and Leveling. Place the stone firmly. Use a dead-blow rubber mallet to set it into the bead. Check for level in both directions. You want a slight 1/8 inch ‘pitch’ toward the front of the step so water runs off the tread rather than pooling against the riser.
- Step 5: The Cure. Don’t let anyone walk on that step for at least 24 hours. In high-humidity environments, it might take 48. Mark it off with caution tape.
“Proper compaction of the sub-base is the single most important factor in the longevity of any segmental retaining wall or stair system.” – ICPI Technical Manual
The Microscopic Reality of Capillary Action
When we talk about ‘wobble,’ we are actually talking about the failure of the interface between the stone’s crystalline structure and the polymer chain of the adhesive. Natural stones like travertine or sandstone have high porosity. They act like sponges. If you don’t seal the top of your steps, water migrates through the stone and attacks the adhesive bond from the backside. This is why we insist on using 2026-grade silane-siloxane sealers after the adhesive has cured. You have to stop the water at the surface before it can reach the bond line. This isn’t just about aesthetics; it is about preventing the chemical breakdown of your structural fasteners. Don’t skip the cleaning. Don’t skip the dry time. A wobbly step is a symptom of a larger environmental battle. You win that battle by controlling the moisture and the movement. Ground-up builds require an 8-inch modified gravel base, compacted in 2-inch ‘lifts.’ If you are fixing a hack job, you are fighting against the poor foundation laid by the person before you. Use the best adhesive available, or you will be back out there in twelve months doing it again.