Build a Simple Stone Path Using Local River Rocks
Why Planning Your Stone Path is 80% of the Hardscape Work
Building a river rock path requires precise site analysis of soil compaction, topographic drainage, and material density to ensure the stones do not migrate or sink into the subgrade over time. A professional installation prioritizes the structural base over the aesthetic finish to prevent long-term maintenance failures.
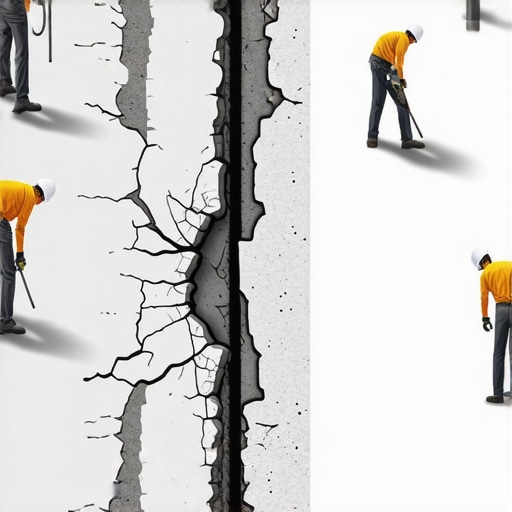
I recently got called out to tear up a $30,000 patio and walkway system that was sinking because the previous contractor thought he could skip the compaction phase. He had laid beautiful local river rocks over two inches of loose sand on top of uncompacted clay soil. Within one season of freeze-thaw cycles, the clay expanded, the sand washed into the subgrade, and the entire path became a muddy hazard. It was a textbook case of base-layer failure. I had to explain to the homeowner that while the rocks looked great, the engineering underneath was nonexistent. We spent three days just excavating the mess before we could even talk about stones. If you don’t fix the soil grading first, every plant or stone you put in the ground is just expensive compost or buried debris. This is the reality of hardscaping: what you don’t see is what keeps the project alive.
The Geological Logic of Local River Rocks
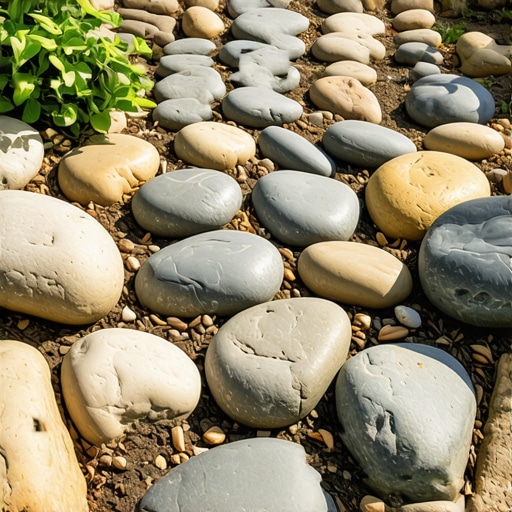
Selecting local river rocks for your hardscaping project involves choosing rounded alluvial stones that offer high permeability and regional aesthetic consistency while minimizing transportation costs and environmental impact. Local stones are already acclimated to your climate’s chemical weathering patterns.
Don’t just head to a big-box store and buy bagged ‘Mexican Beach Pebble’ if you live in the Midwest. It looks out of place and costs four times as much. Local river rock is usually a mix of granites, quartzites, or basalt, depending on your watershed. These stones are naturally tumbled by water, meaning they have no sharp edges to cut into your geotextile fabric. For a walking path, you want a 1-inch to 3-inch diameter mix. Anything smaller than an inch acts like marbles under your feet; anything larger than 4 inches becomes a tripping hazard. You are looking for ‘clean’ stone, meaning it has been washed of fines (dust and dirt) so it won’t clog your drainage layers.
| Material Layer | Standard Depth | Purpose | Compaction Target |
|---|---|---|---|
| Subgrade Soil | 6-8 Inches (Excavated) | Foundation | 95% Proctor Density |
| Geotextile Fabric | N/A (Layer) | Separation/Weed Barrier | N/A |
| 3/4″ Minus Gravel | 4 Inches | Structural Base | High (Vibratory Plate) |
| Local River Rock | 2-3 Inches | Wearing Surface | Settled by Hand |
“The success of any stone installation is dependent upon the preparation of the sub-base and the management of water runoff to prevent hydrostatic pressure build-up.” – Hardscape Engineering Axiom
How much modified gravel do I need for a patio base?
To calculate gravel volume for a pathway base, multiply the total square footage by the desired depth in feet (e.g., 4 inches is 0.33 feet) and divide by 27 to find the cubic yardage required. Always add a 10% buffer for compaction loss. For a 100-square-foot path, you need roughly 1.25 cubic yards of dense-graded aggregate. If you skimp here, your path will shift within 12 months. No exceptions.
The Engineering Core: Excavation and Base Prep
Excavating for a stone path requires removing at least 6 inches of topsoil to reach the compacted subgrade, followed by the installation of a non-woven geotextile fabric to prevent the mixing of aggregate base and native soil. This separation is critical for maintaining structural integrity in high-moisture environments.
Use a sod cutter for clean edges. Once you’re down to the subsoil, use a hand tamper or, better yet, rent a vibratory plate compactor. If the soil is heavy clay, you need to be careful. Clay holds water. If you trap water under your path, the frost will heave it. I tell my crew: if the tamper doesn’t bounce off the ground, it’s not ready. After compaction, lay your fabric. Use a non-woven 4-ounce fabric. This allows water to pass through but keeps the mud from pumping up into your clean gravel. Overlap your seams by at least 12 inches.
“Subgrade stabilization through the use of geotextiles is a primary factor in extending the lifecycle of permeable pavements and walkways by 50% or more.” – Penn State Agricultural Extension
How do I stop river rocks from moving?
To prevent stone migration, you must install rigid edging made of heavy-duty plastic, steel, or pressure-treated timber that sits 1/2 inch above the river rock surface. This creates a containment cell that holds the stones in place under foot traffic. Without edging, your landscaping rocks will end up in your turf grass, where they will destroy your mower blades. It is a common mistake to leave the edges ‘natural.’ Don’t do it. Use 10-inch steel spikes to anchor your edging every 2 feet. If you are using timber, use 3-inch deck screws and 12-inch rebar pins. Make it permanent.
The Installation: Setting the Stones and Managing Drainage
Installing river rock involves spreading the stone in uniform lifts across the prepared base, ensuring the depth does not exceed 3 inches to maintain walking stability. A shallow layer is easier to walk on and stays flatter over time than a deep, ‘loose’ pile of stones.
When you dump the stone, don’t just rake it flat. Use a square shovel to distribute it evenly. You want the stones to nestle against each other. If you have larger ‘accent’ stones, hand-set them first, then fill in with the smaller river rocks. This gives the path a more natural, ‘stream-bed’ look rather than a construction-site look. Watch your grades. The path should have a 1% to 2% cross-slope. This means for every foot of width, it drops about 1/8 to 1/4 inch to one side. This ensures that during a heavy rain, water doesn’t sit in the path. It moves off the surface and into your garden design beds or drainage swales. Standing water is the enemy of any hardscape.
- Checklist for Path Success:
- Call 811 to mark underground utilities before digging.
- Remove all organic matter (roots/grass) from the trench.
- Use ‘3/4 inch minus’ gravel for the base—the ‘fines’ help it lock together.
- Ensure the geotextile fabric covers the sides of the trench, not just the bottom.
- Hand-tamp the final rock layer to ‘set’ the stones into the top of the gravel base.
Maintenance and Long-Term Stability
Maintaining a stone path requires annual top-dressing of stones and the removal of organic debris like leaves or grass clippings to prevent weed germination within the rock layer. Even with fabric, weeds will grow on top of the rocks if dirt accumulates between them. Use a leaf blower on a low setting. Don’t use a pressure washer; you’ll just blow the fines out of your base and cause the path to settle unevenly. If you see a dip, pull back the river rock, add a bit more base gravel, re-tamp, and replace the stone. It’s a 10-minute fix now that prevents a 10-hour repair later. Hardscaping isn’t ‘set and forget.’ It is an engineered system that requires minor calibration. Stay on top of it, and those local river rocks will be there in 30 years. Skip the prep, and you’ll be digging them out of your lawn by next spring.