Build a $400 2026 Paver Walkway for Urban Backyard Entry
I recently got called out to tear up a $30,000 patio that was sinking because the previous contractor used stone dust as a primary base layer. Within two years, that dust turned into a saturated sponge, holding moisture against the pavers and causing massive frost heaving. It was a structural disaster that could have been avoided with twenty dollars worth of proper aggregate. I see this daily: homeowners and hack contractors focusing on the color of the stone rather than the physics of the soil. When you are building an urban backyard entry on a $400 budget, you do not have room for error. You have to get the engineering right the first time because you cannot afford a second one. This project is not about aesthetics; it is about managing hydrostatic pressure and ensuring soil compaction that rivals a highway subgrade. We are looking at a 50-square-foot project, which is standard for a city lot entry. If you follow these mechanical specs, your walkway will outlast the house.
The $400 Budget Reality Check for Urban Entries
A $400 urban paver walkway requires a strategic 50-square-foot design using 4×8 concrete pavers, 4 inches of compacted 21A modified gravel, and one inch of ASTM C33 bedding sand. You achieve this price point by performing all excavation labor manually and sourcing materials from local bulk yards rather than big-box retailers. Stop looking at those $10 individual flagstones. We are using standard pavers because they are engineered for uniform height and easy interlocking. The budget breaks down like this: $100 for pavers, $90 for aggregate and sand, $50 for edge restraints and spikes, $40 for geotextile fabric, $40 for polymeric sand, and an $80 rental for a gas-powered plate compactor. Do not skip the compactor. Your arms are not strong enough to hit 3,000 pounds of centrifugal force with a hand tamper. It will fail. You must commit to the sweat equity of moving 1.5 tons of material by hand.
Engineering the Foundation for Lasting Stability
The foundation of a paver walkway must be excavated to a depth of 7 to 8 inches to accommodate a 4-inch gravel base, a 1-inch sand bedding layer, and the 2.375-inch paver thickness. This depth ensures that the subgrade soil is protected from surface loads and provides adequate drainage for rainwater runoff.
“A retaining wall doesn’t fail because of the stone; it fails because of the water trapped behind it.” – Hardscape Engineering Axiom
The same logic applies to your walkway. If water sits under your pavers, they will shift. We start by stripping the organic layer. Grass and topsoil are compressible; they are the enemy of a flat walk. You dig until you hit subsoil. In most urban environments, this is a heavy clay or a silty mix. Once you are down 8 inches, you must pitch the floor. I use a 2 percent slope. That is a 1-inch drop for every 4 feet of width. This forces water to move away from your foundation. If you slope it toward the house, you are just building a gutter for your basement. This is civil engineering at a micro-scale.
How much modified gravel do I need for a patio base?
For a standard 50-square-foot walkway at a 4-inch depth, you need approximately 0.75 cubic yards of modified gravel, which equates to about 1.25 to 1.5 tons. Always order 10 percent extra to account for compaction shrinkage as the vibratory plate compactor reduces the air voids in the aggregate. Do not use pea gravel. Pea gravel is round and acts like ball bearings. You need angular, crushed stone with fines. When you hit it with a compactor, the jagged edges lock together like a puzzle. This creates a bridge that spreads the load of your footsteps across the soil.
Material Procurement and Technical Specifications
Sourcing the right materials is where most DIYers blow their budget. You must avoid the 50-pound bags of leveling sand at the local hardware store. They are overpriced and often contain too much silt. Go to a local landscape supply yard. Tell them you need 21A or CR-6 (crushed run). This is a mix of 3/4-inch stone down to dust. It is the gold standard for road bases. For your bedding sand, ask for washed concrete sand (ASTM C33). This sand is angular. It provides the friction needed to lock the bottom of the pavers in place. Refer to this table for the $400 material breakdown based on current 2026 market estimates for a 4×12.5 foot run (50 sq ft). | Material | Quantity | Estimated Cost | Technical Spec | | :— | :— | :— | :— | | 21A Modified Gravel | 1.5 Tons | $65 | 3/4 inch minus crushed | | ASTM C33 Bedding Sand | 0.5 Tons | $30 | Washed angular sand | | Concrete Pavers (4×8) | 225 units | $110 | 60mm thickness | | Geotextile Fabric | 50 Sq Ft | $40 | Non-woven 4oz | | Edge Restraint | 30 Linear Ft | $55 | Rigid plastic or aluminum | | Polymeric Sand | 1 Bag | $45 | G2 Intelligent Sand | | Plate Compactor | 4 Hour Rental | $55 | 3000 PSI rating |
The Step-by-Step Installation Protocol
Installation is a process of layers and physics. Follow this checklist to ensure the walk does not move for 20 years.
- Subgrade Compaction: Once you dig the hole, compact the bare dirt. If the dirt is soft, the gravel will sink into it.
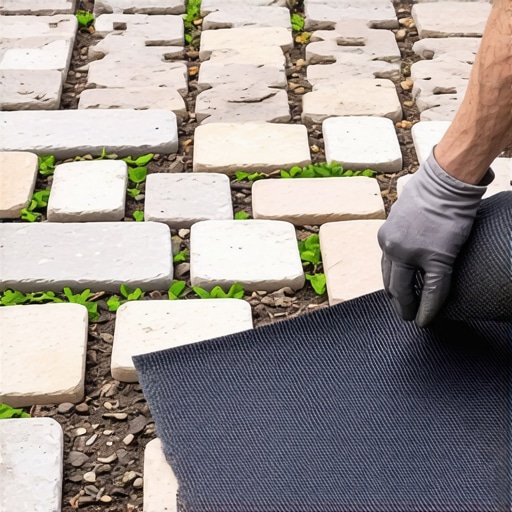
- Geotextile Placement: Lay down a non-woven fabric. This keeps your clean gravel from mixing with the muddy soil. It is a filter. Use it.
- The 2-Inch Lift Rule: Do not dump 4 inches of gravel and try to compact it at once. Put down 2 inches, wet it slightly, and run the compactor. Then add the next 2 inches. This ensures maximum density.
- The Screed: Lay two 1-inch outside diameter pipes on your gravel. Pour sand over them. Use a straight board to pull the sand flat. This gives you a perfect 1-inch bedding layer. Do not walk on it.
- Hand-Seating: Place your pavers. Do not slide them; drop them straight down. Use a string line to keep the rows straight.
- Edge Restraints: Install these immediately. Without edges, your walkway will spread like a pancake over time. Use 10-inch steel spikes every 12 inches.
- The Final Lock: Sweep polymeric sand into the joints. Run the compactor over the pavers with a protective mat. This vibrates the sand into the crevices. Mist it with water to activate the polymers.
Why shouldn’t I use stone dust as a base?
Stone dust is a byproduct of the crushing process and contains too many fines that trap water via capillary action. In regions with freeze-thaw cycles, this trapped water expands, pushing pavers upward and ruining the level surface. Professionals use washed sand and open-graded aggregate to allow for vertical drainage and structural integrity.
“Concrete sand provides the necessary inter-particle friction to prevent paver migration under load.” – ICPI Technical Manual
If you use stone dust, you are building a shelf-life into your project. It will fail. Use the right sand.
Managing Urban Site Constraints
Urban backyards present unique challenges like limited access and high compaction from previous construction. You must call 811 before you dig. In a city, gas and electric lines are often shallow. If you hit a line, your $400 project becomes a $10,000 liability. Also, consider the soil pH and drainage. Many urban soils are depleted and packed hard. If your yard does not drain, you might need to install a French drain alongside your walkway to move water to a lower point. Do not just hope the water goes away. It won’t. It will find the path of least resistance, which is usually your basement wall. Keep your pavers 1 to 2 inches above the surrounding soil level to prevent mulch migration and dirt buildup on the surface. This is the difference between a walkway that looks good for a month and one that stays clean for a decade. Hardscaping is 90 percent dirt work and 10 percent stone work. If you spend your time on the 90 percent, the 10 percent is easy.