![Build a $400 Flagstone Walkway in One Weekend [DIY]](https://lawnmajesty.com/wp-content/uploads/2026/06/Build-a-400-Flagstone-Walkway-in-One-Weekend-DIY.jpeg)
Build a $400 Flagstone Walkway in One Weekend [DIY]
Why Most DIY Flagstone Walkways Fail Within Two Seasons
Building a flagstone walkway for $400 requires precise site preparation and subgrade compaction to prevent the stones from shifting or heaving during freeze-thaw cycles. Success depends on achieving a 95% Proctor density in your base material and ensuring a 1/4 inch per foot slope for proper drainage away from structures.
I recently got called out to tear up a $30,000 patio that was sinking because the previous contractor thought he could get away with laying stone directly over uncompacted topsoil. Within eight months, the hydrostatic pressure from trapped water turned the entire installation into a muddy, uneven mess. The owner had to pay me twice as much to fix it as he did for the initial install. If you don’t fix the soil grading first, every plant or stone you put in the ground is just expensive compost. For this $400 DIY project, we aren’t cutting corners; we are just being smart with raw material procurement and sweat equity. Forget the fancy landscaping firm markups. You need a shovel, a plate compactor, and a basic understanding of civil engineering at the garden scale. If you skip the base-layer compaction, your walkway will look like a set of stairs within a year. It will fail. Do not ignore the dirt.
The Critical Materials Breakdown for a $400 Budget
A $400 hardscaping budget covers approximately 50 to 70 square feet of natural stone walkway when sourcing irregular flagstone and modified gravel from local quarries rather than big-box retailers. By purchasing crushed limestone (2A modified) and stone dust in bulk, you reduce costs by 60% compared to bagged products. Use this table to track your material costs for a standard 3-foot by 20-foot path.
| Material | Quantity | Estimated Cost (Bulk) | Purpose |
|---|---|---|---|
| Irregular Flagstone (1.5″ thick) | 1 Ton | $220.00 | Walking surface |
| 2A Modified Gravel | 2 Cubic Yards | $80.00 | Structural base layer |
| Stone Dust/Screenings | 1 Cubic Yard | $40.00 | Leveling/Bedding layer |
| Geotextile Fabric | 1 Roll (60 sq ft) | $35.00 | Soil separation |
| Polymeric Sand | 2 Bags | $25.00 | Joint stabilization |
To keep costs low, look for quarry remnants or “pallets of seconds.” Often, stones with slight discolorations or odd shapes are sold at a steep discount. Avoid slate if you live in a region with heavy freeze-thaw cycles, as it tends to delaminate. Stick to sandstone or limestone flagstone for long-term durability.
How deep should I dig for a flagstone walkway?
For a residential flagstone walkway, you must excavate to a depth of 7 to 9 inches to accommodate a 4-inch compacted gravel base, a 1-inch sand bedding layer, and the 2-inch thickness of the natural stone. Removing organic matter and expansive clay is non-negotiable because organic material decomposes and shrinks, leading to stone settlement. Use a string line and a line level to maintain a consistent depth across the entire trench. Don’t eyeball it. If your subgrade is soft clay, you might need to go deeper and add more aggregate. This is where civil engineering meets the shovel.
“A retaining wall doesn’t fail because of the stone; it fails because of the water trapped behind it. The same logic applies to walkways: saturation of the sub-base leads to structural failure.” – Hardscape Engineering Axiom
Step-by-Step Installation: The Ground-Up Build
Once the trench is dug, you must manage water runoff. If the ground is flat, you create a crowned subgrade to shed water to the sides. Lay down your geotextile fabric. This acts as a filter membrane, preventing the crushed stone from sinking into the soft soil. This is the difference between a professional installation and a hack job. Next, add your 2A modified gravel in 2-inch lifts. You cannot dump 4 inches and expect it to compact. It won’t happen. The vibratory plate compactor should literally bounce off the surface when the aggregate is fully locked.
- Call 811 to mark underground utility lines before digging.
- Remove all sod and rhizomatous weeds to prevent future growth.
- Install edge restraints (plastic or aluminum) to prevent lateral shifting.
- Spread 1 inch of stone dust as a leveling medium.
- Place the largest flagstones first to establish the primary walking path.
- Fill interstitial spaces with smaller stones for a jigsaw-like fit.
- Sweep in polymeric sand and mist with water to activate the binder.
How much modified gravel do I need for a patio base?
To calculate the required aggregate volume, multiply the square footage by the desired depth in feet (e.g., 60 sq ft x 0.33 ft for a 4-inch base), which equals 20 cubic feet; then divide by 27 to get approximately 0.75 cubic yards. Always order 20% more to account for compaction loss, as the volume of modified gravel decreases by about one-quarter once the fines are vibrated into the void spaces. If you don’t account for this, you’ll run out of base material halfway through the Saturday afternoon. I’ve seen it happen a hundred times. It’s a waste of a rental day.
“Effective soil drainage is the cornerstone of any permanent landscape installation. Without a clear path for moisture to exit the sub-base, frost heave will inevitably displace surface pavers.” – Penn State Agricultural Extension
Choosing the Right Stone for Longevity
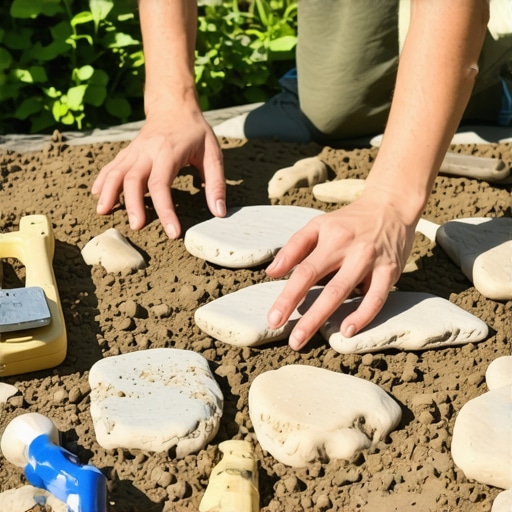
Don’t be fooled by big-box store thin pavers. You want natural cleft flagstone. It has a natural grip and looks better as it ages. Thermal finish stones are too slick when wet. For a $400 budget, focus on irregular stones. They are cheaper because they haven’t been guillotined or saw-cut into squares. The labor of fitting them together is higher, but the material cost is significantly lower. Use a dead-blow mallet to set each stone. If the stone wobbles, lift it and add more bedding sand. Never shim a stone with a smaller rock; it will crack the main stone under pedestrian load. It’s about load distribution.
Maintenance and Year-One Expectations
In the first year, expect some minor settling. If a stone drops more than 1/4 inch, pop it up and add more screenings. Keep the polymeric sand joints full to prevent weed seeds from germinating in the organic debris that collects in the cracks. Lawn care around the path is also vital. Do not scalp the grass edges near the stones with a string trimmer. This exposes the base layer to erosion. Keep your soil pH balanced and the turf healthy to provide a natural border. A well-built path should last 20 years. Don’t skip the compaction. Just don’t.