Build a Simple Cedar Trellis in One Afternoon
I always drill into my new crew members: if you don’t fix the soil grading and consider the structural load first, every plant you put in the ground is just expensive compost. I’ve seen too many DIY trellises made of cheap pine that snap under the weight of a mature wisteria in three years or rot at the base because the homeowner didn’t understand soil-to-wood contact. Building a cedar trellis isn’t just about aesthetics; it is about managing vertical tension and biological weight loads. A simple project done correctly will last fifteen years. A project done poorly is just a future pile of debris for my crew to haul away during a landscape renovation.
The Fundamental Engineering of Vertical Support Structures
To build a simple cedar trellis, you must select Grade A Western Red Cedar and use 304 stainless steel screws to prevent the corrosive tannins in the wood from reacting with the metal and causing black streaks. Proper construction requires calculating the projected leaf mass and wind resistance to ensure the trellis remains upright during seasonal storm cycles. Don’t skip the pilot holes. Wood splits. If it splits, water enters. If water enters, fungi follow. It is that simple. Most people think of a trellis as a decoration. I think of it as a vertical cantilever system designed to withstand several hundred pounds of organic mass when a vine is fully hydrated. You have to think about the hydrostatic weight of a plant after a heavy rain. That weight can double in minutes.
Why Western Red Cedar is the Professional Standard
We don’t use pressure-treated lumber for garden structures where food or delicate ornamentals are present. Cedar contains natural oils and tannins (thujaplicins) that act as a biological deterrent to rot and insect infestation. However, there is a difference between heartwood and sapwood. The heartwood—the darker center of the tree—is where the rot resistance lives. If your lumber has too much creamy white sapwood, it will fail faster than you think.
“Wood in contact with the ground must be either naturally decay-resistant or treated with preservatives to prevent fungal degradation.” – USDA Forest Products Laboratory
Material Comparison for Garden Structures
| Material Type | Expected Lifespan | Resistance Level | Best Use Case |
|---|---|---|---|
| Western Red Cedar | 15-20 Years | High (Natural) | Organic gardens, high-end hardscaping |
| Pressure Treated (ACQ) | 20+ Years | Very High (Chemical) | Structural posts, non-edible areas |
| Untreated Pine | 2-4 Years | Negligible | Temporary plant markers only |
| Redwood | 20+ Years | High (Natural) | West Coast builds, premium budgets |
How much weight can a cedar trellis hold?
A standard 1×2-inch cedar lattice structure, when properly fastened to a 4×4-inch post, can support approximately 50 to 80 pounds of static weight. However, the dynamic load of wind moving through a dense vine like a Trumpet Creeper can exert several hundred pounds of pressure against the fasteners. This is why we don’t just staple things together. We screw them. We use structural geometry. Triangles are your friend. Squares are for people who like to see things lean after a season of freeze-thaw cycles.
Phase 1: The Tool and Material Inventory
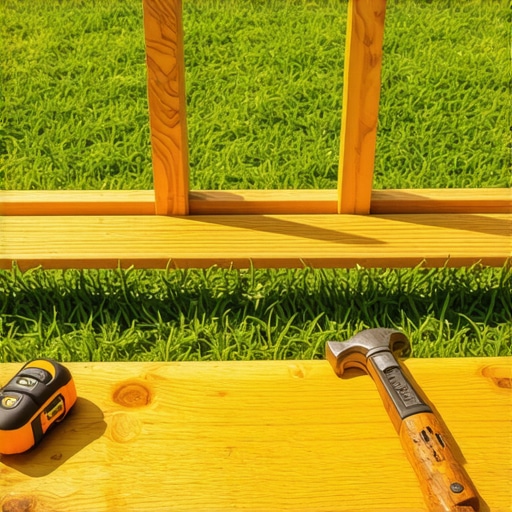
Before you make a single cut, you need to verify your tool kit. Using a dull blade on cedar will tear the fibers rather than slicing them. This creates micro-fissures where moisture collects. Use a 40-tooth or higher carbide blade. You need a miter saw for clean ends, a drill with a countersink bit, and a level. If it isn’t level, the plant will grow lopsided, and the center of gravity will shift. That shift leads to structural failure. Use a tape measure that doesn’t have 1/8th of an inch of play in the hook. Precision matters in hardscaping, even on a small scale.
- 4 pieces of 2×2 Western Red Cedar (Vertical Uprights)
- 10 pieces of 1×2 Western Red Cedar (Horizontal Slats)
- 2.5-inch Stainless Steel Wood Screws
- 1.25-inch Stainless Steel Trim Screws
- Exterior Grade Wood Glue (Waterproof/ANSI Type I)
- Post-hole digger (if ground-mounting)
Phase 2: The Layout and Geometric Alignment
Lay your 2×2 uprights on a flat, clean surface like a concrete garage floor. Do not build this on the grass. The ground is never flat. If you build on an uneven surface, you will build a warped structure. Space your uprights 18 inches apart. This provides enough width for the plant to spread without creating a sail so large it catches too much wind. Check for square by measuring the diagonals. If the diagonal measurements from top-left to bottom-right and top-right to bottom-left are identical, you are ready to fasten. If they aren’t, your trellis will look like a hack job.
“Vertical structures in the landscape act as sails; the foundation must be anchored to resist lateral force equivalent to the maximum local wind gusts.” – Landscape Engineering Manual
Where do I place a trellis for the best plant health?
Placement is dictated by solar orientation and air circulation. A trellis placed directly against a siding wall without a 4-inch gap will trap moisture. This leads to powdery mildew on the plants and dry rot on your house siding. Use spacers or offset brackets to keep the structure away from the building. This allows the plant’s leaves to dry quickly after dew or rain, reducing the need for fungicides. Airflow is the best pesticide you have. Use it.
Phase 3: Fastening and Structural Integrity
Apply a bead of waterproof wood glue at every intersection. Glue provides the shear strength that screws alone cannot provide. Drill your pilot holes using a bit slightly smaller than the shank of the screw. If you drive a screw into the end-grain of cedar without a pilot hole, the wood will split 90% of the time. Once the slat is positioned, drive the 1.25-inch trim screws. Sink the heads slightly below the surface. This prevents the screw heads from catching on the vine or your hands during maintenance. It also allows you to fill the hole with a cedar-toned wood filler if you want a seamless look. I don’t care about the look as much as the tensile strength. Every joint must be rigid. If there is a wobble now, there will be a collapse later.
The Science of Soil Contact
If you are burying the legs of the trellis, you have two choices: use Ground Contact Rated pressure-treated 4x4s as sleeves or accept that the cedar will rot in 7-10 years. Even the best cedar will eventually succumb to the microbial activity in moist soil. To extend the life, I recommend setting the trellis legs into galvanized post bases anchored in concrete. This keeps the wood 2 inches above the soil line. It breaks the capillary action that sucks moisture up into the wood grain. If you must put wood in the dirt, char the ends with a torch first. This old-school method creates a layer of carbon that microbes find difficult to digest.
Phase 4: Integrating the Biological Component
Once the structure is built, you have to think like a horticulturalist. Not all vines are equal. A Clematis uses petioles to climb; it needs thin slats. A Wisteria is a woody twiner; it will literally crush a weak trellis as it grows in diameter. This is called secondary thickening. If you put a Wisteria on a 1×2 trellis, the vine will eventually snap the wood like a toothpick. Choose your plant based on the structural capacity of your build. For this simple cedar design, stick to lighter vines like Sweet Pea, Clematis, or Climbing Roses.
How do I prep the soil at the base of a new trellis?
The area at the base of a trellis is often a rain shadow if it’s near a wall. The soil stays dry because the eaves of the house block the rain. You must amend the soil with 30% organic compost to increase moisture retention. Dig the hole twice as wide as the root ball. Do not bury the root flare of the plant. If you bury the flare, you suffocate the lenticels and kill the plant. Install a simple drip emitter to ensure the plant doesn’t go into drought stress while it is trying to establish its vertical footprint.
Maintenance and Longevity
Cedar weathers to a silver-grey. Some people like that. I don’t. It’s the visual sign of UV degradation of the lignin in the wood. Once the lignin breaks down, the fibers loosen. Apply a high-quality penetrating oil stain with UV inhibitors every two years. Do not use film-forming paints. Paint will peel. Once it peels, it traps water against the wood. It becomes a rot-trap. Oil stays in the wood and repels water from the inside out. Check your fasteners every spring. The freeze-thaw cycle can actually back screws out of the wood as the fibers expand and contract. One afternoon of work deserves a decade of performance. Don’t be the guy who has to rebuild his garden every three years because he was too lazy to drill a pilot hole or buy the right screws. Use your head. Build for the long haul.