Fix Your 2026 Wobbly Flagstone Path with Crushed Limestone
Fix Your 2026 Wobbly Flagstone Path with Crushed Limestone
Walking across a wobbly flagstone path is like navigating a minefield of twisted ankles. If your stones are rocking, sinking, or shifting underfoot, it is not a natural settling issue. It is an engineering failure at the base level. I have spent two decades digging up the mistakes of mow-and-blow contractors who think a bag of leveling sand and a prayer are enough to hold up 200-pound slabs of rock. They are not. In 2026, we are seeing the long-term effects of cheap installs from the post-pandemic DIY boom. It is time to fix it right using the physics of crushed limestone. Most homeowners ignore the sub-grade because it is invisible, but the soil beneath your feet is a dynamic, living system influenced by moisture, temperature, and compaction. If you do not respect the grade, the stones will never respect your ankles.
The Hardscape Autopsy: Why Your Path Failed
Flagstone paths typically fail because the sub-base material lacks the structural interlocking necessary to distribute weight across the soil profile. When hydrostatic pressure builds up in the soil beneath the pavers, it forces the stones upward or allows them to sink into uncompacted silt, resulting in a dangerous, uneven walking surface that requires immediate remediation.
I recently got called out to tear up a $30,000 patio that was sinking because the previous contractor used stone dust as his primary base. Stone dust is a sponge. It holds moisture, and in regions with freeze-thaw cycles, that moisture turns into an ice lever that jacks your stones right out of the ground. When I arrived, the homeowner could literally lift the stones by hand. We had to excavate 8 inches of muck just to find a stable subgrade. It was an expensive lesson in physics. Stone dust lacks the angularity needed for structural locking. We replaced it with 2A modified limestone, and that patio has not moved a millimeter since. Do not make the mistake of using fine, rounded particles where you need jagged, locking aggregate. The failure starts with the material choice.
“A retaining wall doesn’t fail because of the stone; it fails because of the water trapped behind it.” – Hardscape Engineering Axiom
The Science of Crushed Limestone and Angular Locking
Crushed limestone, specifically 2A Modified or #411 stone, is the gold standard for hardscaping because of its angular shape. Unlike rounded pea gravel or play sand, angular aggregates lock together under mechanical compaction to create a monolithic base that remains permeable to water while supporting heavy point loads of natural flagstone. When we talk about 2A modified, we are talking about a specific mix of stone sizes ranging from 1 inch down to dust. This gradation is critical. The smaller particles fill the voids between the larger stones, creating a dense matrix that resists shifting. If you use clean stone without fines, you have better drainage but less stability. For a walkway, you need that balance of compaction and drainage.
How much modified gravel do I need for a patio base?
To calculate your gravel base, multiply the square footage by the excavation depth (typically 6 inches for walkways) and divide by 27 to get cubic yards. Always add a 10 percent compaction factor to your order to ensure you have enough material after the plate compactor makes its final passes over the sub-grade.
| Material Choice | Compaction Rating (PSI) | Drainage Capability | Long-term Stability |
|---|---|---|---|
| Crushed Limestone (2A Modified) | High (95% Proctor) | Excellent | 20+ Years |
| Leveling Sand | Low | Moderate | 1-3 Years |
| Stone Dust / Screenings | Very Low | Poor (Retains Water) | Fails in Freeze/Thaw |
| #57 Clean Stone | Medium | Superior | Requires Geotextile Wrap |
The Blueprint for a Permanent Path
You cannot build on soft earth. You have to get down to the B horizon of the soil. That means digging. If you are not sweating, you are not doing it right. Most DIYers stop digging at 2 inches. I tell my crew to aim for 8 inches minimum for a heavy flagstone path. We want 6 inches of compacted limestone and 2 inches for the stone and bedding layer. If you skip the depth, you skip the durability. Period. The soil at the bottom of your trench should be as hard as a parking lot before the first piece of stone even arrives at the site. We use a 3,000-lb plate compactor to ensure the sub-grade is ready to receive the limestone.
- Excavate to a depth of 8 inches, ensuring a 2 percent slope away from any structures to prevent water pooling.
- Install a 3.1-ounce non-woven geotextile fabric to prevent soil migration into your clean base.
- Add 2A modified limestone in 2-inch lifts, compacting each layer with a gas-powered plate compactor.
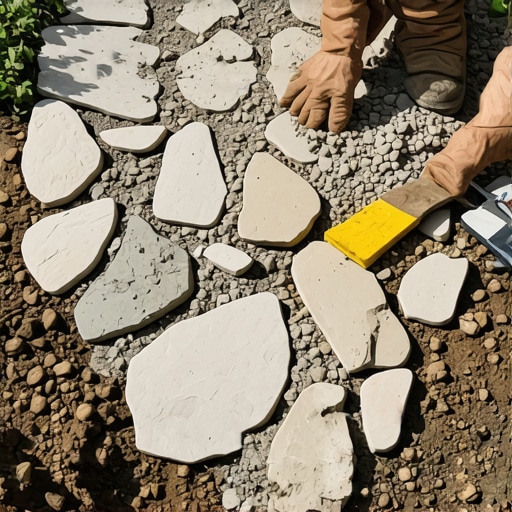
- Use a 1-inch screed layer of coarse sand or limestone fines for final stone leveling.
- Set flagstones with a minimum 1/2-inch gap for jointing material, ensuring no stone rocks when stepped on.
- Fill joints with polymeric sand to lock the surface and prevent weed growth.
“Base compaction should achieve 95% of the standard Proctor density to ensure long-term stability under pedestrian loads.” – ICPI Technical Standards
Why is my flagstone path shifting every winter?
Your flagstone path is shifting because the bedding layer is likely too thick or composed of the wrong material. If the sand layer exceeds 1 inch, the stone will swim on the base. Proper hardscaping requires a thin screed layer over a rock-solid, compacted aggregate foundation to prevent lateral movement and frost heave. When the water in a thick sand bed freezes, it expands. That expansion has to go somewhere, and it usually goes up, taking your stone with it. By using a thinner bed of limestone fines over a well-drained base, you minimize the amount of water available to freeze and move the stone.
Mechanical Compaction vs. Hand Tamping
If you do not rent a power compactor, you are wasting your time. A hand tamper is a toy. It provides about 10 PSI of force. A vibrating plate compactor provides thousands of pounds of centrifugal force. You need that force to drive the smaller limestone particles into the voids between the larger stones. This is how you create a base that does not move when the ground freezes. It must be solid. The tamper should literally bounce off the ground once you hit peak compaction. That sound change from a dull thud to a metallic ring is the sound of a job done right. Don’t stop until you hear it. If you can push a screwdriver more than half an inch into your compacted base, it is not ready. Keep compacting. This is the difference between a path that lasts five years and one that lasts fifty.
Drainage and Hydrostatic Pressure
Water is the enemy of all hardscape. If you do not provide a path for water to leave your limestone base, it will sit there and rot your project from the bottom up. For paths in heavy clay soils, I always recommend a 4-inch perforated pipe wrapped in a drainage sleeve, tucked into the side of the trench. This acts as a relief valve. When the soil becomes saturated, the water enters the pipe rather than sitting in your limestone base. This reduces the hydrostatic pressure that causes stones to pop up. It is a small expense during the excavation phase that prevents a total rebuild ten years down the road. Engineering for water is 90 percent of the job.
![Repair 2026 Cracked Concrete Walkways for $40 [Fast]](https://lawnmajesty.com/wp-content/uploads/2026/05/Repair-2026-Cracked-Concrete-Walkways-for-40-Fast.jpeg)