How to build a modern horizontal fence
The Professional Guide to Modern Horizontal Fence Engineering
What is the key to a long-lasting horizontal fence?
A modern horizontal fence requires a robust post foundation, precise board spacing to manage wood expansion, and high-grade lumber like Western Red Cedar or Ipe to prevent sagging. Unlike vertical designs, horizontal slats exert unique lateral pressure and wind resistance, necessitating posts buried at least 36 inches deep in concrete footers.
I recently got called out to tear up a $30,000 patio and fence combo that was sinking because the previous contractor ignored the basic laws of soil mechanics. The homeowner was devastated. The fence boards were already cupping and the posts were leaning at a 15-degree angle because they were set in shallow, dry-poured concrete. It was a disaster. If you don’t understand hydrostatic pressure and the frost line, you’re not a builder; you’re a vandal with a circular saw. This guide is for those who want to build it once and build it right.
Why Horizontal Fences Fail: The Engineering Reality
Horizontal fences look sleek, but they are unforgiving. In a standard vertical fence, gravity works with the grain. In a horizontal fence, gravity is your constant enemy. Over a six-foot span, a 1×6 cedar board will eventually sag under its own weight if not properly supported by mid-span blocking. Furthermore, horizontal slats act as a solid sail. When a 50 mph gust hits a fence with no gaps, that force is transferred directly to the post-base. If your footings are shallow, the fence will fail.
“The stability of any site-built structure is dependent upon the transfer of lateral loads to the soil through a properly engineered foundation system.” – International Residential Code (IRC) Commentary
Material Selection: Why Big-Box Lumber is a Trap
Stop buying your fence boards at a big-box warehouse. Their pressure-treated pine is often ‘wet’ lumber, saturated with chemical preservatives. As that wood dries in the sun, it will twist, bow, and shrink. For a modern look, you need stable, kiln-dried clear-grade wood. Clear Western Red Cedar or Ipe are the gold standards. They contain natural tannins that resist rot and insects without the warping associated with cheap pine.
| Material Type | Expected Lifespan | Stability Rating | Maintenance Requirement |
|---|---|---|---|
| Pressure Treated Pine | 10-15 Years | Low (Prone to warping) | High (Sealing/Staining) |
| Western Red Cedar | 20-25 Years | High (Dimensionally stable) | Moderate (UV Protection) |
| Ipe (Brazilian Walnut) | 40+ Years | Extreme (Very Dense) | Low (Optional Oil) |
| Composite (High-End) | 25+ Years | High (Engineered) | Zero (Wash only) |
[image_placeholder]
The Foundation: More Than Just Concrete
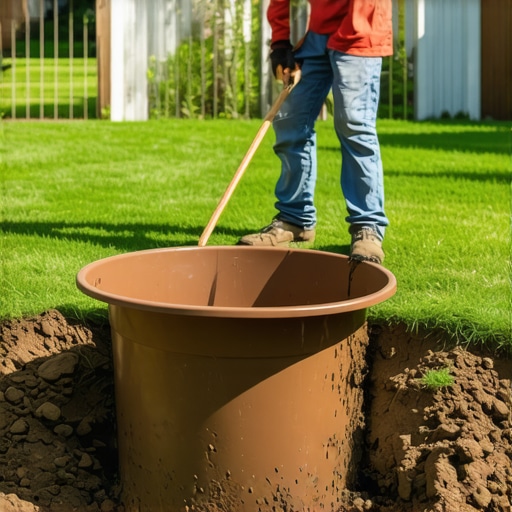
Most contractors dig a hole, throw in a post, and dump a bag of Quikrete. That is a recipe for rot. To build a fence that lasts 30 years, you need a drainage chimney. You dig a 36-inch deep hole. You pour 4 inches of 3/4-inch modified gravel at the bottom. This allows water to drain away from the bottom of the post rather than sitting in a concrete ‘cup’ that rots the wood from the inside out.
How much modified gravel do I need for a patio or fence base?
For a standard fence post, you need approximately 0.5 cubic feet of 3/4-inch clean crushed stone per hole to ensure proper drainage. This base layer prevents the post from settling and creates a critical thermal break that protects the wood during freeze-thaw cycles in colder climates.
The Installation Process: Step-by-Step Precision
- Marking and Utility Check: Call 811 before you dig. It is a legal requirement. Marking your lines with a high-visibility string line is the only way to ensure the fence is perfectly straight.
- Post Installation: Use 6×6 posts for any fence over 6 feet tall. The extra surface area provides significantly more resistance to wind load.
- Screeding and Leveling: Your posts must be perfectly plumb. A 1/8-inch lean at the bottom becomes a 2-inch eyesore at the top.
- The Gap Logic: Use spacers. A 1/8-inch to 1/4-inch gap between boards is not just for looks; it allows the wood to breathe and reduces wind resistance.
- Mid-Span Blocking: For spans over 5 feet, install a vertical 2×2 ‘stiffener’ on the back of the boards. This prevents the ‘smile’ sag that ruins horizontal designs.
“A retaining wall or fence doesn’t fail because of the material; it fails because of the water or wind energy trapped against it.” – Hardscape Engineering Axiom
How do I prevent my horizontal fence from sagging?
To prevent sagging, install vertical mid-span supports every 48 inches and use stainless steel fasteners. Gravity eventually pulls horizontal wood fibers downward, but a vertical stiffener screwed into each slat forces the boards to act as a single structural unit, distributing the weight evenly across the posts.
Fasteners: Don’t Use Nails
If I see a horizontal fence built with a framing nailer, I know it will be falling apart in three years. Nails pull out as wood expands and contracts. You must use 2.5-inch stainless steel trim-head screws. Stainless steel is non-negotiable. The chemicals in modern pressure-treated wood and the natural acids in cedar will eat through galvanized nails, leaving ugly black streaks called ‘bleeding’ down your beautiful new fence. Don’t skip this. Use screws. Sink them consistently.
The “Settling In” Period
Expect your wood to move. In the first year, the boards will shrink slightly as they reach equilibrium with your local humidity. This is normal. If you used the gap logic I mentioned, the fence will handle this movement without buckling. After six months, check your fasteners. Tighten anything that has backed out. Apply a high-quality UV-rated penetrating oil stain to keep the wood from graying. Do not use film-forming paints; they will peel and turn your maintenance-free fence into a nightmare. Ground-up builds are about the long game. Build for the next decade, not just for the next weekend.