How to Fix Wobbly Pavers with Polymeric Sand
The Forensic Autopsy of a Failing Patio
The first sign of a failing hardscape isn’t the crack; it is the sound. It is that hollow clack or the subtle shift under your work boot when you step on the edge of a unit. A wobbly paver is more than a trip hazard. It is a biological and structural indicator that the layers beneath your feet have surrendered to hydrostatic pressure or poor installation. When a homeowner calls me out to diagnose a shifting walkway, I don’t look at the stone first. I look at the drainage. I recently got called out to tear up a $30,000 patio that was sinking because the previous contractor used stone dust as a base material. Stone dust holds moisture, and in our freeze-thaw cycles, that moisture expands, heaving the pavers and pulverizing the joint sand into a useless powder. The entire structure was essentially floating on a bed of wet soot. Don’t be that guy. If you want to fix a wobbly paver, you have to treat it like a surgical procedure, not a quick patch job. It requires precision, the right chemistry, and a deep understanding of soil mechanics.
How to Fix Wobbly Pavers with Polymeric Sand
To fix wobbly pavers with polymeric sand, you must first stabilize the underlying base layers by removing the unstable units, excavating saturated or incorrect bedding material, and replacing it with compacted modified gravel and ASTM C33 bedding sand. Only after the paver is level and immovable should you apply high-quality polymeric sand to seal the joints and prevent future water infiltration.
The Mechanical Failure: Why Pavers Move
Pavers do not move on their own. They move because the interlock has failed. In a professional hardscape, interlock is achieved through three forces: vertical, rotational, and horizontal. When the sand in your joints washes out or the base settles, you lose that interlock. The sand is the ‘gear’ that keeps the stones from sliding against one another. If you just pour more sand on top of a wobbly stone, you are putting a bandage on a broken bone. It will fail. You must address the sub-base compaction. We aim for 98% Proctor density on the base. If your base is soft, no amount of expensive polymer will save the job. It will rot.
“A retaining wall doesn’t fail because of the stone; it fails because of the water trapped behind it.” – Hardscape Engineering Axiom
Tools and Materials Checklist
- Dead blow mallet (non-marking rubber)
- Paver extraction tool or two flathead screwdrivers
- 3/4-inch minus modified crushed stone
- ASTM C33 washed concrete sand
- Vibratory plate compactor with a neoprene protective pad
- Stiff-bristle push broom and a soft-bristle finishing broom
- Leaf blower
- High-performance polymeric sand (look for professional-grade binders)
Step-By-Step Remediation Process
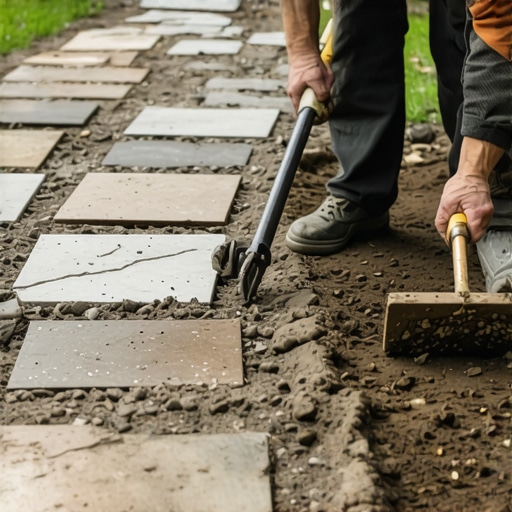
First, extract the offender. Use your extraction tools to lift the wobbly paver straight up. Do not pry against neighboring stones or you will chip the edges. Once the stone is out, inspect the bedding sand. If it is grey, slimy, or smells like sulfur, you have a drainage issue. Dig out that old sand. You need to see the structural base. If the base has settled, add a small amount of modified gravel and pack it down until it is iron-clad. Do not skip this. A firm base is the only thing that prevents the stone from diving again. Next, add a fresh layer of clean bedding sand. Screed it perfectly level. When you drop the paver back in, it should sit about 1/8 of an inch higher than the surrounding stones. Why? Because the plate compactor will set it into the bed during the final phase. Now, clean the joints. Every bit of old, mossy sand must be gone. Use a shop vac if you have to. The polymeric sand needs a clean surface to bond to the vertical faces of the stone.
The Science of Polymeric Sand Selection
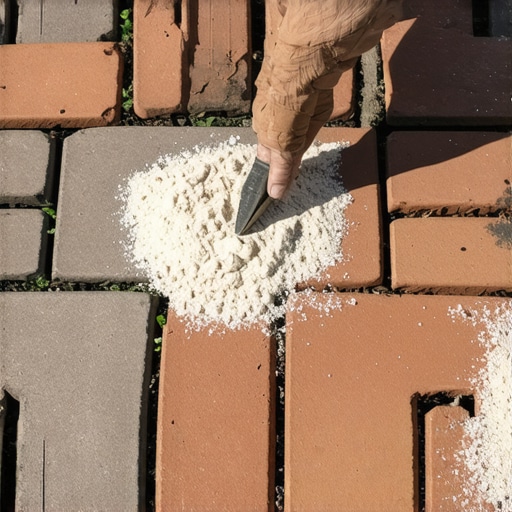
Not all sand is created equal. Cheap big-box store sand often uses low-grade organic binders that break down after one season of heavy rain. You want a sand that utilizes high-tech polymers designed for specific joint widths. If your joints are wider than half an inch, you need a high-flow sand that won’t shrink. When you pour the sand, do it on a bone-dry day. Moisture is the enemy during installation. Sweep the sand into the joints until they are full, then run the plate compactor over the pavers. This is the ‘Sand Dance.’ The vibration forces the sand to settle into every void, eliminating air pockets that lead to future instability.
| Material Type | Typical Joint Width | Compaction Required | Water Permeability |
|---|---|---|---|
| Standard Joint Sand | < 1/8 inch | Medium | High |
| Polymeric Sand (Standard) | 1/8 to 1 inch | High (Vibratory) | Low (Water Resistant) |
| High-Performance Polymer | Up to 2 inches | High (Vibratory) | Very Low |
| Stone Dust (Avoid) | N/A | Low | Poor (Retains Water) |
How much modified gravel do I need for a patio base?
For a standard pedestrian patio, you need a minimum of four to six inches of compacted modified gravel. If you are dealing with heavy clay soil or a driveway application, you must increase that depth to eight or twelve inches to ensure structural integrity and proper drainage under load.
Can I put new polymeric sand over old sand?
No, you cannot cap old sand with new polymeric sand. The new layer will not bond to the old, weathered material, leading to delamination and rapid washout. You must remove at least 1.5 inches of the old joint material to ensure the new sand has enough surface area to lock effectively.
“Joint sand stabilization is critical for the long-term performance of any interlocking concrete pavement system, preventing the ingress of water and weeds while maintaining structural interlock.” – ICPI Tech Manual
The Critical Mistake: The Over-Watering Trap
The most common way contractors ruin a repair is during the activation phase. Once the sand is swept and the dust is blown off the surface, you must mist the joints. Do not flood them. If you use too much water, you wash the polymer binders out of the sand and down to the bottom of the joint. This leaves you with a brittle, sandy top layer that will crack within weeks. Mist the area in sections. Wait ten minutes. Mist again. You want the water to soak in just enough to trigger the chemical bond, not to turn the joint into a slurry. If you see white bubbles, you are over-watering. Stop immediately. Let it cure for 24 to 48 hours before walking on it. No exceptions. It needs time to cross-link its chemical bonds. This is biology and chemistry working in tandem to protect your engineering. Don’t rush it. A professional repair is a permanent repair.