
How to Remove Tree Stumps Without Renting a Grinder
How to Remove Tree Stumps Without Renting a Grinder
I always drill into my new crew members: if you don’t fix the soil grading first, every plant you put in the ground is just expensive compost. The same logic applies to stump removal. Most homeowners see a stump and think about a 1,000-pound machine with spinning carbide teeth. I see a biological structure composed of lignin and cellulose that is currently holding onto a massive amount of carbon. If you understand the cellular breakdown of wood, you don’t need a grinder. You need patience, the right chemistry, and an understanding of the carbon-to-nitrogen ratio. I have spent 20 years digging out the mistakes of ‘mow-and-blow’ hacks who just buried stumps under six inches of topsoil, only to have the ground collapse three years later when the wood finally rotted. If you want to do this right, you do it from the ground up.
Chemical Decomposition and the Nitrogen Drawdown
You can remove tree stumps without a grinder by using high-nitrogen fertilizers or potassium nitrate to accelerate natural decomposition. This process involves drilling deep holes into the stump, filling them with chemicals, and keeping the wood moist to encourage fungal and bacterial activity over several months.
Wood is incredibly stable because of lignin. It is the glue that holds cellulose fibers together. To break it down, you must introduce a catalyst that feeds the microbes responsible for decay. Nitrogen is that catalyst. In a forest, this takes decades. In a managed landscape, we can compress that timeline by manipulating the C:N ratio. If you use a high-nitrogen source like potassium nitrate (often sold as stump remover), you are providing the fuel for aerobic bacteria to feast. Drill your holes at least 8 to 12 inches deep. Space them every 3 inches. Use a 1-inch spade bit. If the holes are too shallow, the chemicals won’t reach the heartwood. It will rot from the outside in, which takes forever. You want it to rot from the inside out. Don’t skip the water. Bacteria need a moisture content of at least 20% to function. If the stump dries out, the decomposition stops. Dead stop.
“A retaining wall doesn’t fail because of the stone; it fails because of the water trapped behind it.” – Hardscape Engineering Axiom
While that axiom refers to walls, the same principle of moisture management applies here. If you saturate the stump but don’t provide drainage in the surrounding soil, you create an anaerobic environment. This slows down the rot and creates a foul-smelling mess. You want damp, not drowned.
The Epsom Salt Method: Magnesium Sulfate Dehydration
Epsom salt, or magnesium sulfate, works by dehydrating the stump’s root system when applied in high concentrations. By drilling 10-inch deep holes and saturating them with salt and water, you disrupt the osmotic balance, eventually killing the remaining living tissue and allowing for easier manual extraction.
This is pure biology. By flooding the stump with magnesium sulfate, you create a hypertonic environment. The salt draws moisture out of the plant cells via osmosis. It effectively mummifies the wood. Once the wood is dead and dried out, it becomes brittle. Brittle wood is easy to break apart with a heavy-duty pickaxe or mattock. I prefer this over common rock salt because magnesium sulfate is actually a secondary macronutrient for the surrounding lawn care in small doses. Rock salt (sodium chloride) is a soil sterilant. Use rock salt, and nothing will grow there for years. Use Epsom salt correctly, and you’re just prepping the soil for future plantings. Fill the holes to the top. Seal them with wax or a tarp to prevent rain from washing the salt out too quickly. It needs to sit for at least 90 days.
Manual Extraction: The Physics of Leverage
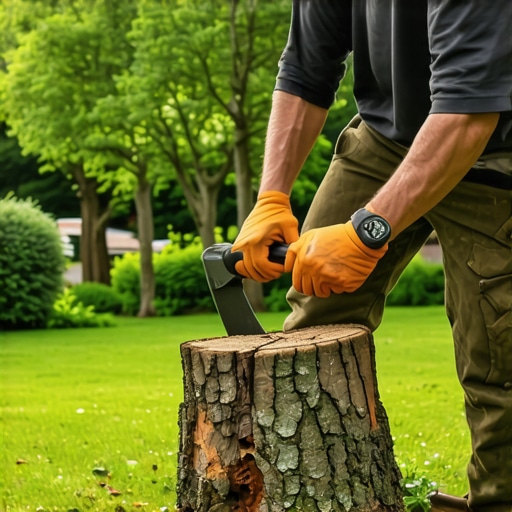
Manual removal relies on mechanical advantage and exposing the structural roots using a spade and mattock. By digging a trench around the root flare and using a high-lift jack or a digging bar, you can sever the lateral roots and win the battle against the stump’s subterranean grip.
| Method | Estimated Time | Physical Effort | Material Cost |
|---|---|---|---|
| Chemical (KNO3) | 4-6 Months | Low | $15-$25 |
| Epsom Salt | 6-12 Months | Low | $10-$20 |
| Manual Digging | 1-2 Days | Very High | $0 |
| Controlled Burn | 12-24 Hours | Medium | $5 |
How much modified gravel do I need for a patio base?
When you finally remove that stump, you’ll have a hole that needs structural fill if you plan to build over it. For a standard patio base, you need roughly 1 ton of modified gravel (2A or CR6) per 100 square feet to achieve a 4-inch compacted depth. Don’t just throw dirt in the hole. It will settle. You must use an aggregate that can be compacted to 95% Proctor density. If you don’t, your hardscaping will fail within two seasons. Guaranteed.
Is it cheaper to burn a stump or use chemicals?
Burning is the cheapest method but requires the most supervision and carries the highest risk. You need to verify local fire codes and ensure the stump is dry enough to sustain a slow smolder. Most residential areas forbid this due to underground utility risks. Chemicals are safer and more controlled for suburban lawn care environments. Check your local ordinances before lighting anything. A root fire can travel underground and pop up 20 feet away in a neighbor’s mulch bed. I’ve seen it happen. It’s an insurance nightmare.
- Drill Bit: 1-inch diameter, at least 12 inches long.
- Chemicals: Potassium nitrate or high-nitrogen fertilizer (46-0-0).
- Protection: Heavy-duty tarp and 12-inch galvanized spikes to hold it down.
- Manual Tools: A 14-pound digging bar and a sharp mattock.
- Safety: 811 call to mark underground lines.
The biggest mistake I see is people trying to pull a stump with a pickup truck. You will ruin your transmission. A 24-inch oak stump has enough tensile strength in its root system to anchor a ship. You aren’t stronger than the tree. Work with the biology of decay or use the physics of a 60-inch digging bar. Don’t be the guy who snaps a chain and sends a metal link through his rear window. It’s a rookie move. Focus on the root flare. The root flare is where the trunk transitions into the roots. Sever those main laterals first. Once they are cut, the stump loses its vertical stability. It becomes a game of weight, not strength.
“Wood decay is not a single event but a succession of microbial colonizations.” – USDA Forest Service Manual
This means you need to keep the environment consistent. If you use the chemical method, re-apply the nitrogen every 3 weeks. You are feeding a colony of fungi. If they starve, the process resets. Stay disciplined. The stump will eventually become soft enough to kick apart with a boot. That is when you know you’ve won. Once removed, backfill the hole with screened topsoil, tamping every 4 inches. If you don’t tamp, you’ll have a sinkhole by next spring. Do it right, or don’t do it at all.


![Stop 2026 Tree Bark Damage from Weed Whackers [Fix]](https://lawnmajesty.com/wp-content/uploads/2026/05/Stop-2026-Tree-Bark-Damage-from-Weed-Whackers-Fix.jpeg)