The Secrets to a Perfectly Edged Lawn for $0
The Engineering of a Clean Edge: Why Your Lawn Looks Ragged
A professional lawn edge is not a cosmetic luxury; it is a structural barrier that manages the bio-mechanical migration of turfgrass species. To achieve a perfectly edged lawn for $0, you must leverage the physics of the Victorian Trench, a technique that uses a standard flat-head spade to create a 4-inch deep air gap that stops rhizomatous growth in its tracks. Most homeowners fail because they rely on plastic store-bought edging that heaves during freeze-thaw cycles or string trimmers that merely scalp the surface without addressing the root architecture.
I always drill into my new crew members: if you don’t fix the soil grading first, every plant you put in the ground is just expensive compost. I have seen countless $50,000 landscapes look like absolute garbage because the contractor didn’t understand the interface between the turf canopy and the mulch bed. If the grade is too high, water pools and rots the crown of your grass. If it is too low, you lose your structural line. We are going to fix that today using nothing but your existing tools and a bit of sweat equity.
The Science of Root Encroachment and Rhizome Biology
Understanding root morphology is the first step in maintaining a clean boundary between your lawn and your garden beds. Turfgrass species like Kentucky Bluegrass (Poa pratensis) and Bermuda grass (Cynodon dactylon) spread through rhizomes and stolons respectively. Rhizomes are underground horizontal stems that can exert significant pressure, pushing through loose soil to colonize your mulch beds. A simple surface cut with a weed whacker does nothing to stop these subterranean invaders. You need a physical break in the soil profile to expose these roots to air, a process known as air-pruning.
“A dense turf canopy is the best defense against weed encroachment, but the physical boundary of the lawn must be maintained to prevent the lateral spread of aggressive turf species into ornamental areas.” – Penn State Center for Turfgrass Science
When you cut a vertical trench, you are effectively creating a micro-retaining wall. This trench serves two purposes: it creates a shadow line that makes the lawn pop visually, and it acts as a catchment for organic debris. Without this 4-inch depth, the nitrogen-rich runoff from your lawn fertilization will bleed directly into your garden beds, fueling weed growth where you least want it. This is why we don’t just cut; we excavate.
The Physics of the Common Spade: Maximizing Leverage
What is the best manual tool for edging?
The best tool for a $0 professional edge is a sharpened flat-head spade or a half-moon edger that uses lever action to slice through compacted soil and root mats. Avoid using a rounded digging shovel, as the curved blade creates an inconsistent depth and jagged edges that are prone to collapsing under hydrostatic pressure during heavy rain events.
Before you start, you must sharpen your spade. A dull blade does not cut roots; it crushes them. Use a 10-inch mill bastard file to create a 45-degree bevel on the front face of the spade. This allows the tool to slice through the thatch layer with minimal downward force. We are looking for a clean, surgical incision that leaves the soil structure intact. If you are struggling to push the spade into the ground, your soil is likely at permanent wilting point. Wait for a rain event or irrigate the area to reach field capacity—where the soil is moist but not saturated—before you begin.
The $0 Step-by-Step: The Victorian Trench Method
First, define your line. For straight runs, use a piece of mason’s twine pulled taut between two stakes. For curves, a garden hose is the standard industry tool. Do not eyeball it. The human eye is remarkably good at spotting a 1-inch deviation in a 20-foot curve, and once you cut, you cannot put the soil back. You must commit to the geometry.
| Step | Action | Technical Goal |
|---|---|---|
| 1 | Marking the Radius | Establish geometric consistency |
| 2 | The Vertical Primary Cut | Sever rhizomes at a 90-degree angle |
| 3 | The 45-Degree Relief Cut | Create the V-trench for air-pruning |
| 4 | Material Removal | Eliminate nutrient-rich soil from the gap |
| 5 | Mulch Integration | Seal the trench to prevent erosion |
Stand on the lawn side, not the bed side. This ensures your weight compacts the turf you want to keep rather than the soil you are trying to remove. Drive the spade 4 to 6 inches straight down. This is your primary cut. Once the vertical line is established, move to the garden bed side and drive the spade in at a 45-degree angle to meet the bottom of your vertical cut. This creates a triangular wedge of soil and grass. Remove this wedge and compost it. You have now created a V-trench. This gap is the secret. It stops grass roots because roots cannot grow through air. It is a biological dead zone that keeps your beds clean.
How deep should a lawn edge be?
A professional lawn edge must be at least 3 to 4 inches deep to effectively bypass the primary root zone of most cool-season and warm-season grasses. Cutting shallower than 3 inches allows stolons to simply drape over the edge and re-root in the mulch, rendering your hard work useless within weeks.
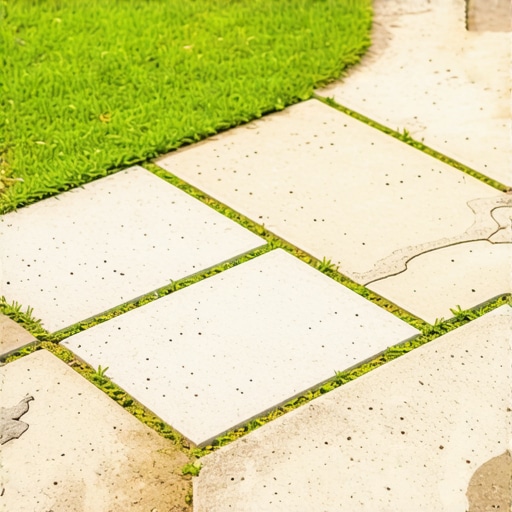
Hardscape Transitions and Hydrostatic Pressure
When edging against a sidewalk or driveway, the physics change. Here, you are dealing with the interface between a rigid body (concrete) and a plastic body (soil). Over time, soil tends to expand and creep over the concrete. This is often exacerbated by thatch buildup. Thatch is a layer of living and dead stems, leaves, and roots that develops between the green vegetation and the soil surface. If your grass feels spongy, your thatch layer is too thick. When you edge against concrete, you aren’t just cutting grass; you are removing this organic mat to reveal the true edge of the stone.
“Hydrostatic pressure from trapped water behind a soil interface is the primary cause of edge collapse in both soft and hard landscaping.” – International Interlocking Paver Institute (ICPI)
Use the same vertical cut method against the concrete. You will likely find a layer of compacted fines or sand. Clear this out. If you leave a gap between the soil and the concrete, fill it with polymeric sand or leave it as a clean air gap to allow for drainage. Never let the soil sit higher than the concrete. This leads to crown rot in the grass and causes water to sheet across the sidewalk, creating a slip hazard and promoting algae growth.
Maintenance: The 1-Inch Rule
Once the trench is established, maintenance is minimal. You don’t need to dig a new trench every week. Instead, use your string trimmer vertically once every two weeks to “flog” the edge. This knocks back any adventurous blades of grass without disturbing the soil structure. If the trench starts to fill with mulch or eroded soil, use a hand trowel to clear it back to the original 4-inch depth. It takes five minutes. It saves hours of weeding.
Check your soil pH at the edge. Often, the concrete from sidewalks leaches lime into the soil, raising the pH and making the grass at the edge grow faster or turn yellow. If this happens, a small application of elemental sulfur can re-balance the chemistry and keep the edge looking uniform with the rest of the turf. Precision is everything. Don’t be the homeowner who scalps the lawn at a 45-degree angle with a trimmer. It looks cheap. It is cheap. Do the work. Dig the trench.
How do you keep grass from growing over sidewalk edges?
To prevent grass from creeping over sidewalks, you must manually remove the sod overgrowth with a spade to expose the concrete lip, then maintain a 1/2-inch air gap between the soil and the stone. Mechanical trimmers only cut the top growth, while a spade removes the root mass that causes the encroachment.
“,”image”:{“imagePrompt”:”A high-detail technical cross-section diagram of a Victorian Trench lawn edge. Show a 90-degree vertical cut on the turf side, a 4-inch deep trench, and a 45-degree angle on the mulch bed side. Label the rhizomes being ‘air-pruned’ in the gap. Use a realistic, professional horticultural illustration style.”,”imageTitle”:”Technical Cross-Section of a Victorian Trench Lawn Edge”,”imageAlt”:”Diagram showing the proper depth and angles for a professional manual lawn edge trench.”},”categoryId”:12345,”postTime”:”2023-10-27T10:00:00Z”} stories/professional-lawn-edging-guide

![Fix Patchy Fescue: 3 Spring Seeding Rules [2026 Fix]](https://lawnmajesty.com/wp-content/uploads/2026/06/Fix-Patchy-Fescue-3-Spring-Seeding-Rules-2026-Fix.jpeg)