![Fix Sinking 2026 Paver Steps with Poly-Sand [DIY]](https://lawnmajesty.com/wp-content/uploads/2026/05/Fix-Sinking-2026-Paver-Steps-with-Poly-Sand-DIY.jpeg)
Fix Sinking 2026 Paver Steps with Poly-Sand [DIY]
You step out onto your porch, and there is that sickening, uneven give under your boot. It is not just a loose stone; it is a structural failure. The paver hasn’t just moved; it has surrendered to gravity because the previous installer treated the earth like a static floor rather than a living, shifting hydraulic system. I recently got called out to tear up a $30,000 patio that was sinking because the previous contractor used stone dust as a base instead of modified gravel. Within two seasons, the stone dust held onto moisture, froze, expanded, and turned the entire $30,000 investment into a series of hazardous speed bumps. If your steps are sinking, you are not just looking at a cosmetic issue; you are looking at a failure of physics.
The Core Reason Paver Steps Sink
To fix sinking paver steps, you must address the sub-grade compaction failure or hydrostatic pressure by excavating the existing material, installing a non-woven geotextile fabric, and rebuilding with a six-inch compacted modified gravel base before sealing joints with polymeric sand. Without a proper base, your steps will settle every time the ground saturates.
Why Standard Dirt Cannot Support Pavers
Soil is full of air pockets and organic matter that decompose and shift. When you place a heavy concrete paver on top of raw topsoil, the weight displaces the air. This is called subsidence. In hardscaping, we measure the success of a project by the Proctor density of the soil. If you don’t hit 98 percent compaction, the project is a ticking time bomb. Most DIYers and low-bid contractors use a hand tamper. A hand tamper is a joke for steps. It only compacts the top half-inch. You need a vibratory plate compactor or a jumping jack to drive the air out of the lower six inches of the base. It will fail. Every single time.
“A retaining wall doesn’t fail because of the stone; it fails because of the water trapped behind it.” – Hardscape Engineering Axiom
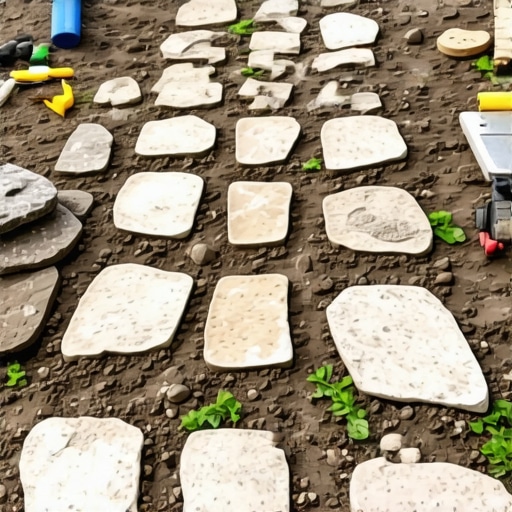
The Anatomy of a Correct Paver Base
We use a specific graduation of stone called 21A or CR-6. This is a mix of 3/4-inch crushed limestone down to the finest dust. The jagged edges of the large stones lock together, while the dust fills the voids. When compacted, it creates a semi-permeable ‘slab’ that is stronger than concrete but allows for the minute flex required during a freeze-thaw cycle.
| Material Type | Drainage Ability | Load Bearing Capacity | Primary Use Case |
|---|---|---|---|
| Modified Gravel (21A) | Excellent | Very High | Structural Base Layer |
| Stone Dust | Poor | Low | Avoid for structural steps |
| Masonry Sand | Fair | Moderate | Leveling layer (1-inch max) |
| Polymeric Sand | None (Sealant) | High (Locking) | Joint stabilization only |
How much modified gravel do I need for a patio base?
For structural steps, you need a minimum of 6 to 8 inches of compacted modified gravel extending 6 inches beyond the footprint of the steps themselves. To calculate the volume, multiply the length by the width by the depth (in feet), then divide by 27 to get cubic yards. Add a 20 percent ‘compaction factor’ to your order because the volume will shrink as you tamp it down. Don’t be cheap here. Buying an extra half-ton of gravel is cheaper than rebuilding the steps in 2027.
Step-by-Step Remediation: The Forensic Fix
1. The Full Excavation
Pull the pavers. Do not try to ‘shim’ them up with extra sand. If the base is sinking, adding sand is like putting a band-aid on a broken leg. Dig down until you hit ‘virgin’ soil—undisturbed earth that hasn’t been turned over in years. Usually, this is about 10-12 inches below your target height.
2. Geo-Textile Intervention
Lay down a non-woven geotextile fabric. This is the ‘bridge’ that prevents your expensive gravel from migrating into the soft soil. It is a critical engineering step that ‘mow-and-blow’ hacks skip to save fifty bucks. Don’t skip it. It keeps the structural integrity of your base intact for decades.
3. The 2-Inch Lift Rule
Never dump 6 inches of gravel and try to compact it all at once. The machine’s vibration won’t reach the bottom. You must work in 2-inch ‘lifts.’ Dump two inches, wet it down slightly to lubricate the stone particles, and run the compactor over it until the machine literally bounces off the surface. Repeat until you are 1 inch below your finished grade.
Why does polymeric sand fail in steps?
Polymeric sand fails because of ‘washout’ or improper activation. If the joints are too wide (over 2 inches) or if the sand was not vibrated into the joints to eliminate air pockets, the polymer cannot form a solid bond. Furthermore, if you over-water it during the activation phase, you wash the glue out of the sand before it sets. Use the ‘snap test.’ After 24 hours, the sand should feel like a hard eraser, not a rock and not mush.
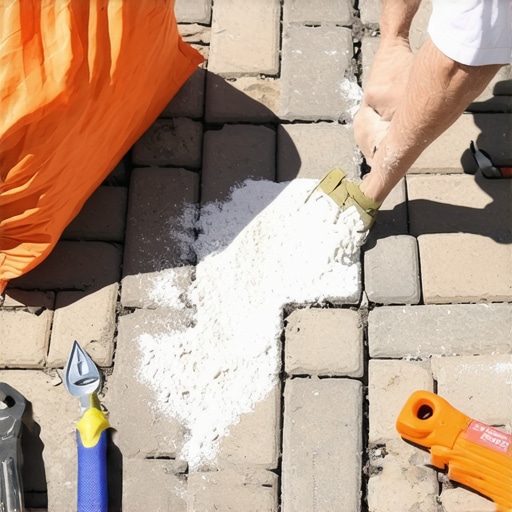
The Critical Role of Polymeric Sand (Poly-Sand)
Polymeric sand is a high-tech mix of graded sand and binders (polymers) that harden when exposed to water. In 2026, the technology has evolved to include faster-setting resins that resist ‘hazing’—that white film that used to ruin dark pavers. But it is not magic. It is a chemical reaction. If you apply it to wet pavers, it will stick to the surface and ruin the aesthetic. The pavers must be bone dry.
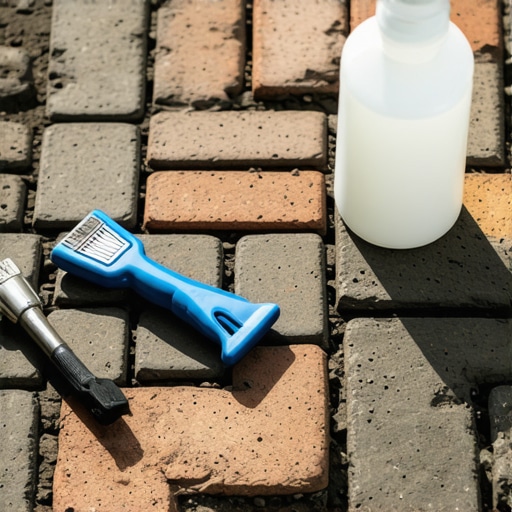
- Step 1: Sweep sand into joints until full.
- Step 2: Use a vibratory plate (with a protective mat) to settle the sand. You will see the sand level drop; this is the air leaving the joint.
- Step 3: Refill the joints to 1/8 inch below the chamfer (the beveled edge of the paver).
- Step 4: Leaf-blow every grain of dust off the paver surface.
- Step 5: Mist the joints. Do not flood them. Mist, wait 10 minutes, mist again.
“The longevity of an interlocking pavement system is directly proportional to the moisture management of the sub-base and the integrity of the joint sand.” – ICPI Tech Spec #2
How to avoid the ‘Haze’ on new pavers?
Hazing occurs when the polymers in the sand react with moisture on the surface of the stone rather than inside the joint. To prevent this, use a leaf blower on low power to clear all dust. Check the weather. You need at least 24 hours of zero rain after installation. If it rains early, the polymers will liquefy and smear across the face of your stone. It is a nightmare to clean.
Maintaining the Repair
Your work is not done once the sand is hard. Landscaping is a battle against the elements. Every spring, inspect the joints. If the poly-sand has cracked due to extreme freeze-thaw cycles, do not just pour more on top. You must scrape out the loose material and redo the joint. Keep organic debris like wet leaves off the steps; the tannins in the leaves can break down the polymers over time. Most importantly, ensure your gutters are not dumping water directly onto the step landing. No amount of engineering can withstand a concentrated waterfall of roof runoff. Fix the drainage or the steps will sink again. Don’t be the homeowner who does the same job twice.