4 Ways to Hide an Ugly Chain Link Fence
4 Professional Ways to Conceal a Chain Link Fence: Engineering and Horticultural Solutions
Chain link fencing is the functional skeleton of many properties, but it lacks the aesthetic weight required for high-end landscape design. As a veteran contractor, I see these silver-gray grids as a failure of imagination. I recently got called out to tear up a $30,000 patio that was sinking because the previous contractor failed to account for the hydrostatic pressure and drainage issues created by a poorly installed perimeter fence. The posts were set in shallow concrete ‘pancakes’ rather than deep piers, causing the soil to heave and shift the entire hardscape. If you do not understand the structural and biological reality of your fence line, any attempt to hide it will eventually fail. We are not just decorating; we are engineering a visual and physical barrier that respects soil mechanics and plant physiology.
1. Deploying Living Privacy Screens with Horticultural Precision
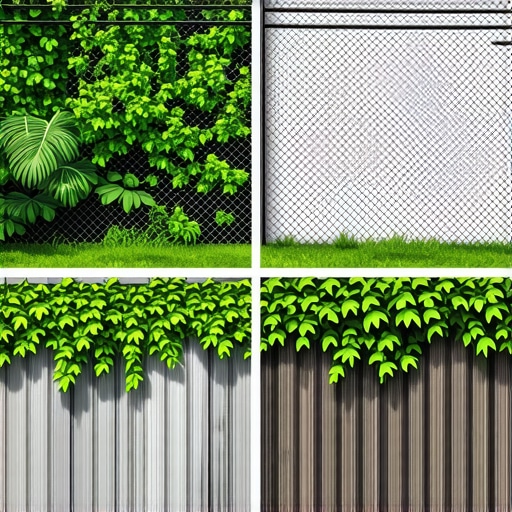
To hide a chain link fence with plants, you must select species based on USDA Hardiness Zones, light exposure, and root architecture to create a dense biological barrier. Choosing the wrong plant leads to root girdling or invasive spread that can compromise the structural integrity of the galvanized mesh.
“Site preparation, including the removal of competitive weeds and the amendment of soil based on a laboratory soil test, is critical for the success of any living screen.” – Texas A&M AgriLife Extension
When I specify a living wall, I look at the soil pH first. If you are planting Thuja occidentalis ‘Emerald Green’ into high-alkaline clay, you are just buying expensive compost. These evergreens require a well-drained, slightly acidic environment to thrive. You must dig your trench twice as wide as the root ball and ensure the root flare is visible above the soil line. Planting too deep is the primary cause of early mortality in privacy hedges. For a chain link integration, consider the ‘Espalier’ technique. You can train woody ornamentals or even fruit trees along the wire mesh. This turns a 2D fence into a 3D structural element. Avoid invasive species like English Ivy or Trumpet Vine; their weight and aggressive aerial roots will eventually pull the fence posts out of alignment. Stick to non-invasive climbers like Clematis or a high-performance screening shrub like the Hicks Yew. These plants offer a dense needle structure that absorbs sound and blocks line-of-sight better than any plastic slat.
2. Structural Wood Panel Integration and Wind Load Engineering
Integrating wood panels into a chain link frame transforms a utility fence into a high-end hardscape feature by using the existing steel posts as a structural foundation. This method requires careful calculation of the PSI and wind resistance to prevent the entire line from tipping during a storm.
“Fences and walls should be designed to resist lateral wind loads and the resulting overturning moments.” – Hardscape Engineering Standard
Most residential chain link fences use 1.5-inch or 2-inch diameter posts. If you intend to bolt 6-foot cedar panels to these, you are essentially creating a giant sail. I always check the post depth first. If those posts aren’t at least 24 to 36 inches deep in a compacted gravel and concrete base, they will fail. We use specialized ‘brackets’ designed to bridge the gap between round steel and flat wood. Using Western Red Cedar is non-negotiable here; it contains natural tannins that resist rot and insect infestation. Unlike the pressure-treated lumber found at big-box stores, which often warps within six months due to high moisture content, kiln-dried cedar stays true. When installing, leave a two-inch gap at the bottom. This prevents the wood from wicking up ground moisture and allows for airflow, which is critical for the longevity of the organic material. It also makes weed-whacking easier without damaging the wood grain. This is a permanent solution that replaces the ‘cheap’ look of wire with the architectural weight of timber.
How do I secure a privacy screen against high winds?
To secure a privacy screen against high winds, you must ensure your fence posts are set at a depth equal to one-third of their total height and use breathable materials. If using solid panels, drilling small ‘weep holes’ or leaving gaps between slats reduces the wind load significantly. Never use zip-ties for permanent structural attachments; stainless steel carriage bolts are the professional standard.
3. High-Density Polymer Slats and Mesh Overlays
High-density polyethylene (HDPE) slats provide an immediate, low-maintenance privacy solution by sliding directly into the chain link mesh to create a solid color block. While often dismissed by purists, modern engineering has improved the UV resistance and tensile strength of these polymers, preventing the cracking and fading seen in older installations. The key here is ‘density.’ Cheap slats leave gaps. Professional-grade ‘Winged’ slats have extra lateral coverage that provides up to 98 percent privacy. When we install these, we don’t just slide them in. We ensure they are locked into a bottom track. This prevents the ‘clattering’ sound during high winds. From a lawn care perspective, slats are superior because they don’t require water, fertilizer, or pruning. They are inert. However, you must consider the heat sink effect. In sun-drenched areas, a black or dark green slat can radiate heat, which might stress any nearby turf grass or delicate perennials. We often use a ‘mesh tape’ or ‘privacy fabric’ in industrial applications, but for residential garden design, the slats offer a cleaner, more structured look. If you want a more organic feel, there are bamboo or willow rolls that can be wired to the fence. These materials are biodegradable and usually last 3 to 5 years. They are a great ‘stop-gap’ while your permanent hedge is maturing. Just be sure to treat them with a water sealant to prevent mold growth in humid climates.
4. Strategic Grading and Berming to Change the Sightline
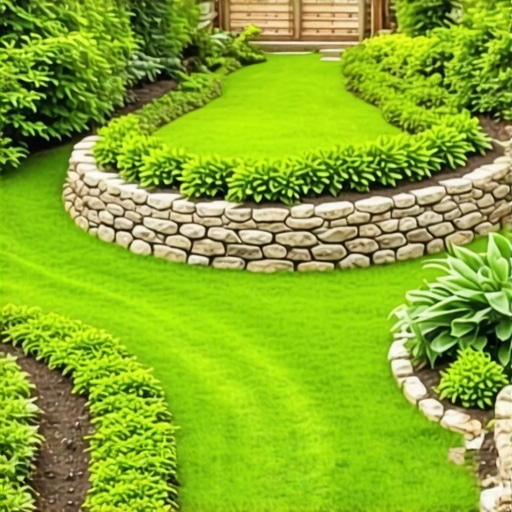
Strategic grading involves using soil and hardscape elements to physically raise the ground level near the fence, effectively shortening the visible height of the chain link. This technique uses civil engineering principles to redirect water flow while masking the perimeter with topographical variety. If you have a 4-foot chain link fence, you can build a 2-foot high berm in front of it. Now, you only have 2 feet of fence to hide. This is where most DIYers fail. You cannot just pile dirt against a fence. The weight of the soil will blow out the mesh, and the moisture will corrode the galvanized coating. You must install a ‘retaining lip’ or a series of small boulder walls to hold the earth back. This creates a ‘tiered’ planting bed. We use a 3-to-1 slope ratio for berms to prevent erosion. This means for every 1 foot of height, the berm should be 3 feet wide. Inside these berms, I recommend a mix of ‘structural’ soil (a blend of gravel and organic matter) to ensure the mound doesn’t settle and lose its height over time. Incorporating large-scale hardscaping like boulders or gabion baskets provides a visual anchor that draws the eye away from the fence line. This method also improves drainage by directing runoff into a designated French drain or rain garden rather than letting it pool at the base of your fence posts. It turns a flat, boring yard into a dynamic landscape with depth and movement.
Will ivy ruin a chain link fence?
Yes, aggressive ivy like Hedera helix will eventually ruin a chain link fence. The sheer weight of the mature vines can bend the top rails, and the moisture trapped against the metal accelerates rust. Furthermore, the thick mats of foliage become a haven for rodents and trap debris that is nearly impossible to clean out. Use annual vines like Morning Glory if you want a climbing effect without the permanent structural damage.
| Material Choice | Privacy Rating | Lifespan | Maintenance Level | Engineering Complexity |
|---|---|---|---|---|
| Evergreen Hedge | 95% | 30+ Years | High (Pruning/Water) | Medium (Soil/Drainage) |
| Cedar Panels | 100% | 15-20 Years | Medium (Staining) | High (Wind Load) |
| HDPE Slats | 85-98% | 10-15 Years | Zero | Low |
| Berming/Grading | Variable | Permanent | Low (Mulching) | High (Civil/Hydro) |
Success in landscaping is determined by the preparation you do before the first shovel hits the dirt. Don’t skip the compaction. Don’t ignore the drainage. If you follow these professional protocols, that ugly chain link fence will become a ghost in your garden design. It will stay upright. It will look intentional. It will last.
- Conduct a soil test to determine NPK and pH levels before planting.
- Check local zoning codes for maximum fence height and setback requirements.
- Call 811 to mark underground utility lines before digging post holes or berms.
- Install a weed barrier and 3 inches of hardwood mulch at the base of any living screen.
- Inspect fence post caps and tension wires for signs of rust before covering.