Build a $350 2026 Brick Paver Landing [DIY]
The $350 Brick Landing Blueprint
A $350 brick paver landing requires meticulous excavation, base compaction, and polymeric sand application to prevent shifting and weed growth. By focusing on a 4 to 6-inch sub-base of compacted gravel and a 1-inch layer of bedding sand, homeowners can create a professional-grade entry point that resists freeze-thaw cycles and heavy foot traffic. Success depends entirely on the structural integrity of what sits beneath the visible brick.
I recently got called out to tear up a $30,000 patio that was sinking because the previous contractor used stone dust instead of a proper modified gravel base. It was a forensic nightmare. If a thirty-thousand-dollar project can fail due to basic physics, your $350 DIY landing stands no chance if you just toss bricks on the dirt. You are not just laying stones; you are building a flexible pavement system. This system must manage hydrostatic pressure and distribute weight across the subgrade. If you cut corners, the ground will reclaim your work within two seasons. Do not be the person who has to do this twice. One hundred percent of failures happen because of the base. I have seen guys spend weeks on the pattern only to watch the whole thing heave after the first hard frost because they were too lazy to rent a plate compactor. It is a waste of money and a waste of sweat. We do it right or we do not do it at all.
“A retaining wall or landing doesn’t fail because of the stone; it fails because of the water trapped behind or beneath it.” – Hardscape Engineering Axiom
The Engineering of Soil and Aggregate
Before you touch a shovel, understand that your soil has a load-bearing capacity measured in pounds per square foot. Most residential yards have clay-heavy or loamy soil that expands when wet. If you place pavers directly on this, they will tilt. You must excavate at least 7 to 9 inches deep to account for the gravel, sand, and the brick height itself. We use #57 stone or 2A modified gravel because the varying sizes of aggregate lock together under pressure. This is called interlocking. Without it, the base is fluid. With it, it is a rock. Don’t skip the geotextile fabric. This fabric prevents your expensive gravel from migrating into the soft soil over time. It is the skin of your project. It keeps everything separated and stable. If you omit the fabric, the mud will eventually swallow your gravel. It will sink.
How much modified gravel do I need for a patio base?
To calculate your gravel needs, multiply the square footage of your landing by the depth of the base (usually 0.5 feet) and divide by 27 to get cubic yards. For a standard 4×5 landing, you will need approximately 0.4 cubic yards of CR6 or 2A modified gravel to ensure a stable 6-inch foundation. Always buy 10 percent more than your calculation to account for compaction shrinkage. When you hit that gravel with a power tamper, it will shrink in volume as the air pockets are forced out. This is exactly what you want. You are looking for a base that feels like concrete before you ever put a grain of sand down. If you can kick a stone loose with your boot, it is not compacted enough. It needs to be solid.
The 2026 Material Cost Breakdown
| Material | Quantity | Estimated Cost |
|---|---|---|
| Reclaimed or Standard Red Clay Bricks | 80-100 units | $120 |
| #57 Modified Gravel (Bulk) | 0.5 Cubic Yard | $45 |
| Coarse Bedding Sand | 5-8 Bags | $40 |
| Polymeric Jointing Sand | 1 Bag | $35 |
| Geotextile Filter Fabric | 1 Roll (Small) | $30 |
| Edge Restraints (PVC or Aluminum) | 12 Linear Feet | $40 |
| Plate Compactor Rental (4 Hours) | 1 Rental | $40 |
| Total Estimated Investment | – | $350 |
What is the best sand for paver joints?
The best jointing material for a DIY landing is high-performance polymeric sand which contains chemical binders that harden when misted with water. This creates a weed-resistant and ant-resistant seal that remains flexible enough to handle thermal expansion. Do not use play sand or beach sand. These materials wash away during the first rainstorm and provide a perfect germination bed for weeds. Polymeric sand is the only way to lock the pavers together. It turns individual bricks into a monolithic surface. When applying it, the pavers must be bone dry. If there is a hint of moisture, the polymers will activate on the surface and leave a white haze that is nearly impossible to remove. Be patient. Wait for a dry window.
The Installation Protocol: Step-by-Step
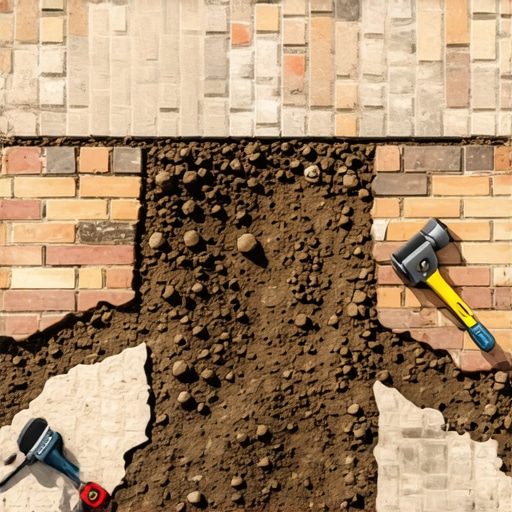
- Excavation: Dig 8 inches deep, extending 6 inches beyond the actual footprint of the landing to provide room for edge restraints.
- Subgrade Compaction: Use a hand tamper or plate compactor on the raw dirt until it no longer yields to your weight.
- Fabric Placement: Lay down non-woven geotextile fabric. Overlap seams by 12 inches.
- Gravel Base: Add gravel in 2-inch lifts. Wet it slightly. Compact each lift until the machine bounces.
- Screeding Sand: Lay two 1-inch pipes on the gravel. Spread sand between them. Use a straight board to pull the sand flat. Do not walk on it.
- Setting Bricks: Place pavers in your desired pattern (Herringbone is strongest). Drop them straight down; do not slide them.
- Edge Restraints: Stake down your edging tightly against the bricks to prevent lateral shifting.
- Joint Sand: Sweep polymeric sand into the gaps. Vibrate the pavers with the compactor (use a protective mat) to settle the sand. Repeat.
- Hydration: Mist the joints with water. Do not flood them. The water triggers the hardening agent.
“Poor drainage is the primary cause of flexible pavement failure, leading to edge-cracking and settling.” – ASTM D2487 Soil Classification Standards
The Year One Maintenance Cycle
Your landing is a living structure. In the first year, the bricks will settle slightly. This is normal. Check the joints every spring. If the polymeric sand has eroded or cracked, clean the area and reapplied a small amount. Ensure your downspouts are not dumping directly onto the landing. Even the best-built hardscape cannot survive a constant firehose of roof runoff. Redirect that water at least 5 feet away using a buried 4-inch PVC pipe. This protects your base from saturation and prevents the subgrade from turning into a slurry. Keep it clean. Keep it dry. It will last forty years if you spend ten minutes a year looking at the drainage. Don’t let moss take over. Moss holds moisture, and moisture leads to salt crystallization and spalling in red clay bricks. If you see green, kill it with a diluted vinegar solution. Keep the surface clear. Your landing is your home’s first impression. Make sure it stays level and firm. That is the hallmark of a pro job.