Build a $400 2026 Brick Walkway for Large Garden Patios
The Hardscape Autopsy: Why Cheap Walkways Fail
I recently got called out to tear up a $30,000 patio that was sinking because the previous contractor thought he could skip the sub-base compaction and use stone dust instead of concrete sand. Within two seasons, the hydrostatic pressure from trapped groundwater turned the entire surface into a roller coaster. The bricks were heaving, the polymeric sand was blown out, and the homeowner was looking at a total loss. This is the reality of hardscaping without engineering. If you don’t understand soil mechanics, you are just throwing money into a hole. For a 2026 project on a $400 budget, we aren’t building a 500-square-foot plaza; we are engineering a precision 15-foot connector for large garden patios using reclaimed materials and professional-grade base layers. It is about physics, not aesthetics.
How to plan a $400 brick walkway for 2026 garden designs?
To build a $400 brick walkway for large garden patios, you must prioritize a 4-inch compacted 21A modified gravel base and ASTM-C33 concrete sand. This budget covers roughly 15-20 linear feet if you source reclaimed clay bricks or contractor overstock and perform all excavation and 95% Proctor density compaction manually. Avoid big-box store sand at all costs.
The Soil Mechanics of the Subgrade
Before you touch a shovel, you have to know what you are digging into. In my 20 years, I’ve seen more failures from “soft clay” than any other factor. You need to excavate deep enough to reach undisturbed native soil. If you hit organic matter—roots, decaying leaves, or dark topsoil—keep digging. You cannot compact organic material. It will rot. Once you reach the subgrade, you need to check the moisture content. Take a handful of soil and squeeze it. If it crumbles, it’s too dry. If it stays in a solid, muddy ball, it’s too wet. You want that middle ground where it holds its shape but breaks with a thumb press. This is the foundation of your hardscaping project. Don’t skip the layout. Use batter boards and mason line. If your lines aren’t pulled to a 1/8-inch tolerance, your garden design will look like a DIY disaster. [IMAGE_PLACEHOLDER]
“Standard paver installations require a minimum of 4 inches of compacted aggregate for pedestrian traffic to prevent vertical displacement.” – ICPI Technical Manual
Material Specifications and Budget Breakdown
To stay under $400 in 2026, you have to be tactical. You aren’t buying boutique pavers. You are looking for “Severe Weather” (SW) grade clay bricks. These are fired at higher temperatures and won’t spall when the freeze-thaw cycle hits. Look for local masonry yards selling “last year’s pallets.” Here is the raw data on your material requirements for a standard 3′ x 15′ path.
| Material Item | Quantity Required | Estimated Cost (2026) | Purpose |
|---|---|---|---|
| 21A Modified Gravel | 1.5 Tons | $95 | Load-bearing foundation |
| ASTM-C33 Concrete Sand | 0.5 Tons | $45 | Setting bed for bricks |
| SW Grade Reclaimed Bricks | 225 Units | $180 | Wearing surface |
| Polymeric Sand (1 bag) | 50 lbs | $40 | Joint stabilization |
| Edge Restraints (PVC) | 30 Linear Feet | $40 | Lateral movement prevention |
How much modified gravel do I need for a patio base?
To calculate modified gravel needs, multiply your square footage by the depth in feet (e.g., 0.33 for 4 inches) and divide by 27 to get cubic yards, then multiply by 1.5 to convert to tons. For a 15-foot brick walkway, you need roughly 1.5 tons to ensure a stable landscaping foundation. Base depth is non-negotiable.
The Science of Compaction and Drainage
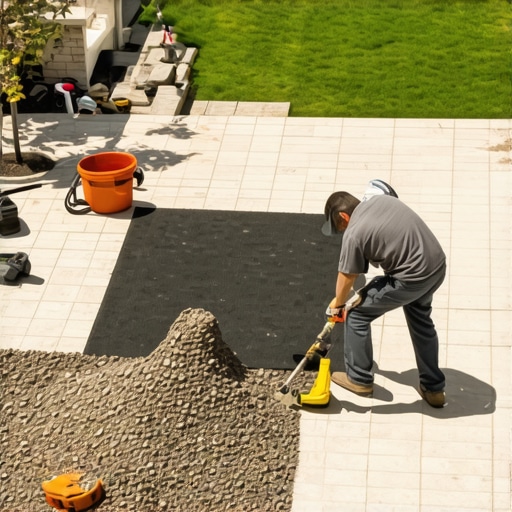
Compaction is where the “hacks” fail. You cannot just walk on the gravel to pack it down. You need a vibratory plate compactor. For a $400 budget, you are likely using a hand tamper. If you go the manual route, you must install the gravel in 2-inch lifts. Pour 2 inches, wet it down to reach optimum moisture, and pound it until the tamper literally bounces off the surface. Repeat for the second lift. If the gravel feels “spongy,” you have failed. The lawn care around the walkway also matters; ensure the grade slopes away from the path at a 2% minimum pitch. This prevents the “bathtub effect” where water sits under your bricks and turns the base into mush.
“A retaining wall doesn’t fail because of the stone; it fails because of the water trapped behind it.” – Hardscape Engineering Axiom
What is the best sand for a brick walkway?
The best sand for a brick walkway is ASTM-C33 concrete sand, which is an angular, washed sand that interlocks under pressure. Never use play sand or masonry sand for the setting bed. These sands are too round and fine, causing the bricks to shift and the hardscaping to fail under foot traffic. Angularity provides the friction needed for stability.
Step-by-Step Installation Checklist
- Mark the Site: Use white marking paint and call 811 to check for underground utilities. Don’t die for a walkway.
- Excavation: Dig to a depth of 7.25 inches (4″ base + 1″ sand + 2.25″ brick).
- Geotextile Layer: Lay non-woven geotextile fabric over the subgrade. This prevents the gravel from migrating into the clay.
- Base Installation: Add 21A modified gravel in two 2-inch lifts, compacting each to 95% Proctor density.
- Screeding: Place two 1-inch O.D. pipes on the base and pull a straight board across to level the ASTM-C33 sand bed.
- Brick Placement: Lay bricks in a running bond or herringbone pattern. Drop them straight down; do not slide them on the sand.
- Edge Restraints: Install PVC edging tight against the bricks and drive 10-inch steel spikes every 12 inches.
- Joint Sand: Sweep in polymeric sand, vibrate the bricks with a piece of wood and a mallet, and mist with water to activate the polymers.
Information Gain: The “Slip Plane” Warning
While the internet tells you to put landscape fabric everywhere, never place it directly under your sand layer. This creates a “slip plane.” The sand will slide across the fabric like a puck on ice, causing your entire garden design to shift laterally over time. Fabric goes under the gravel, nowhere else. Also, if you are working in heavy red clay, you must increase your base depth by 2 inches. Clay holds water, and water destroys landscaping via frost heave. Don’t be the person who has to rebuild their path in 2027 because they saved $20 on gravel. Precision matters. Measure twice. Tamp until your arms ache. That is how you build a professional path on a budget.
![Build a $400 Flagstone Walkway in One Weekend [DIY]](https://lawnmajesty.com/wp-content/uploads/2026/06/Build-a-400-Flagstone-Walkway-in-One-Weekend-DIY.jpeg)