Build a $100 Potting Bench with Scrap Wood
Why Your Potting Bench Should Be Built Like a Retaining Wall
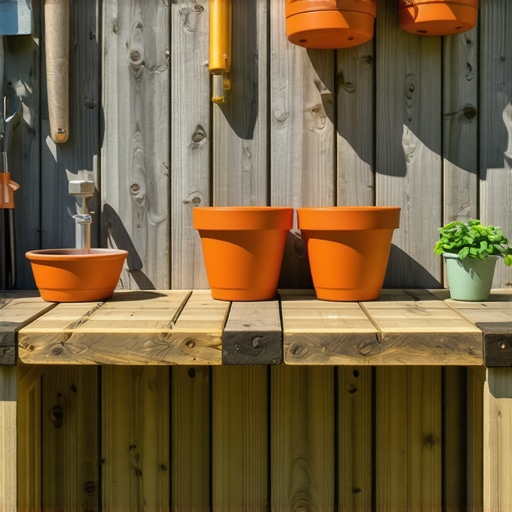
Building a potting bench from scrap wood requires a focus on structural load paths and moisture management to ensure the unit survives more than one season in a high-humidity garden environment. A professional potting bench must support concentrated loads exceeding 200 pounds while resisting the fungal decay that occurs when wet soil meets untreated timber. I always drill into my new crew members: if you dont fix the soil grading first, every plant you put in the ground is just expensive compost. The same logic applies to your workshop; if you build a bench with a weak base or poor wood choice, you are just assembling a pile of kindling that will collapse under the weight of a three-gallon ceramic pot. I have seen countless DIY benches buckle because the builder used interior-grade zinc screws or failed to account for the hydrostatic pressure of saturated potting mix sitting on a shelf. Landscaping is applied engineering, and your workstation is the primary tool in that application. Success starts with understanding the material properties of your scrap pile and how to mitigate the biological degradation of wood fibers through proper assembly and site placement.
Sourcing Scrap Wood: Reclaimed Decking vs. Pallet Hazards
The best scrap wood for a potting bench is reclaimed decking material like Western Red Cedar or Ipe, which contains natural oils that inhibit rot and insect infestation. If you are using pallets, you must identify the HT stamp which stands for heat-treated; avoid any wood marked with MB as this indicates the use of methyl bromide, a toxic pesticide that can leach into your soil and kill your seedlings. Scrap wood is not synonymous with trash. It is salvaged structural material. When scouting for boards, look for straight grain and minimal checking. Checking refers to the small cracks that run parallel to the grain, which occur when wood dries too quickly. These cracks allow water to penetrate the core of the timber, accelerating internal rot. If you find old pressure-treated 4×4 posts from a fence teardown, these are gold for the bench legs. They have already undergone the initial drying cycle and are less likely to warp further. However, you must use a respirator when cutting them, as the older treatments often contained arsenic or high concentrations of copper that you do not want in your lungs or your compost pile.
“Wood in contact with the ground or subject to frequent wetting must be either naturally decay-resistant or pressure-treated to prevent structural failure within 3 to 5 years.” – Forest Products Laboratory Wood Handbook
How much weight can a scrap wood bench hold?
A properly engineered scrap wood bench using 2×4 framing and staggered 3-inch stainless steel fasteners can easily support 300 to 500 pounds of vertical load. The limiting factor is usually the shear strength of the fasteners and the compressive strength of the wood species used for the legs. Softwoods like pine have lower PSI ratings than hardwoods like oak, meaning they will crush or deform more easily under heavy ceramic containers. To maximize load capacity, always ensure the horizontal support beams are notched into the legs rather than just being screwed to the sides. This transfers the weight directly down the vertical grain of the wood, utilizing the natural structural integrity of the timber rather than relying solely on the metal screws.
How do I stop my potting bench from rotting?
To prevent rot, you must break the capillary action that pulls water into the wood grain by using end-grain sealer and elevating the legs off the soil. Use plastic furniture glides or small pieces of slate under the legs to prevent them from sitting in standing water. Applying a coat of raw tung oil or boiled linseed oil every two years will provide a hydrophobic barrier without the risk of synthetic chemical peeling. Fungal hyphae, the root-like structures of rot-inducing mushrooms, require moisture, oxygen, and a food source. By sealing the wood and keeping it dry, you remove the moisture component, effectively putting the wood in a state of suspended animation. Avoid using film-forming stains or paints, as these eventually crack, trapping water against the wood and accelerating the rot from the inside out.
| Wood Type | Rot Resistance | Structural Density | Common Scrap Source |
|---|---|---|---|
| Western Red Cedar | High | Moderate | Old deck boards |
| White Oak | High | Very High | Shipping crates |
| Heat-Treated Pine | Low | Moderate | Pallets (HT marked) |
| Pressure Treated | Very High | Moderate | Fence posts |
The Ground-Up Build: Structural Assembly Steps
Eighty percent of the build happens during the measuring and squaring phase. Start by leveling the ground where the bench will sit, ideally over a 4-inch base of compacted modified gravel to prevent settling. Measure your legs to 36 inches, which is the ergonomic standard for standing workstations. Cut your frame members using a miter saw to ensure 90-degree angles; even a two-degree deviation will cause the bench to wobble. Use a 1/8-inch drill bit to pre-drill every hole. This is not optional. Scrap wood is often brittle and will split instantly if you drive a screw into the end grain without a pilot hole. When assembling the top, leave a 1/4-inch gap between every board. This gap allows for seasonal wood expansion and, more importantly, permits water and soil to fall through to the ground rather than pooling on the surface. Pooling water is the primary cause of surface rot and fungal growth on garden furniture.
- Checklist for Build Success:
- Confirm all pallets are stamped HT (Heat Treated).
- Use 304 or 316 Stainless Steel screws to prevent galvanic corrosion.
- Check for square at every corner using a speed square.
- Apply a copper-based preservative to any cut ends of pressure-treated lumber.
- Install a galvanized metal mesh screen on one section of the top for sifting compost.
- Add a 2-inch lip around the back and sides to prevent pots from sliding off.
“A work surface height of 36 inches is the industry standard for standing tasks to minimize musculoskeletal strain during repetitive motions like transplanting.” – Ergonomics in Agricultural Design
Ergonomics and Garden Design Integration
A potting bench should not be an afterthought tucked in a dark corner of the yard. It needs to be positioned near your primary water source and soil storage to minimize the labor of hauling heavy materials. In professional garden design, we look for the utility zone, a space that is accessible but shielded from high-traffic aesthetic areas. Place your bench under a 10 percent slope or provide a simple corrugated metal roof to shield it from direct UV rays, which degrade the lignin in the wood and lead to silvering and brittleness. If your soil is heavy clay, ensure the area under the bench is excavated and backfilled with crushed stone to facilitate drainage. You do not want to stand in a mud pit while you are seeding your spring trays. The physical height of 36 inches is critical. I have seen veterans with ruined backs because they spent years stooped over a 30-inch table. Your elbows should be at a 90-degree angle when working. This setup allows you to use your body weight to press soil into cell trays rather than relying on small muscle groups in your wrists and forearms.
Fastener Chemistry and Long-Term Maintenance
Never use standard drywall screws for a landscaping project. The acidity in many wood species, especially cedar and modern ACQ pressure-treated lumber, will eat through zinc coatings in a single season. This leads to black staining around the screw heads and eventual structural failure. Use ceramic-coated or stainless steel fasteners. When driving screws, stagger them. Do not place two screws in the same grain line, as this acts like a wedge and will split the board. Maintenance is a biennial task. Every two years, scrub the bench with a stiff brush and a solution of oxygen bleach and water to kill any lingering mold spores. Once dry, reapply your oil of choice. This prevents the wood from becoming hydroscopic, meaning it won’t suck up water like a sponge during the rainy season. A well-built scrap wood bench is a testament to the idea that landscaping excellence does not require a massive budget; it requires a deep respect for the materials and the physics of the outdoor environment. Do not skip the pilot holes. Do not skip the level. Do not use chemical-treated pallets. Stick to these engineering protocols, and your $100 investment in scrap and screws will outlast any $500 kit-built bench from a big-box store. Precision is free. Quality is a choice. Build it once, build it right, and get back to the real work of growing.

![Build a $500 Outdoor Kitchen Frame with Steel Studs [DIY]](https://lawnmajesty.com/wp-content/uploads/2026/05/Build-a-500-Outdoor-Kitchen-Frame-with-Steel-Studs-DIY.jpeg)