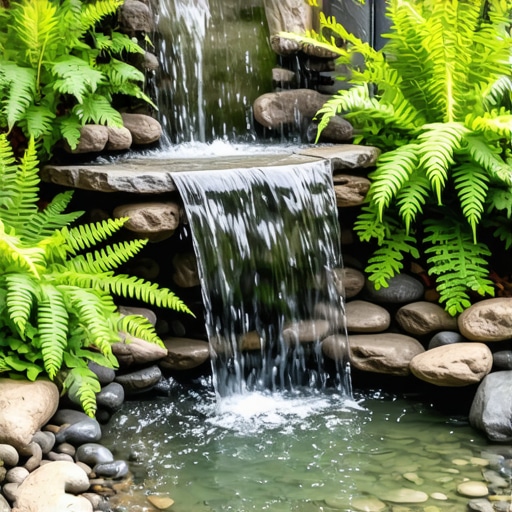
Building a Backyard Waterfall for Under $300
Engineering a Functional Water Feature on a Strict Budget
Building a backyard waterfall for under $300 requires a shift from buying expensive kits to sourcing raw materials and understanding the hydraulic principles of water movement. By prioritizing EPDM liners, submersible pumps with proper GPH ratings, and reclaimed fieldstone, you can construct a professional-grade feature without the premium price tag.
The Hardscape Autopsy: Why Cheap Features Fail
I recently got called out to tear up a $30,000 patio that was sinking because the previous contractor failed to manage the hydrostatic pressure from an adjacent poorly built water feature. The water wasn’t just circulating; it was migrating into the sub-base of the pavers. This is the reality of hardscaping. If you don’t control the water, the water will control your landscape. When building on a budget, people often cut corners on the underlayment or the liner thickness. They buy 20-mil PVC because it’s cheap. Within two seasons, UV degradation or a single sharp stone punctures it. Now you have a $300 muddy hole. We do it right by focusing on the ‘bones’ of the build. The soil grading and the liner integrity are non-negotiable. If you miss the mark here, you are just throwing money into a hole in the ground.
“A retaining wall doesn’t fail because of the stone; it fails because of the water trapped behind it.” – Hardscape Engineering Axiom
The Physics of the Waterfall: Head Height and GPH
To keep costs under $300, you must calculate your Total Dynamic Head (TDH) accurately to avoid overspending on a pump you don’t need or underspending on one that won’t lift the water. Head height is the vertical distance from the water surface in the basin to the highest point of the waterfall. For every 10 feet of tubing, add 1 foot of head height due to friction loss. For a standard 2-foot high waterfall, a 500-800 GPH pump is usually sufficient. This keeps your power consumption low and your initial investment manageable.
| Material | Estimated Cost | Source Strategy |
|---|---|---|
| 45-Mil EPDM Liner (8×10) | $90-$110 | Online Specialty Wholesalers |
| Submersible Pump (600 GPH) | $45-$60 | Non-Branded Industrial Supply |
| 1″ Corrugated Tubing (15 ft) | $20 | Hardware Store Plumbing Dept |
| Fieldstone / Riprap | $0-$50 | Local Excavation Sites / Craigslist |
| Non-Woven Geotextile | $20 | Construction Remnants |
| Total | $175-$240 | Remaining Budget for Plants |
How deep should a backyard waterfall basin be?
A backyard waterfall basin should be at least 18 to 24 inches deep to ensure the submersible pump remains fully submerged even with natural evaporation. This depth prevents pump cavitation and protects the motor from overheating while providing enough volume to handle the ‘surge’ when the pump is turned off.
Site Preparation and Soil Mechanics
The biggest mistake in DIY water features is ignoring the angle of repose for the soil. If you dig a vertical wall in sandy loam, it will collapse before the liner is even in. You need to shelf your pond. Excavate in ‘steps’ of about 8-12 inches. This provides structural stability and creates natural ledges for rock placement. Before the liner goes down, you must address the underlayment. If you can’t afford professional geotextile, use old carpet padding or three layers of heavy-duty newspaper. This protects the 45-mil EPDM from stone-induced punctures from the underside.
The Mechanical Assembly: Avoiding Capillary Action
Capillary action is the silent killer of water features. This occurs when the liner is tucked behind a rock, and the water ‘wicks’ over the edge and into the surrounding soil. You’ll be losing 50 gallons a day and blaming a leak that doesn’t exist. To prevent this, ensure the liner extends at least 6 inches above the maximum water line and is buried in a ‘U’ shape trench. This creates a physical barrier that forces water back into the system. Don’t use standard mortar for the rocks; use black waterfall foam. It expands to fill the gaps, forcing the water over the top of the stones rather than letting it disappear underneath them.
“Proper drainage is the foundation of all sustainable site engineering; without it, the structural integrity of any hardscape is compromised.” – ICPI Tech Spec No. 2
What is the cheapest way to build a pond waterfall?
The cheapest way to build a waterfall is to utilize disappearing basin technology, often called a ‘pondless’ waterfall. By using a buried reservoir filled with gravel rather than an open pond, you save money on expensive filtration systems, algae treatments, and large-scale liners while significantly reducing maintenance requirements.
Pre-Installation Checklist
- Call 811 to mark underground utility lines before digging.
- Calculate your pond volume: (Length x Width x Depth) x 7.48 = Total Gallons.
- Level the ‘spillway’ rock using a 4-foot carpenter’s level to ensure even water flow.
- Test the pump in a bucket of water before installing it in the basin.
- Source local stone from construction sites (with permission) to save $200+ in material costs.
Information Gain: The Evaporation Fallacy
Many homeowners believe they have a leak when they are actually experiencing high evaporation rates. A waterfall with a large surface area and high splash can lose 1 to 2 inches of water depth per week in low humidity. Before you tear your liner apart looking for a hole, perform a ‘Bucket Test’. Fill a bucket with water and set it next to the pond. After 24 hours, compare the water loss. If the pond lost significantly more than the bucket, you have a leak. If they are the same, it’s just the atmosphere doing its job.
Long-Term Maintenance and Biology
Once the feature is running, you are managing a micro-ecosystem. Do not use chlorine. It kills the pump seals and any beneficial bacteria. If you have algae, it’s a sign of high nitrates or excess sunlight. Use barley straw extract or simply add more native plants like Anacharis to compete for the nutrients. Keep the intake screen on your pump clear of debris. A clogged pump works harder, runs hotter, and dies faster. It will rot if you leave it clogged with leaf litter over the winter. Pull the pump in freezing climates and store it in a bucket of water in the garage to keep the seals moist. These small steps ensure your $300 investment lasts a decade.