The mistake people make when building fire pits
The Fatal Flaw in Amateur Fire Pit Construction
Building a fire pit that lasts more than two seasons requires an understanding of thermodynamics and civil engineering that most DIY tutorials completely ignore. A professional fire pit fails only when the builder neglects base compaction, fails to account for thermal expansion, or ignores the hydrostatic pressure of the surrounding soil. You cannot simply stack stones in a circle and expect the structure to remain level after a single freeze-thaw cycle. It will fail. Every time.
The Hardscape Autopsy: A Thirty Thousand Dollar Lesson
I recently got called out to tear up a $30,000 patio that was sinking because the previous contractor thought he could skip the excavation and sub-base preparation for a massive stone fire feature. Within eighteen months, the four-ton structure had settled three inches on the north side, shearing the gas line and cracking the expensive travertine surround. The culprit was a lack of 2A modified crushed stone and zero consideration for the local clay soil’s load-bearing capacity. We had to excavate the entire site, haul away the contaminated subgrade, and start from the dirt up. This is the reality of hardscaping: if you don’t respect the physics of the ground, the ground will reclaim your work. I see this weekly. Homeowners buy a kit from a big-box store, throw it on top of their lawn care-treated grass, and wonder why the blocks are heaving by November. You are not just building a pit; you are managing a thermal engine sitting on a shifting tectonic plate of soil and moisture.
The Foundation: Why Drainage and Compaction Rule the Backyard
The longevity of any hardscape project is determined by the six to twelve inches of material that you will never see once the project is finished. Proper fire pit foundations require a minimum of six inches of 2A modified gravel compacted to a 95 percent Proctor density to prevent settling. This layer acts as a structural raft that distributes the weight of the masonry while allowing water to move away from the stones. [image_placeholder]
“A retaining wall doesn’t fail because of the stone; it fails because of the water trapped behind it.” – Hardscape Engineering Axiom
How much modified gravel do I need for a fire pit base?
Calculating gravel volume requires multiplying the total square footage of your excavation by the depth (usually 0.5 feet) and dividing by 27 to find cubic yards. For a standard 5 foot diameter fire pit area, you should expect to use at least one ton of 2A modified stone to ensure a stable, frost-resistant foundation. Don’t skimp. If you think a bag of pea gravel from the local hardware store is enough, you have already lost the battle against gravity. Pea gravel is rounded; it rolls like ball bearings. You need angular, crushed stone that locks together under the force of a plate compactor. I tell my crew: the tamper should literally bounce off the compacted base. If it still feels soft, keep going.
The Thermal Reality of Fire Bricks and Spalling
Concrete blocks are not designed to withstand direct flame. When standard landscape wall blocks are exposed to high heat, the moisture trapped inside the concrete expands, leading to a process called spalling where the stone face explodes or crumbles. Professional fire pits must be lined with kiln-fired refractory fire bricks and high-temperature fire clay mortar to isolate the decorative exterior stone from the intense thermal energy of the fire. If you skip the fire brick liner, your expensive garden design will be a pile of rubble in three years. Below is a comparison of materials common in fire pit construction.
| Material Type | Heat Resistance | Structural Density | Recommended Use |
|---|---|---|---|
| Refractory Fire Brick | 2000F+ | Very High | Inner Fire Box Lining |
| Natural Granite | Low (Risk of Cracking) | High | Exterior Facade Only |
| Standard Concrete Block | Low (Spalls at 400F) | Medium | Structural Backing with Liner |
| Steel Ring Insert | High | Medium | Heat Shielding/Airflow |
What is the best stone for a backyard fire pit?
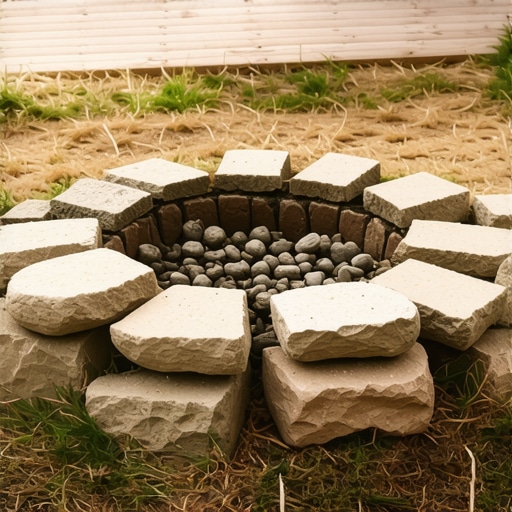
The best stone for the exterior of a fire pit is a high-density natural stone like basalt or granite, provided it is separated from the heat source by a refractory barrier. Avoid porous stones like sandstone or river rocks, which can trap water and explode when heated rapidly. Always use a steel ring or fire brick liner. It is non-negotiable. I have seen river rock pits shatter like grenades because the homeowner didn’t understand vapor pressure. It is dangerous. Don’t do it.
The Step-By-Step Engineering Checklist
Before you even think about the aesthetic of your fire pit, you must clear the technical hurdles. This is the blueprint for a build that survives for decades rather than months. Follow it or prepare to rebuild next year.
- Call 811: Never break ground without a utility mark-out. Gas and fiber optic lines are often shallower than you think.
- Excavate to Subsoil: Remove all organic material, including grass and topsoil. You must reach the inorganic subsoil to prevent organic rot and settling.
- Filter Fabric: Lay down a non-woven geotextile fabric to prevent the gravel from migrating into the clay or soil.
- The 6-Inch Rule: Install 2A modified stone in 2-inch lifts, compacting each layer with a mechanical plate compactor.
- Ventilation: Leave at least two gaps in the bottom course of stone to allow oxygen to feed the fire and prevent smoke from choking the guests.
- Adhesive Selection: Use high-heat masonry adhesive for the exterior stones, but never for the fire bricks which should be dry-set or used with fire clay.
How do I prevent my fire pit from filling with water?
Drainage is the most overlooked aspect of fire pit design. Every fire pit should have a central drainage core filled with clean 3/4 inch stone that extends down through the compacted base into the subsoil. This allows rainwater to exit the pit immediately rather than sitting and stagnating or, worse, freezing and cracking the masonry from the inside out.
“Soil drainage is the single most important factor in the success of any structural hardscape installation.” – USDA Soil Engineering Manual
The Maintenance Schedule for Hardscape Longevity
Once the pit is built, the work isn’t over. The first year is the settling period. You need to inspect the polymeric sand joints or mortar lines for hairline cracks. These are signs of slight shifting. Fill any cracks immediately to prevent water from entering the structure and initiating a freeze-thaw cycle that will widen the gaps. In the fall, ensure the drainage hole is clear of ash and debris. If ash turns into a paste at the bottom of your pit, it will clog the drainage and lead to a swampy mess. Keep it clean. Keep it dry. Your yard is a living system. Treat the hardscaping as the skeleton of that system. Without a strong skeleton, the body fails. It is that simple.