Build a $1000 2026 Flagstone Patio [Step-by-Step]
The Hardscape Autopsy: Why Most DIY Patios Fail by Year Two
I recently got called out to tear up a $30,000 patio that was sinking because the previous contractor ignored the most basic rule of civil engineering: sub-grade stabilization. The homeowner was devastated. The pavers were top-of-the-line, but the base was a disaster of uncompacted organic soil and thin, loose sand. It was a forensic lesson in incompetence. To build a $1000 2026 flagstone patio, you must focus on structural sub-base engineering and hydrostatic pressure management rather than just laying stones on dirt. Success in hardscaping requires a 6-inch excavation depth, 4-inches of compacted 21A modified gravel, and industrial-grade geotextile fabric to ensure the installation remains level for decades.
The Physics of the Ground: Why Dirt is Your Enemy
Most homeowners think they are building a floor. You aren’t. You are building a shallow foundation. Soil is alive; it breathes, it freezes, and it expands. If you put a heavy stone on top of raw soil, the first heavy rain will turn that soil into a slurry. The stone sinks. You get trip hazards. You get weeds. You get a mess. I tell my crew every day: we don’t get paid to lay stone; we get paid to manage water and dirt. If the base isn’t a solid, monolithic plate of compacted aggregate, the project is just expensive compost. You need to understand the California Bearing Ratio (CBR) of your soil. Heavy clay has a low CBR, meaning it deforms under load. Sandy loam is better but still requires a separation layer. Never skip the fabric. It prevents the gravel from migrating into the soil, which is the number one cause of sinking.
“Proper compaction of the subgrade and base layers is the single most critical factor in the longevity of any segmental pavement system.” ICPI Tech Spec No. 2
The $1000 Budget Breakdown for 2026
Can you build a pro-level patio for a grand in 2026? Yes, but only if your footprint is modest (around 80 to 100 square feet) and you do the labor yourself. In 2026, material costs for bulk aggregate and natural stone have climbed, but savvy sourcing can keep you on target. Avoid the big-box stores. Their bagged stone is marked up 400 percent. Go to a local quarry or a dedicated landscape supply yard. Order bulk. A single pallet of irregular flagstone and two tons of modified gravel will be your primary expenses. You must factor in the cost of a plate compactor rental. Do not use a hand tamper. Your arms will fail long before the ground is actually compacted to the required 95 percent Proctor density.
| Material | Quantity (100 sq ft) | Estimated 2026 Cost | Pro Specification |
|---|---|---|---|
| 21A Modified Gravel | 2.5 Tons | $150 – $200 | Must contain fines for compaction |
| Coarse Washed Sand | 1 Ton | $80 – $120 | ASTM C33 specification |
| Irregular Flagstone | 1 Pallet | $500 – $650 | Natural cleft, 1.5 to 2 inches thick |
| Geotextile Fabric | 120 sq ft | $40 – $60 | Non-woven, 4oz or higher |
| Polymeric Sand | 2 Bags | $80 – $100 | High-performance binder type |
Phase 1: Excavation and Drainage Logic
Before you touch a shovel, you must call 811. Utility lines are often shallower than you think. Once cleared, you must calculate your pitch. A patio that holds water is a failed patio. You need a 2 percent slope. That is a 1-inch drop for every 4 feet of distance. I have seen million-dollar homes with rotting foundations because a hack contractor pitched a patio toward the house. Don’t be that guy. Use a line level or a laser level. Excavate 7 to 8 inches deep. This allows for 4 inches of gravel, 1 inch of sand, and 2 inches of stone. If you hit heavy clay, go deeper. You need more drainage. The bottom of your pit should be smooth. Remove every root. Every piece of wood left under a patio will rot, create a void, and cause a sinkhole. It is inevitable.
How much modified gravel do I need for a patio base?
To calculate your gravel requirements, multiply your total square footage by the desired depth in feet, then divide by 27 to get cubic yards; finally, multiply by 1.5 to convert to tons of aggregate. For a standard 100-square-foot patio with a 4-inch base, you will need approximately 1.25 cubic yards or 1.9 tons of stone. Always order 10 percent extra for compaction loss. When you hit that gravel with a vibratory plate compactor, it will shrink in volume as the fines fill the voids between the larger stones. This is exactly what you want. It creates a solid, interlocking mass that resists movement.
Phase 2: The Lift and Compaction Protocol
Lay your geotextile fabric down first. It should run up the sides of the excavation. Now, bring in the gravel. Do not dump it all at once. You must work in lifts. A 4-inch base should be done in two 2-inch lifts. Spread the gravel, wet it down slightly to lubricate the particles, and run the plate compactor over it at least four times in alternating directions. The compactor should literally bounce off the surface when it is done. If the ground feels soft or spongy, you have high moisture content or poor sub-soil. Stop. Let it dry or dig deeper. You cannot build on mud. This is where the engineering happens. The gravel base distributes the load of the stone across a wider area of soil, preventing localized failure.
“Poor drainage is the primary cause of hardscape failure; water must be directed away from the structure at a minimum slope of 2 percent.” Penn State Agricultural Extension
What is the best base for a flagstone patio?
The best base for flagstone is a dual-layered system consisting of a compacted 21A or 3/4-inch minus gravel sub-base topped with a 1-inch screeding layer of coarse washed sand. This combination provides both structural rigidity and the lateral flexibility needed to level irregular stones of varying thicknesses. Avoid using stone dust or screenings as a setting bed. Stone dust holds water and will lead to significant frost heave in colder climates, causing your stones to pop and shift over the winter.
Phase 3: The Screeding and Setting Process
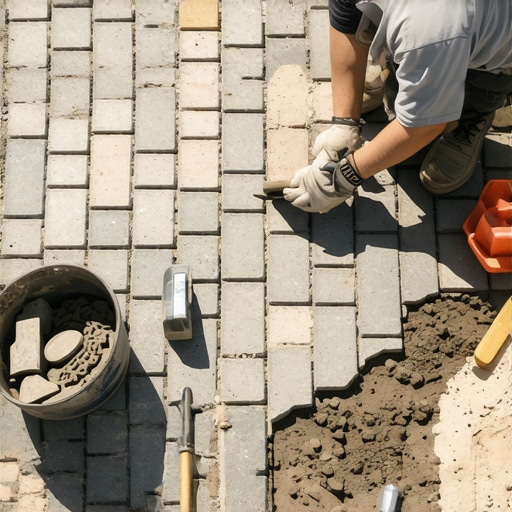
Once your gravel is a rock-hard plate, it is time for the sand. Use 1-inch PVC pipes as screed rails. Lay them parallel on the gravel, fill the area with sand, and pull a straight 2×4 board across the pipes. This gives you a perfectly flat 1-inch bed. Do not walk on the sand. Now, the puzzle begins. Flagstone is irregular. You are looking for tight joints. Large gaps are the hallmark of a lazy installer. Use a dead-blow hammer to set each stone. Since flagstone varies in thickness, you will have to lift some stones and add or remove a handful of sand to get them flush. This is slow, back-breaking work. Your knees will hurt. Your back will ache. That is how you know you are doing it right. Keep a level across multiple stones to ensure no one is a toe-tripper.
Phase 4: Joint Stabilization and Edge Restraints
Edge restraints are non-negotiable. If you don’t lock the perimeter, the stones will migrate outward over time. Use heavy-duty plastic edging with 10-inch steel spikes driven every 12 inches. Or, better yet, do a concrete “pre-set” edge where the outer stones are bedded in mortar. For the joints, use polymeric sand. This is a mix of sand and polymers that hardens when wet. It keeps weeds out and prevents ants from mining the sand. Follow the instructions on the bag to the letter. Sweep it in, vibrate it with the plate compactor (use a protective mat on the stone), sweep off every single grain of excess sand from the surface, and then mist it. If you leave excess sand on the stone and get it wet, it will stain the flagstone with a hazy film that is a nightmare to remove. Use a leaf blower to clear the surface before wetting.
The Long-Term Maintenance Protocol
Your patio is a living system. In year one, it will settle slightly. This is normal. You may need to top off the polymeric sand in a few spots. Every three years, you should clean it with a pH-neutral stone cleaner. Do not use a pressure washer on high blast. You will blow out the joints and scar the stone. Use a fan tip at a distance. If you see moss growing in the shade, your drainage might be slowing down. Re-apply a breathable stone sealer to protect against salt and oil stains, but make sure it is vapor-permeable. If the sealer doesn’t breathe, moisture will get trapped under the surface and cause the stone to spall or flake. Landscaping isn’t a one-time event; it is a commitment to the biology and geology of your property. Respect the dirt, and the stone will stay put.
Checklist for a Professional Flagstone Installation
- Utility marking (811) completed before excavation.
- Slope checked with a transit or laser level (min 1/4 inch per foot).
- Sub-grade cleared of all organic material and roots.
- Non-woven geotextile fabric installed between soil and gravel.
- Gravel compacted in 2-inch lifts to 95 percent Proctor density.
- Setting bed of coarse washed sand (ASTM C33) at exactly 1 inch.
- Flagstones selected for minimum 1.5-inch thickness.
- Edge restraints secured with steel spikes.
- Polymeric sand applied to dry stones and thoroughly vibrated.
- Surface blown clean of dust before water activation.