Build a $200 2026 Gravel Path with Brick Edging [Quick Fix]
The Physics of a Stable Gravel Path
Building a $200 gravel path with brick edging requires sub-grade excavation, a compacted sub-base, and geotextile separation to prevent soil migration. For this budget, focus on angular crushed stone and reclaimed bricks to ensure structural integrity and effective drainage while avoiding long-term settling issues.
I always drill into my new crew members: if you don’t fix the soil grading first, every plant you put in the ground is just expensive compost, and every stone you lay is a future trip hazard. I have spent two decades fixing paths that were built on soft topsoil. People think they can just throw some gravel on the grass and call it a day. In three months, the grass grows through. In six months, the gravel has vanished into the mud. We do not do that. We build for 2026 and beyond. A path is a piece of civil engineering. It must handle hydrostatic pressure. It must manage surface runoff. It must remain stable under the weight of a loaded wheelbarrow. If you ignore the sub-grade, you are just wasting money.
The $200 budget is tight, but it is achievable if you understand material weights and sourcing. You are not buying bagged stone from a big-box store. That is for amateurs. You are buying in bulk from a local quarry or landscape supply yard. Bagged stone is roughly 400 percent more expensive per cubic yard than bulk stone. To hit your budget, you need to know exactly how much material you need. We calculate this in tons. A path 20 feet long and 3 feet wide, excavated to a depth of 4 inches, requires approximately 0.75 tons of material. You also need to account for the brick edging. Reclaimed bricks are often free on local marketplaces if you are willing to haul them. This is how you stay under budget without sacrificing the structural integrity of the build.
“A retaining wall or hardscape border doesn’t fail because of the stone; it fails because of the water trapped behind it and the lack of a proper foundation.” – Hardscape Engineering Axiom
The Anatomy of the Excavation
Start by marking your path with layout strings or marking paint. Do not eyeball it. You need clean lines. Excavate to a depth of at least 4 inches. This allows for 2 inches of sub-base and 2 inches of surface gravel. When you hit the bottom of your trench, you must check the compaction. If the soil is soft, you need to use a hand tamper until it is firm. If the soil is heavy clay, you have a drainage problem. Clay holds water. Water freezes and thaws. This causes heaving. To prevent this, your sub-grade must have a slight pitch. A 1 percent slope is enough to move water away from your house foundation or other structures. Don’t skip this. A flat trench is a bathtub for your gravel.
| #57 Crushed Limestone | $28 – $45 | Sub-base drainage | High |
| Pea Gravel | $35 – $60 | Top layer (Decorative) | Low (Rolls) |
| Crushed Granite (3/4″) | $40 – $75 | All-in-one path | Excellent |
| Decomposed Granite | $50 – $90 | Firm, walkable surface | Very High |
Installing the Geotextile Barrier
Once your trench is dug and tamped, you must lay down a non-woven geotextile fabric. This is not the cheap weed plastic you see in garden centers. You need a fabric that allows water to pass through but prevents the soil from mixing with your gravel. This process is called separation. Without it, the heavier stones will eventually sink into the soil. Use 6-inch landscape staples to pin the fabric down. Overlap any seams by at least 12 inches. This is the insurance policy for your path. It stops the mud from swallowing your $200 investment. It also provides a secondary layer of weed suppression by preventing seeds from reaching the soil below.
The Brick Edging: Lock and Load
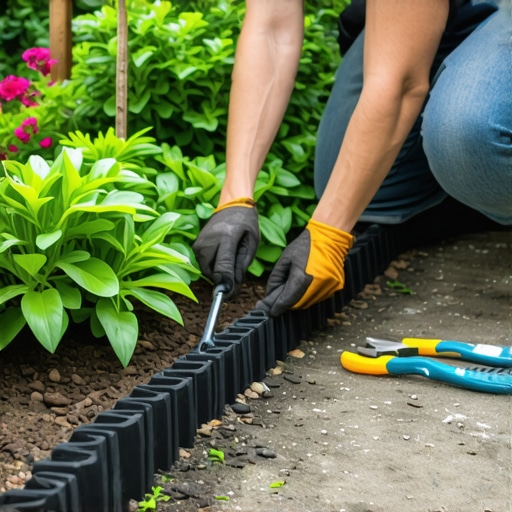
The bricks are the skeleton of the path. They hold the gravel in place. Without edging, the gravel will migrate into your lawn. This is the number one complaint of homeowners. To install the bricks, dig a small trench along the perimeter of your main path. You want the bricks to sit at an angle or vertically. Set them on a 1-inch bed of sand or fine crushed stone. This allows you to level each brick individually. Use a rubber mallet to set them. Do not use a metal hammer. It will shatter the clay. Once the bricks are in, backfill the outside with soil and pack it tight. This lateral pressure is what keeps the bricks from falling over.
How much modified gravel do I need for a path?
To calculate gravel needs, multiply length times width times depth in feet to get cubic feet. Divide by 27 to get cubic yards. Most gravel weighs approximately 1.4 tons per cubic yard. For a standard 20-foot path, you will typically need about one ton of total material including the sub-base. Always order 10 percent more than you think you need. You will lose volume during compaction. If you don’t compact the stone, it will settle unevenly. Use a plate compactor if you can afford the rental, otherwise, use a heavy hand tamper and a lot of sweat. You want the stone to be so tight that your feet don’t sink when you walk on it.
Do I need a border for a gravel walkway?
Yes, a border is mandatory for any gravel path. Without a hard edge like brick, stone, or heavy-duty steel, the gravel will spread laterally under the weight of foot traffic. This creates a messy appearance and makes lawn mowing difficult. A brick border provides a clean transition between the garden bed and the walkway. It also acts as a mini-retaining wall for the gravel. If you use reclaimed bricks, ensure they are kiln-fired. Old house bricks are sometimes too soft for ground contact and will flake apart after a few winters. Look for pavers or street bricks for the best durability.
“Soil compaction is the most critical and most neglected aspect of residential landscaping. Without a Proctor density of at least 95 percent, any hardscape install is temporary.” – Agronomy Field Manual
The Final Layer: Selecting the Right Stone
For the top 2 inches, use an angular stone. Do not use pea gravel if you want a stable walking surface. Pea gravel is round, like ball bearings. It shifts under your feet. It is hard to walk on in flip-flops. Instead, look for 3/8 inch crushed stone or “breeze.” The jagged edges of the stone lock together. This creates a firm surface. Spread the stone evenly with a garden rake. Once spread, water it down. This helps the fines settle into the gaps. If you have extra budget, you can use a polymer stabilizer, but for $200, we rely on mechanical locking. Pack it. Then pack it again.
- Checklist for Path Success:
- Call 811 before you dig. Don’t hit a gas line.
- Use a 4-foot level to check the pitch of the trench.
- Source bricks from local demolition sites to save 50 percent of the budget.
- Use non-woven geotextile, not plastic.
- Compact the sub-grade before adding any stone.
- Install the brick edging at least 1 inch above the gravel line.
Maintenance is the part most people forget. Over time, organic matter like leaves and dust will settle into the gravel. This creates a growing medium for weeds. Every spring, you should blow out the debris with a leaf blower. If weeds do appear, do not use a torch if you have a plastic liner. Use a concentrated vinegar solution or pull them by hand. Every two to three years, you might need to add a fresh half-inch of top stone to keep the path looking new. This is a quick fix that lasts decades if you respect the engineering. Don’t be a hack. Do the work right the first time.