Repair Your 2026 Leaky Pond Liner for $40
Repair Your 2026 Leaky Pond Liner for $40: The Forensic Guide to Water Feature Salvage
I recently got called out to tear up a $30,000 patio that was sinking because the previous contractor failed to secure the pond liner to the skimmer faceplate properly. The homeowner thought they had a minor evaporation issue. In reality, the 45-mil EPDM liner had a hairline tear behind the waterfall weir, and 200 gallons of water were pumping directly into the modified gravel base every single day. The hydrostatic pressure turned the sub-soil into a slurry, and the entire $30k hardscape installation began to tilt. It was a structural autopsy that could have been avoided with a $40 patch kit and ten minutes of professional due diligence. If your pond is losing more than an inch of water in 24 hours, stop the pump. You don’t need a new installation. You need to understand the physics of water retention and the chemistry of vulcanized rubber.
The Forensic Autopsy: Identifying the Breach Point
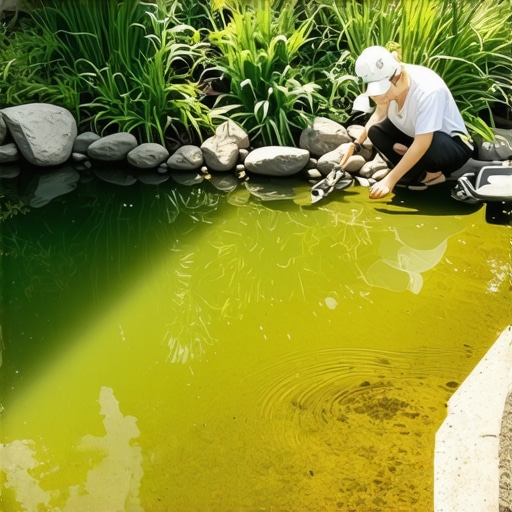
To identify if a pond liner leak is occurring versus standard evaporation, you must execute a static water level test by marking the water line with a grease pencil and turning off the filtration system for 24 hours. If the level drops significantly while the pump is off, the puncture is in the main basin liner; if it only drops when the pump is running, the failure exists in the plumbing, waterfall spillway, or stream bed. [image_placeholder]
How do I find a leak in a pond liner without draining it?
Finding a needle in a haystack is easier than finding a puncture in a 1,000-square-foot EPDM sheet covered in algae. Use milk or concentrated pond dye near suspected areas while the pump is off. The dye will be pulled toward the hole by the outward flow of water. Focus your search on the top 6 inches of the liner first. Ninety percent of leaks occur at the edge where the liner has settled or been punctured by a terrestrial predator like a heron or raccoon. Stop looking for a massive gash. Look for a pinprick. It only takes one small hole to drain 500 gallons under pressure.
“A retaining wall doesn’t fail because of the stone; it fails because of the water trapped behind it. Similarly, a pond liner doesn’t fail because of the rubber; it fails because of the preparation of the substrate underneath.” – Hardscape Engineering Axiom
Understanding Liner Degradation Chemistry
Most modern ponds built in the last decade utilize 45-mil EPDM (Ethylene Propylene Diene Monomer). This material is highly resistant to UV, but it is not immortal. By 2026, many liners installed during the early 2020s DIY boom will face mechanical stress failures at the seams. PVC liners, often found in cheaper big-box store kits, are even more prone to brittleness. When PVC loses its plasticizers, it cracks like glass. You cannot patch a shattered PVC liner for $40; you replace it. However, EPDM is a different beast. It is a thermoset membrane that can be chemically bonded using a primer and pressure-sensitive tape. This is not a job for duct tape or hardware store silicone. Silicone does not stick to EPDM. It will peel. It will fail. You will be back in the mud in a week.
Liner Material Comparison and Repair Feasibility
| Material Type | Typical Lifespan | Repair Method | $40 Fix Feasibility |
|---|---|---|---|
| EPDM (45-mil) | 25-40 Years | Chemical Primer & Flash Tape | High |
| PVC (20-mil) | 5-10 Years | Heat Welding or Vinyl Patch | Low (Brittle) |
| RPE (Reinforced Poly) | 20-30 Years | Heat Tape / Specialized Adhesive | Moderate |
| Pre-Formed Plastic | 10-15 Years | Epoxy / Plastic Weld | Low |
The $40 Remediation Kit: What You Actually Need
The secret to a permanent fix is MS Polymer sealant or an EPDM patch kit that includes a chemical primer. Do not buy “underwater tape” and expect it to hold for a decade. The bond must be molecular. For under $40, you can acquire a 6×6 inch EPDM patch, a small tin of LVOC primer, and a scouring pad. This is the industry standard. The primer reacts with the rubber to “open” the pores, allowing the adhesive on the patch to fuse into the liner itself. This process is called cold vulcanization. Don’t skip the primer. If the liner isn’t tacky before the patch goes on, the patch is just a temporary bandage.
- EPDM Primer: The most critical component for chemical bonding.
- 6×6 Self-Adhesive EPDM Patch: Matches the expansion/contraction of the main liner.
- Steel Seam Roller: Used to apply the required 15+ PSI for adhesive activation.
- Scouring Pad: To remove the “bio-film” and oxidation from the old rubber.
- Acetone or Rubbing Alcohol: For the final surface prep.
The Step-By-Step Restoration Process
First, drain the water until the level stabilizes. The point where the water stops dropping is the elevation of your leak. Clean the area aggressively. You are fighting bio-film—that slippery layer of bacteria and algae. If the surface isn’t bone-dry and surgically clean, the patch will fail. Use the scouring pad and acetone until the EPDM looks charcoal gray and matte, not black and shiny. Apply the primer in a thin, even coat. Wait until it is “finger-tacky”—meaning it sticks to your finger but doesn’t string up. Place the patch from the center outward to avoid air pockets. Use a roller. Apply heavy pressure. The bond is instantaneous. It will not rot. It will not peel. If you are patching a waterfall weir, ensure you extend the patch at least 3 inches beyond the crack in all directions to account for hydrostatic pressure.
“Soil saturation levels adjacent to hardscape foundations must be monitored; a leaking pond can increase local pore water pressure, leading to a 40% reduction in soil shear strength.” – Penn State Agricultural Extension Manual
How much modified gravel do I need for a pond base?
If you are repairing a leak that has washed out your base, you need to calculate the void fill. Generally, for a standard 10×10 pond, a 4-inch layer of #2A modified gravel (crushed limestone) is required for structural stability under the liner. Compact this in 2-inch lifts. Do not use pea gravel. Pea gravel acts like ball bearings and will shift, causing the liner to stretch and eventually tear. You want angular stone that locks together. This prevents the very settling failures that lead to leaks in the first place.
Can I patch a pond liner underwater?
Yes, but you cannot use standard EPDM tape. You must use a high-modulus MS Polymer sealant like Gold Label or Aquascape’s specialized underwater adhesives. These chemicals cure via a reaction with moisture. However, an underwater patch is a 70% solution. A dry, primed patch is a 100% solution. If you can drain the pond, do it. If you can’t, use the polymer, apply it to a piece of scrap liner, and dive it down to the hole. Hold it under pressure for 60 seconds. It works in an emergency, but it’s not the foreman’s choice.
The “Settling In” Period and Biological Load
Once patched, do not immediately refill to the brim. Refill halfway and wait. Monitor the patch for 12 hours. If the bond holds, finish the fill. Note that a leaking pond often leads to anaerobic soil conditions outside the liner. This can smell like rotten eggs (hydrogen sulfide). Once the leak is fixed, the soil will take weeks to dry out. Do not plant heavy shrubs near the repair site immediately; the soil needs to re-compact. Maintaining your pond design means more than just looking at the surface; it means managing the nitrogen cycle and ensuring that your landscaping rocks aren’t putting sharp pressure points on the repair. Remove any large, sharp-edged boulders that sit directly on the liner without an underlayment buffer. Every rock is a potential puncture point during the winter freeze-thaw cycle.

![Why Your 2026 Pond Pump is Making Noise [Easy Fix]](https://lawnmajesty.com/wp-content/uploads/2026/05/Why-Your-2026-Pond-Pump-is-Making-Noise-Easy-Fix.jpeg)