The Hardscape Autopsy: Why Your Investment is Moving
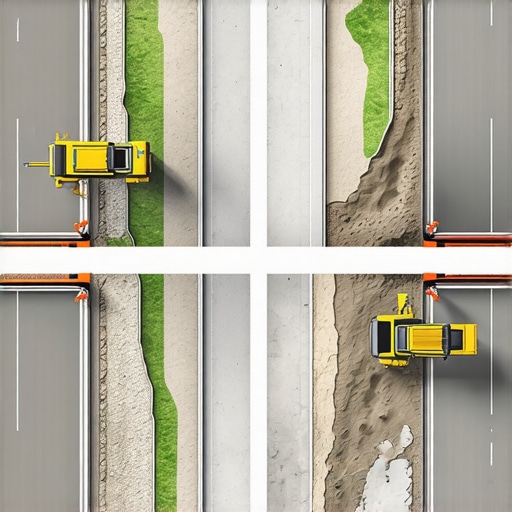
I recently got called out to tear up a $30,000 driveway that was sinking because the previous contractor used stone screenings instead of 3/4-inch modified stone. The homeowner thought they were getting a deal; what they got was a structural nightmare. By the time I arrived, the pavers were undulating like a mountain range. This wasn’t a cosmetic issue. It was a failure of physics. When you ignore the sub-base, you aren’t building a driveway; you’re building a very expensive ruin. This guide breaks down the forensic reality of why paver systems fail and the four engineering-grade repairs required to fix them for the long haul.
“A retaining wall doesn’t fail because of the stone; it fails because of the water trapped behind it.” – Hardscape Engineering Axiom
1. Structural Excavation and Geotextile Integration
Structural excavation for a sinking driveway requires removing the compromised pavers and the saturated bedding layer to reach the native sub-grade. This repair focuses on installing non-woven geotextile fabric to separate the soil from the aggregate, preventing the stone base from being swallowed by the earth during freeze-thaw cycles.
The biggest mistake is thinking you can just throw more sand on top. If the soil underneath is soft, more weight just makes it sink faster. We look at the California Bearing Ratio (CBR) of the soil. If it’s heavy clay, you’re in trouble without a separation layer. We excavate until we hit a solid shelf. Then, we lay down a heavy-duty geotextile. This fabric acts as a bridge. It keeps your expensive gravel from mixing with the mud. It is the literal foundation of the system. If you skip the fabric, you’re just wasting stone. Don’t skip it.
2. Cement-Stabilized Sub-Base (CSB) for High-Load Zones
A Cement-Stabilized Sub-Base (CSB) is the preferred repair for driveways experiencing rutting from heavy vehicle loads. This involves mixing Portland cement into the 3/4-inch minus aggregate at a ratio of 4% to 6% by weight, creating a semi-rigid foundation that resists lateral shifting and vertical settlement.
We use this when the driveway has to handle more than just a sedan. If you’ve got a heavy SUV or a delivery truck coming in, standard gravel might not cut it over ten years. We mix the cement in dry, grade it, and then hydrate it. This creates a slab-like strength while maintaining the flexibility of a paver system. It’s the difference between a driveway that lasts five years and one that lasts fifty. Most ‘mow-and-blow’ guys haven’t even heard of CSB. They just want to get paid and get out. We want the pavers to stay exactly where we put them. PSI matters. Compaction matters.
| Material Type | Drainage Rating | Load Bearing Capacity | Best Use Case |
|---|---|---|---|
| 3/4″ Modified Stone | Moderate | High | Standard Residential |
| #57 Open Graded Stone | Extreme | Moderate | Permeable Systems |
| Cement-Stabilized Base | Low | Extreme | High-Traffic Driveways |
| Stone Dust/Screenings | Non-existent | Very Low | DO NOT USE |
3. Mitigating Hydrostatic Pressure with Sub-Surface Drainage
Repairing a sinking driveway often requires the installation of French drains or perforated pipe systems to manage hydrostatic pressure. This repair intercepts sub-surface water before it can saturate the base materials, which is the primary cause of base liquefaction and paver settlement.
Water is the enemy. If it gets trapped under your pavers, it turns your base into soup. We install 4-inch perforated pipes wrapped in silt socks at the lowest point of the excavation. We daylight these pipes far away from the driveway. You have to give the water a place to go. If the water stays, the base moves. If the base moves, the pavers sink. It’s a simple chain of causality. I’ve seen $50,000 driveways destroyed by a $200 lack of drainage pipe. It’s a tragedy of engineering. We use a transit level to ensure a minimum 2% slope on all drainage runs. Precision isn’t optional.
How much modified gravel do I need for a patio base?
To calculate base material volume, multiply the total square footage by the compacted depth (usually 6-8 inches for patios, 10-12 for driveways). Divide this by 324 to get cubic yards, then multiply by 1.5 to account for compaction loss and density factors of 3/4-inch modified stone.
Why is my paver driveway sinking?
A sinking paver driveway is typically caused by sub-base saturation, insufficient compaction (failing to reach 98% Proctor density), or the use of incorrect bedding materials like stone dust. Water infiltration softens the sub-grade, allowing heavy vehicles to push pavers into the weakened foundation below.
4. Resetting the Bedding Layer and Polymeric Sand Fusion
The final repair stage involves screeding a new bedding layer of washed concrete sand and applying high-performance polymeric sand. This ensures the interlock between pavers is restored, preventing water from entering the joints and restarting the erosion cycle.
We don’t use ‘play sand’ or ‘mason sand.’ We use sharp, angular concrete sand. It locks together. Once the pavers are back in place, we use a vibratory plate compactor with a protective mat to set them. Then comes the polymeric sand. This isn’t just sand; it’s a binder. When activated with water, it turns into a flexible grout. It keeps weeds out and, more importantly, keeps water from getting under the pavers. You have to follow the manufacturer’s instructions to the letter. Too much water and you wash out the polymers. Too little and it won’t set. We do it right the first time.
- Step 1: Excavate to a minimum of 12 inches for driveway applications.
- Step 2: Install 8oz non-woven geotextile fabric across the entire sub-grade.
- Step 3: Layer 3/4-inch modified stone in 4-inch lifts, compacting each with a 5,000 lbf plate compactor.
- Step 4: Install 1 inch of washed concrete sand as the final bedding course.
- Step 5: Re-lay pavers and sweep in high-polymer jointing sand.
“Proper sub-base compaction is the single most critical factor in the longevity of flexible pavement systems.” – ICPI Tech Spec No. 2
Maintenance doesn’t end when we pack up the trucks. In year one, those pavers are going to settle slightly. That’s normal. What isn’t normal is a 2-inch dip where your front tire sits. If you see that, the base failed. We build so that doesn’t happen. We check the pH of the surrounding soil to ensure our runoff isn’t killing your boxwoods, and we make sure the grading pulls water away from your foundation. Landscaping is civil engineering in your front yard. Treat it that way.

![5 Cool-Touch Paver Fixes for a Safer 2026 Patio [Tested]](https://lawnmajesty.com/wp-content/uploads/2026/04/5-Cool-Touch-Paver-Fixes-for-a-Safer-2026-Patio-Tested.jpeg)
![5 Non-Slip Stone Finishes for Safe 2026 Pool Decks [Tested]](https://lawnmajesty.com/wp-content/uploads/2026/02/5-Non-Slip-Stone-Finishes-for-Safe-2026-Pool-Decks-Tested.jpeg)
This post highlights some critical points about proper sub-base preparation that I think are often overlooked, especially by DIY enthusiasts. In my experience, skipping components like geotextile fabric or neglecting proper compaction can really compromise the longevity of a driveway. It’s fascinating how much impact the initial groundwork has on the entire system’s durability. Interestingly, I’ve encountered driveways where water infiltration caused issues years later, despite seemingly good initial installation. That underscores the importance of effective drainage and moisture management, like French drains and perforated pipes mentioned here. I find that paying close attention to the soil type and ensuring proper assessment before excavation can save a lot of trouble down the line. Has anyone here found innovative ways to verify soil stability before starting a project? I’d love to hear other successful strategies for ensuring a solid foundation from the get-go, especially in heavy clay areas where moisture retention can really cause havoc.