Build a $350 2026 Brick Walkway for Side Garden Entry Path
The Engineering Reality of the Side Garden Path
To build a $350 brick walkway in 2026, you must prioritize sub-grade compaction and reclaimed clay pavers. By excavating 6 inches, utilizing 4 inches of compacted 2A modified stone, and sourcing local secondary-market bricks, you create a load-bearing surface that resists hydrostatic heave and vertical displacement. Most DIY projects fail because they treat sand as a structural component. It is not. Sand is a setting bed. If your base is not a monolithic, compacted layer of angular stone, your $350 investment will be a wavy, tripping hazard within two freeze-thaw cycles. Do not skip the plate compactor rental. It is the difference between a 30-year path and a 3-month mistake.
The Hardscape Autopsy: Why Cheap Paths Fail
I recently got called out to tear up a $30,000 patio that was sinking because the previous contractor thought he could save time by using pea gravel instead of a modified base. The stone was round. Round stones act like ball bearings. Every time someone walked on that patio, the stones shifted. In six months, the center of the patio had dropped four inches, collecting a stagnant pool of mosquito-breeding water. When you are building a $350 walkway for a side garden, you do not have the luxury of $30,000 mistakes. You have to get the physics right the first time. The side of a house is often a drainage nightmare. Gutters dump hundreds of gallons of water into these narrow corridors. If you don’t grade the soil away from the foundation at a minimum 2 percent slope, you aren’t building a walkway; you are building a canal that will eventually flood your basement or crawlspace.
“A retaining wall doesn’t fail because of the stone; it fails because of the water trapped behind it.” – Hardscape Engineering Axiom
Material Procurement in the 2026 Economy
By 2026, the cost of virgin clay pavers has outpaced the average homeowner’s weekend budget. To hit the $350 mark, you need to look for reclaimed street pavers or overstock from municipal projects. New 4×8 pavers often retail for $4.00 to $6.00 per square foot. Reclaimed pavers can be found for free or under $1.00 if you are willing to haul them. You must distinguish between ‘face brick’ and ‘paver brick.’ Face bricks are porous and intended for vertical walls. They will shatter during the first hard freeze if used on the ground. Paver bricks are fired at higher temperatures to achieve a higher density and lower absorption rate. This is non-negotiable.
| Material | Quantity (50 sq ft) | Estimated 2026 Cost | Source | | :— | :— | :— | :— | | Reclaimed Clay Pavers | 225 units | $100 | Secondary Market/FB | | 2A Modified Crushed Stone | 1.5 Tons | $85 | Local Quarry | | Coarse Concrete Sand | 0.5 Tons | $40 | Landscape Supply | | Polymeric Sand | 2 Bags | $60 | Hardscape Dealer | | Rental: Plate Compactor | 4 Hours | $65 | Tool Rental Depot | | **Total** | | **$350** | |
The Physics of the Base: Beyond the Surface
We need to talk about the Proctor Density. When we compact the 2A modified stone (which is a mix of 3/4-inch angular rock down to stone dust), we are trying to remove the air pockets. The stone dust fills the voids between the larger rocks, creating a locked matrix. You need to apply at least 4,000 pounds of centrifugal force via a vibratory plate compactor. A hand tamper is a joke. It only affects the top half-inch of the stone. If the base isn’t solid, the bricks will migrate into the soil. We call this ‘pavement pumping.’ As water enters the joints, it softens the sub-grade. The pressure of a footstep then forces that liquid mud up through the gravel and sand, destabilizing the entire structure. Use a non-woven geotextile fabric between the raw soil and your gravel to prevent this migration. It is an extra $25 that saves the project.
Step-by-Step Installation Protocol
- Excavation: Dig to a depth of 7 inches. This allows for 4 inches of stone, 1 inch of sand, and a 2-inch brick.
- Sub-grade Compaction: Compact the raw dirt before adding any stone. If the dirt is soft, the stone will sink.
- Base Layer: Add stone in 2-inch ‘lifts.’ Compact each lift until the machine literally bounces off the surface.
- The Screed Bed: Use two 1-inch O.D. (outside diameter) steel pipes as guides. Spread concrete sand and pull a straight board across the pipes. Do not walk on this sand.
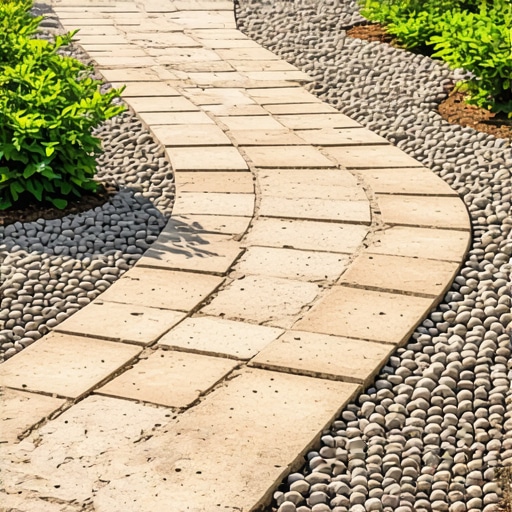
- Brick Placement: Lay the bricks in a ‘running bond’ pattern for maximum interlock. Use a rubber mallet to set them.
- Edge Restraint: You must install a plastic or aluminum edge restraint. Without it, the bricks will spread laterally into the lawn.
- Joint Stabilization: Sweep polymeric sand into the cracks. Mist with water to activate the polymers. This creates a flexible ‘glue’ that prevents weed growth and ant hills.
How much modified gravel do I need for a walkway base?
To calculate your gravel needs, multiply the length by the width by the depth in feet, then divide by 27 to get cubic yards. For a 25-foot by 2-foot walkway with a 4-inch base: (25 * 2 * 0.33) / 27 = 0.61 cubic yards. Since a yard of crushed stone weighs approximately 1.4 tons, you would need about 0.85 tons. Always round up by 15 percent for compaction loss. The stone will occupy less volume once the air is vibrated out of it.
“Soil drainage is the single most important factor in the longevity of any landscape installation. Poorly drained soils lead to root rot in plants and frost heave in hardscapes.” – Penn State Agricultural Extension
What is the best sand for brick pavers?
Never use ‘play sand’ or ‘masonry sand’ for the setting bed. These sands are too fine and round. You need ASTM C33 concrete sand. It is coarse and angular. The sharp edges of the sand grains lock into each other under the weight of the brick, providing a stable foundation that doesn’t wash away. For the joints, only use high-performance polymeric sand. This material is designed to remain flexible while resisting the erosive forces of wind and heavy rain. In the side garden, where sunlight is often limited, polymeric sand is essential for preventing moss from overtaking the joints and breaking the bond between the bricks.
Micro-Climate Considerations: The Side Yard Shadow
Side yards are often ‘micro-climates’ with higher humidity and less airflow. This leads to persistent moisture. If you are building this walkway against the north side of a structure, the bricks will rarely see the sun. In these conditions, avoid organic-heavy soil near the walkway edges. Organic matter holds water like a sponge. Instead, backfill the edges with a mix of topsoil and coarse sand to ensure quick drainage. If the area is prone to standing water, you may need to install a 4-inch perforated French drain alongside the walkway, wrapped in a silt sock, and daylighted at the curb or a lower point in the garden. This prevents the ‘bathtub effect’ where your walkway base becomes a reservoir for subsurface water. It will rot the soil structure. Don’t skip the drainage assessment. It is the boring part of landscaping that makes the pretty part last for decades.
The 2026 Maintenance Schedule
In year one, expect the polymeric sand to settle slightly. You may need to top off the joints. Do not use a pressure washer on high settings; you will blast the stabilizing polymers out of the joints. A simple garden hose and a soft brush are sufficient. Check the edge restraints every spring after the ground thaws. If the frost has pushed a spike up, hammer it back down immediately. This path is a living engineering system. Treat it with the respect that 20 years of dirt-under-the-fingernails expertise demands.