Build a $350 2026 Brick Walkway with Sand Base
Why Most $350 DIY Walkways Fail Before the First Frost
Building a budget-friendly brick walkway requires more than just laying pavers on dirt; it demands a fundamental understanding of sub-grade compaction, hydrostatic pressure, and material grain geometry to prevent shifting. By using reclaimed bricks and a sand-set method, you can achieve a professional-grade hardscape installation for under $350 that resists heaving and settling.
I recently got called out to tear up a $30,000 patio that was sinking because the previous contractor thought he could skip the compaction of the sub-base. The homeowner was literally watching their investment slide into a drainage swale. It was a textbook case of base-layer failure. When you are working with a $350 budget for a 2026 project, you don’t have the luxury of expensive structural concrete. You have to rely on physics. If your soil grading is off by even a quarter inch per foot, water will pond, freeze, and pop your bricks like bottle caps. I tell my crew every morning: the bricks are just the skin; the base is the skeleton. If the skeleton is weak, the body collapses. Most people see a pretty path; I see a 4-inch deep trench of 21A modified stone and C33 concrete sand that hasn’t been tamped correctly.
“A retaining wall doesn’t fail because of the stone; it fails because of the water trapped behind it.” – Hardscape Engineering Axiom
How much modified gravel do I need for a walkway base?
To calculate the modified gravel base for a standard walkway, multiply the square footage by the depth of the base (usually 4 inches) and divide by 27 to find the cubic yardage needed. For a $350 project, sourcing crushed stone locally is essential to minimize transportation costs.
The Physics of the Sand-Set Brick Method
The sand-set brick method relies on interlocking friction between individual pavers and the angular grains of sand to create a semi-rigid surface that can flex with freeze-thaw cycles. Unlike rigid mortar, polymeric sand or jointing sand allows for capillary action, which prevents hydrostatic pressure from building up beneath the walkway surface and causing frost heave.
When we talk about sand, we aren’t talking about that soft, round play sand you find at a big-box store. That stuff is useless for hardscaping. You need coarse, angular sand. Under a microscope, those grains look like jagged rocks. When you vibrate them into the joints, they lock together. This is the difference between a path that lasts 20 years and one that washes away after the first thunderstorm. It is about the Coefficient of Uniformity. If your sand grains are all the same size, they will roll over each other. You want a mix of sizes to fill the voids. Don’t skip the plate compactor rental. You need at least 3,000 lbs of centrifugal force to seat those bricks properly. If you don’t feel the vibration in your teeth, you aren’t compacting enough.
| Material Item | Unit Cost (2026 Est.) | Quantity (15′ Path) | Total Estimated |
|---|---|---|---|
| Reclaimed Red Bricks | $0.45 / unit | 350 units | $157.50 |
| 21A Modified Stone | $45.00 / ton | 1.5 tons | $67.50 |
| C33 Concrete Sand | $35.00 / ton | 0.75 tons | $26.25 |
| Plastic Edge Restraints | $18.00 / 8ft | 4 units | $72.00 |
| Polymeric Sand | $28.00 / bag | 1 bag | $28.00 |
What is the best sand for a brick walkway base?
The best material for a brick walkway base is C33 concrete sand or washed stone dust, as these materials provide the angularity required for interlocking friction. Avoid using masonry sand or play sand, as their rounded grains lead to paver instability and creepage over time.
Step-by-Step Excavation and Soil Grading
Effective excavation and soil grading involve removing the organic topsoil layer and creating a 1% to 2% slope away from foundations to ensure surface drainage. For a stable hardscape, you must reach the sub-grade—usually 6 to 8 inches deep—and compact it to a 95% Proctor density before adding any base materials.
- Call 811 to mark underground utilities before digging any trench.
- Remove all sod and organic material; roots will rot and cause sinkholes.
- Set your string lines to account for a 1/4-inch drop per foot of width.
- Use a hand tamper or plate compactor on the raw soil until it rings.
- Apply a non-woven geotextile fabric to prevent soil migration into your gravel.
It will rot. If you leave a single root from an old oak tree under your path, it will decompose over three years, leave a void, and your walkway will collapse into it. I see it every week. People think they can just scrape the grass off and start pouring sand. No. You have to get down to the mineral soil. This is where the hard work happens. If you aren’t sweating in the trench, you aren’t doing it right. You are looking for compaction lift thickness. Never add more than 2 inches of gravel at a time before compacting. If you throw 4 inches in and try to tamp it, the bottom 2 inches stay loose. That is how you get differential settlement. It is simple engineering, but 90% of DIYers ignore it because their backs hurt.
“Standard paver installations require a minimum 4-inch compacted sub-base to resist freeze-thaw displacement.” – ICPI Tech Manual
Setting the Screed and Laying Bricks
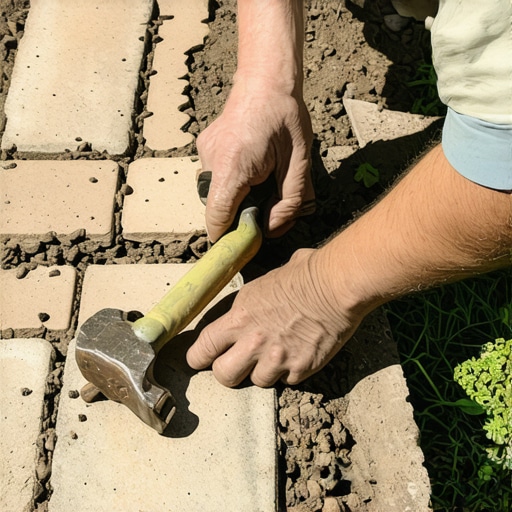
Setting the screed layer involves placing two 1-inch outside-diameter pipes in the base and pulling a straightedge across them to create a perfectly level bedding sand surface. Once the bedding layer is set, place the bricks in your chosen pattern (like herringbone or running bond), ensuring you do not step on the fresh sand.
The screed pipes are your best friends. They take the guesswork out of the sand depth. Don’t walk on the sand. If you step on it, you create a high-density spot, and the bricks will sit unevenly. Drop the bricks straight down; don’t slide them, or you’ll kick up a ridge of sand that prevents a tight joint. For a $350 budget, running bond is the most efficient pattern because it requires the fewest cuts. Every cut costs money in diamond blade wear and time. If you use reclaimed bricks, check for spalling. If the face of the brick is flaking off, it’s garbage. Throw it in the back of the base as filler. You want hard-fired clay that can handle compressive loads and moisture absorption without shattering.
![Fixing 2026 Sinking Pavers with Polymeric Sand [DIY]](https://lawnmajesty.com/wp-content/uploads/2026/07/Fixing-2026-Sinking-Pavers-with-Polymeric-Sand-DIY.jpeg)